Google Cloud Storage
Overview
The Google Cloud Storage connector provides a convenient way of exporting data directly from the Decentriq DMP to a GCS bucket.
Prerequisites
- Have a Google Cloud account.
- Have an existing Cloud Storage bucket where data can be uploaded.
- Have existing service account credentials.
Step-by-step guide
Step 1: Select the destination
Follow the steps to create a new export and select Google Cloud Storage from the list of connectors.

Step 2: Configure connection
Click Continue to proceed to connection configuration. Enter the required connection details:
- Bucket name: Name of the GCS bucket where the data should be exported.
- Service Account JSON: The service account credentials associated with the Google Cloud account (see the Google documentation for more details). This takes the form of a JSON file generated when setting up the service account and contains the following information:
- type: Identifies the type of credentials (this will be set to service_account).
- project_id: The ID of your Google Cloud project.
- private_key_id: The identifier for the private key.
- private_key: The actual private key used for authentication - in PEM format.
- client_email: The email address of the service account.
- client_id: A unique identifier for the service account.
- auth_uri: The URL to initiate OAuth2 authentication requests.
- token_uri: The URL to retrieve OAuth2 tokens.
- auth_provider_x509_cert_url: The URL to get Google's public certificates for verifying signatures.
- client_x509_cert_url: The URL to the public certificate for the service account.
- universe_domain: The domain of the API endpoint.
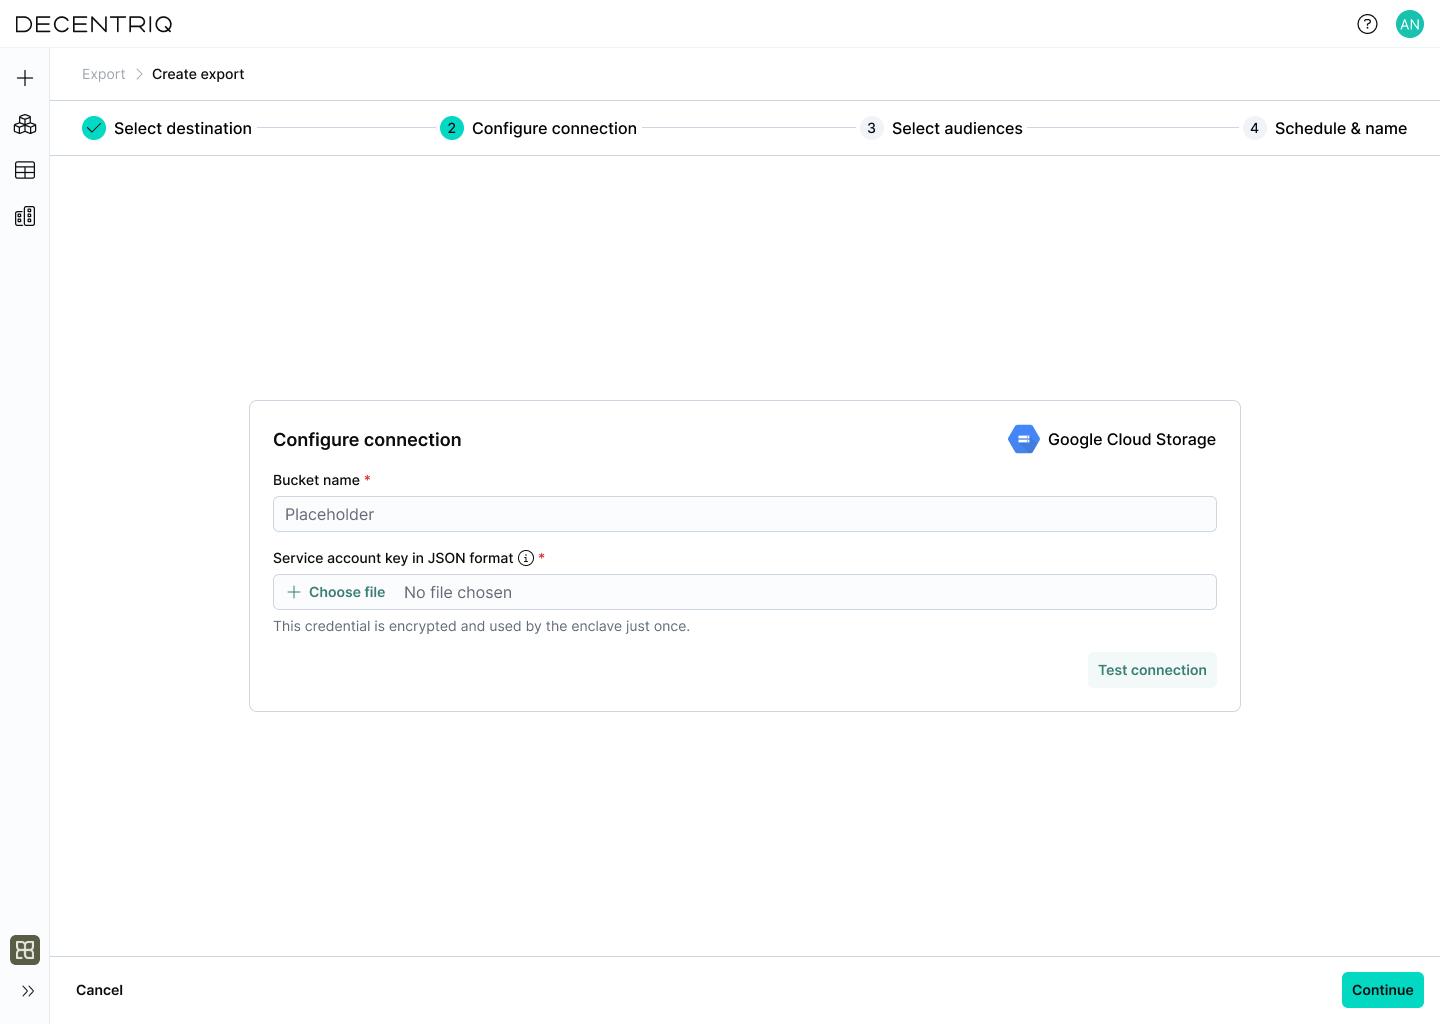
Click Test connection to verify that the credentials and configuration are valid.
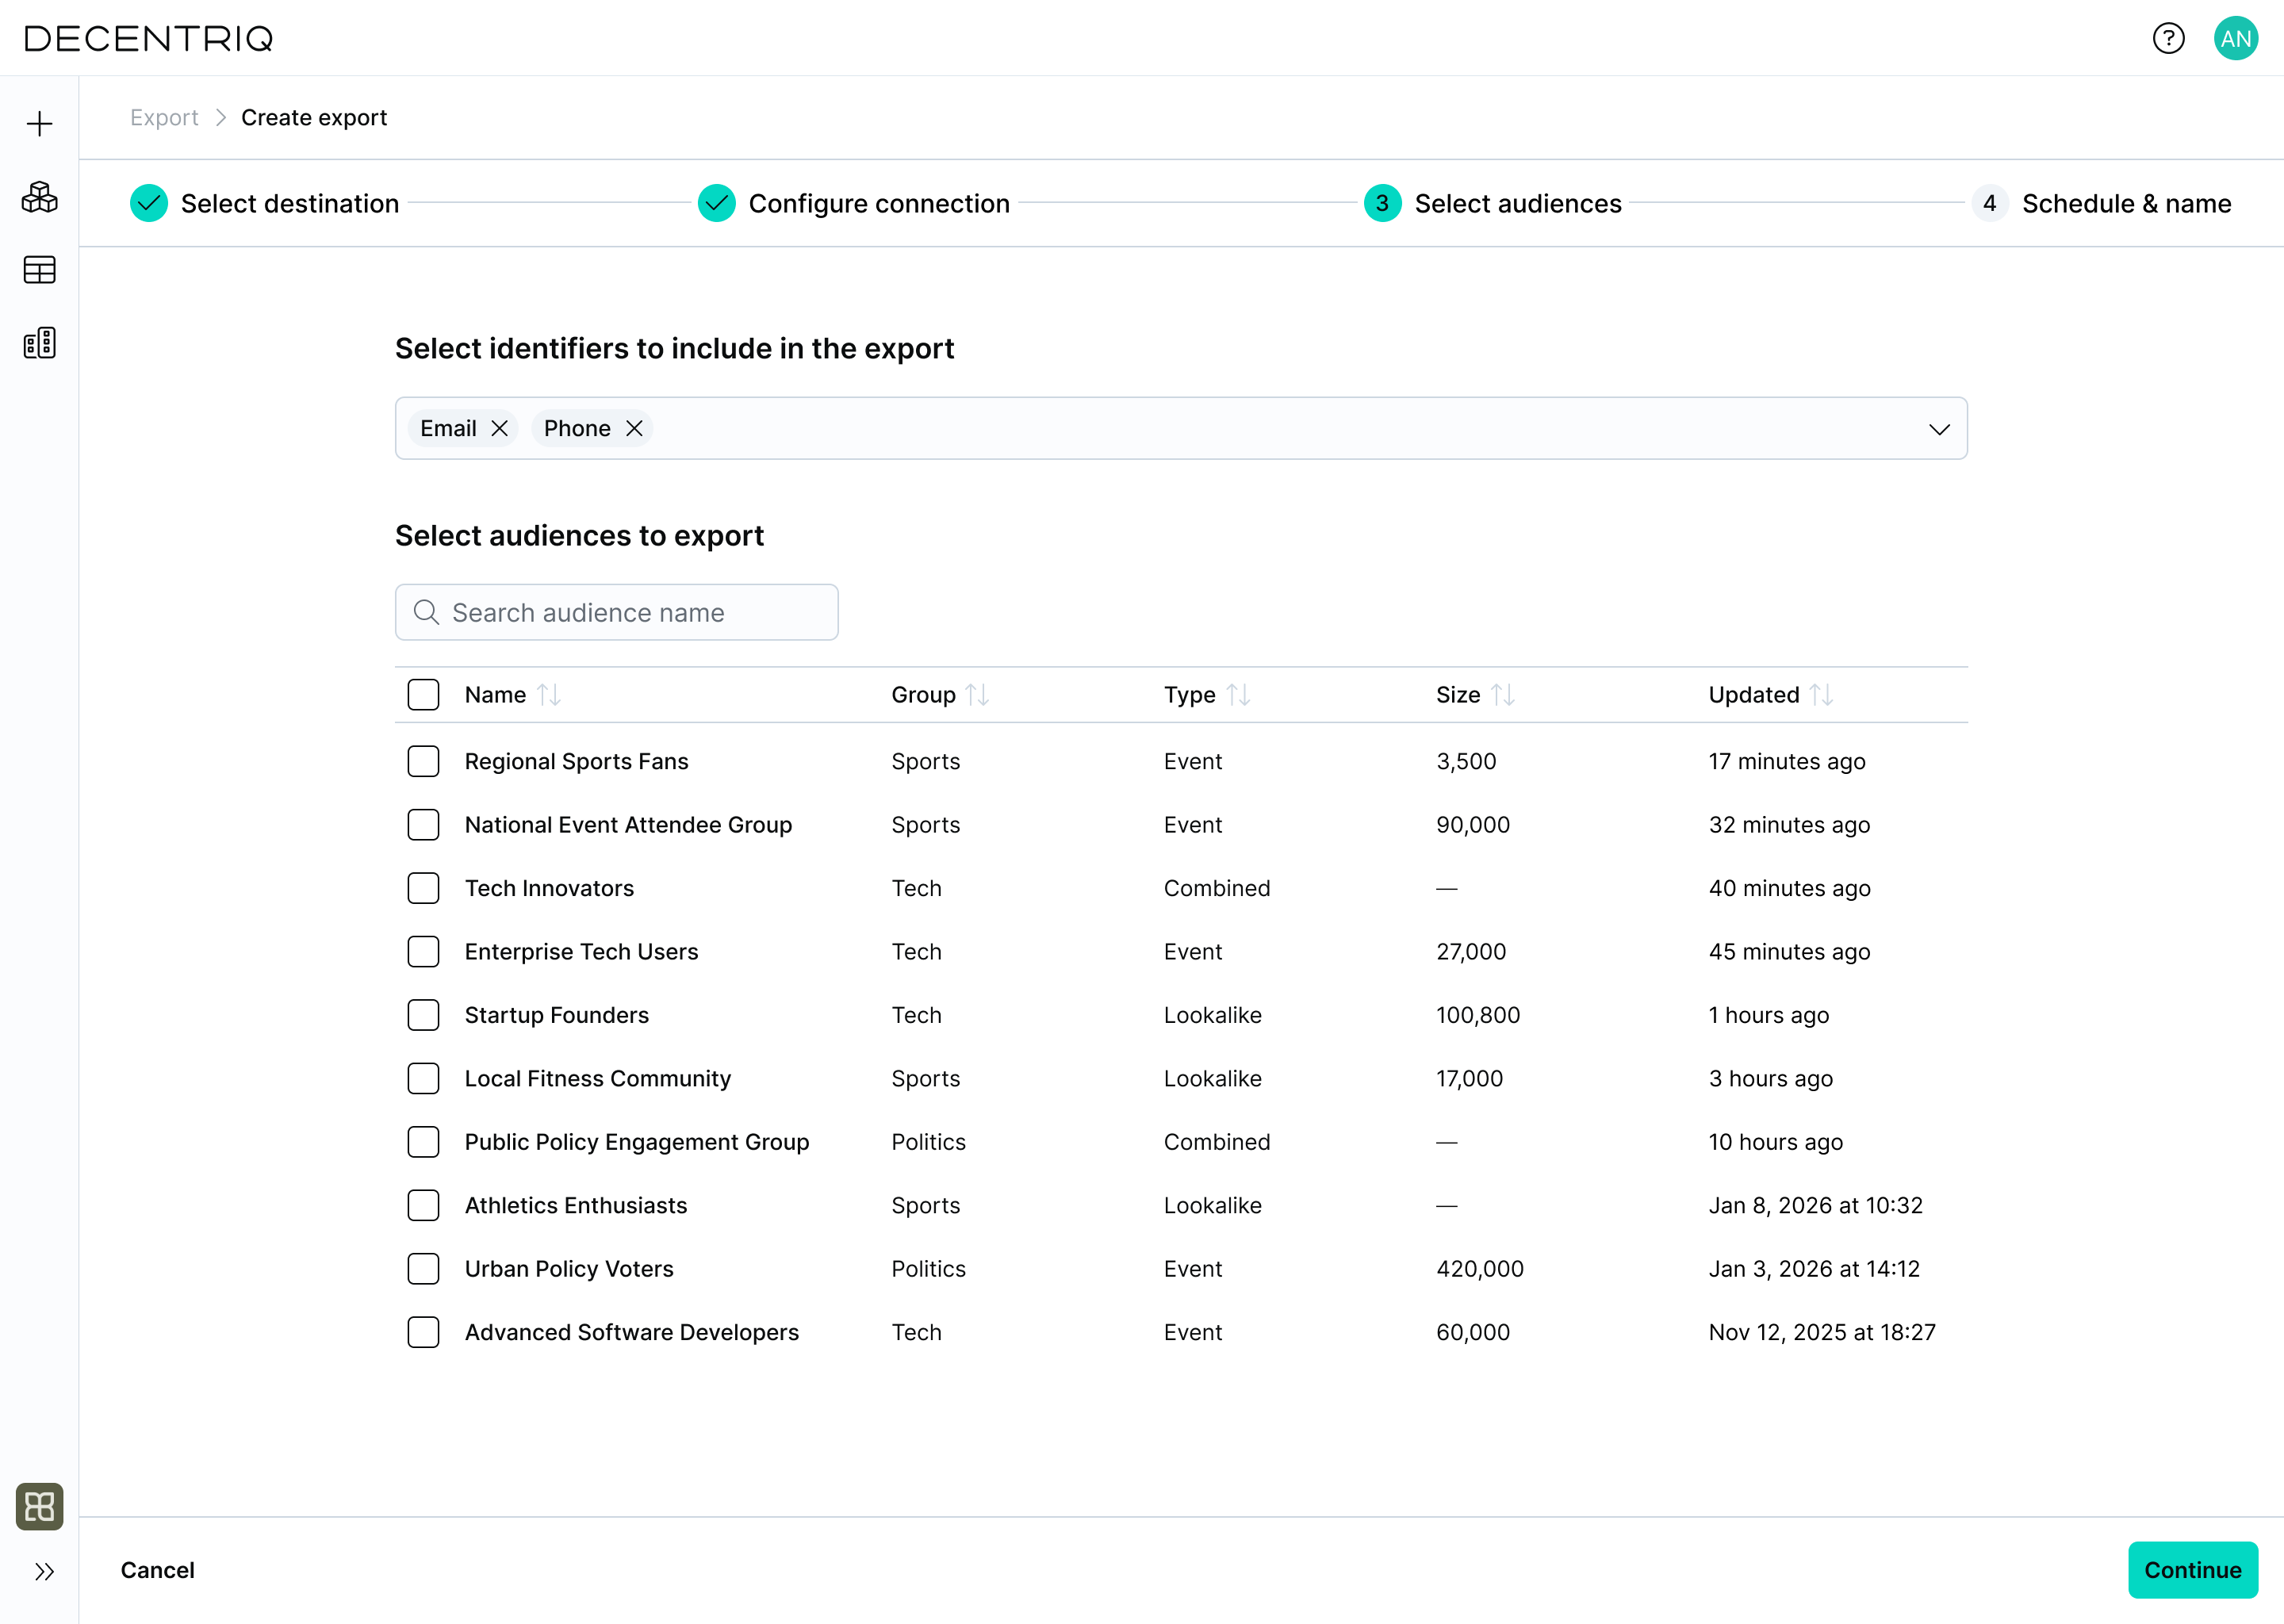
Step 3: Select audiences
Click Continue to proceed to audience selection. Select the identifiers to include in the export and choose the audiences to export. Multiple audiences can be selected. Only users belonging to at least one selected audience will be included.
Step 4: Configure the export
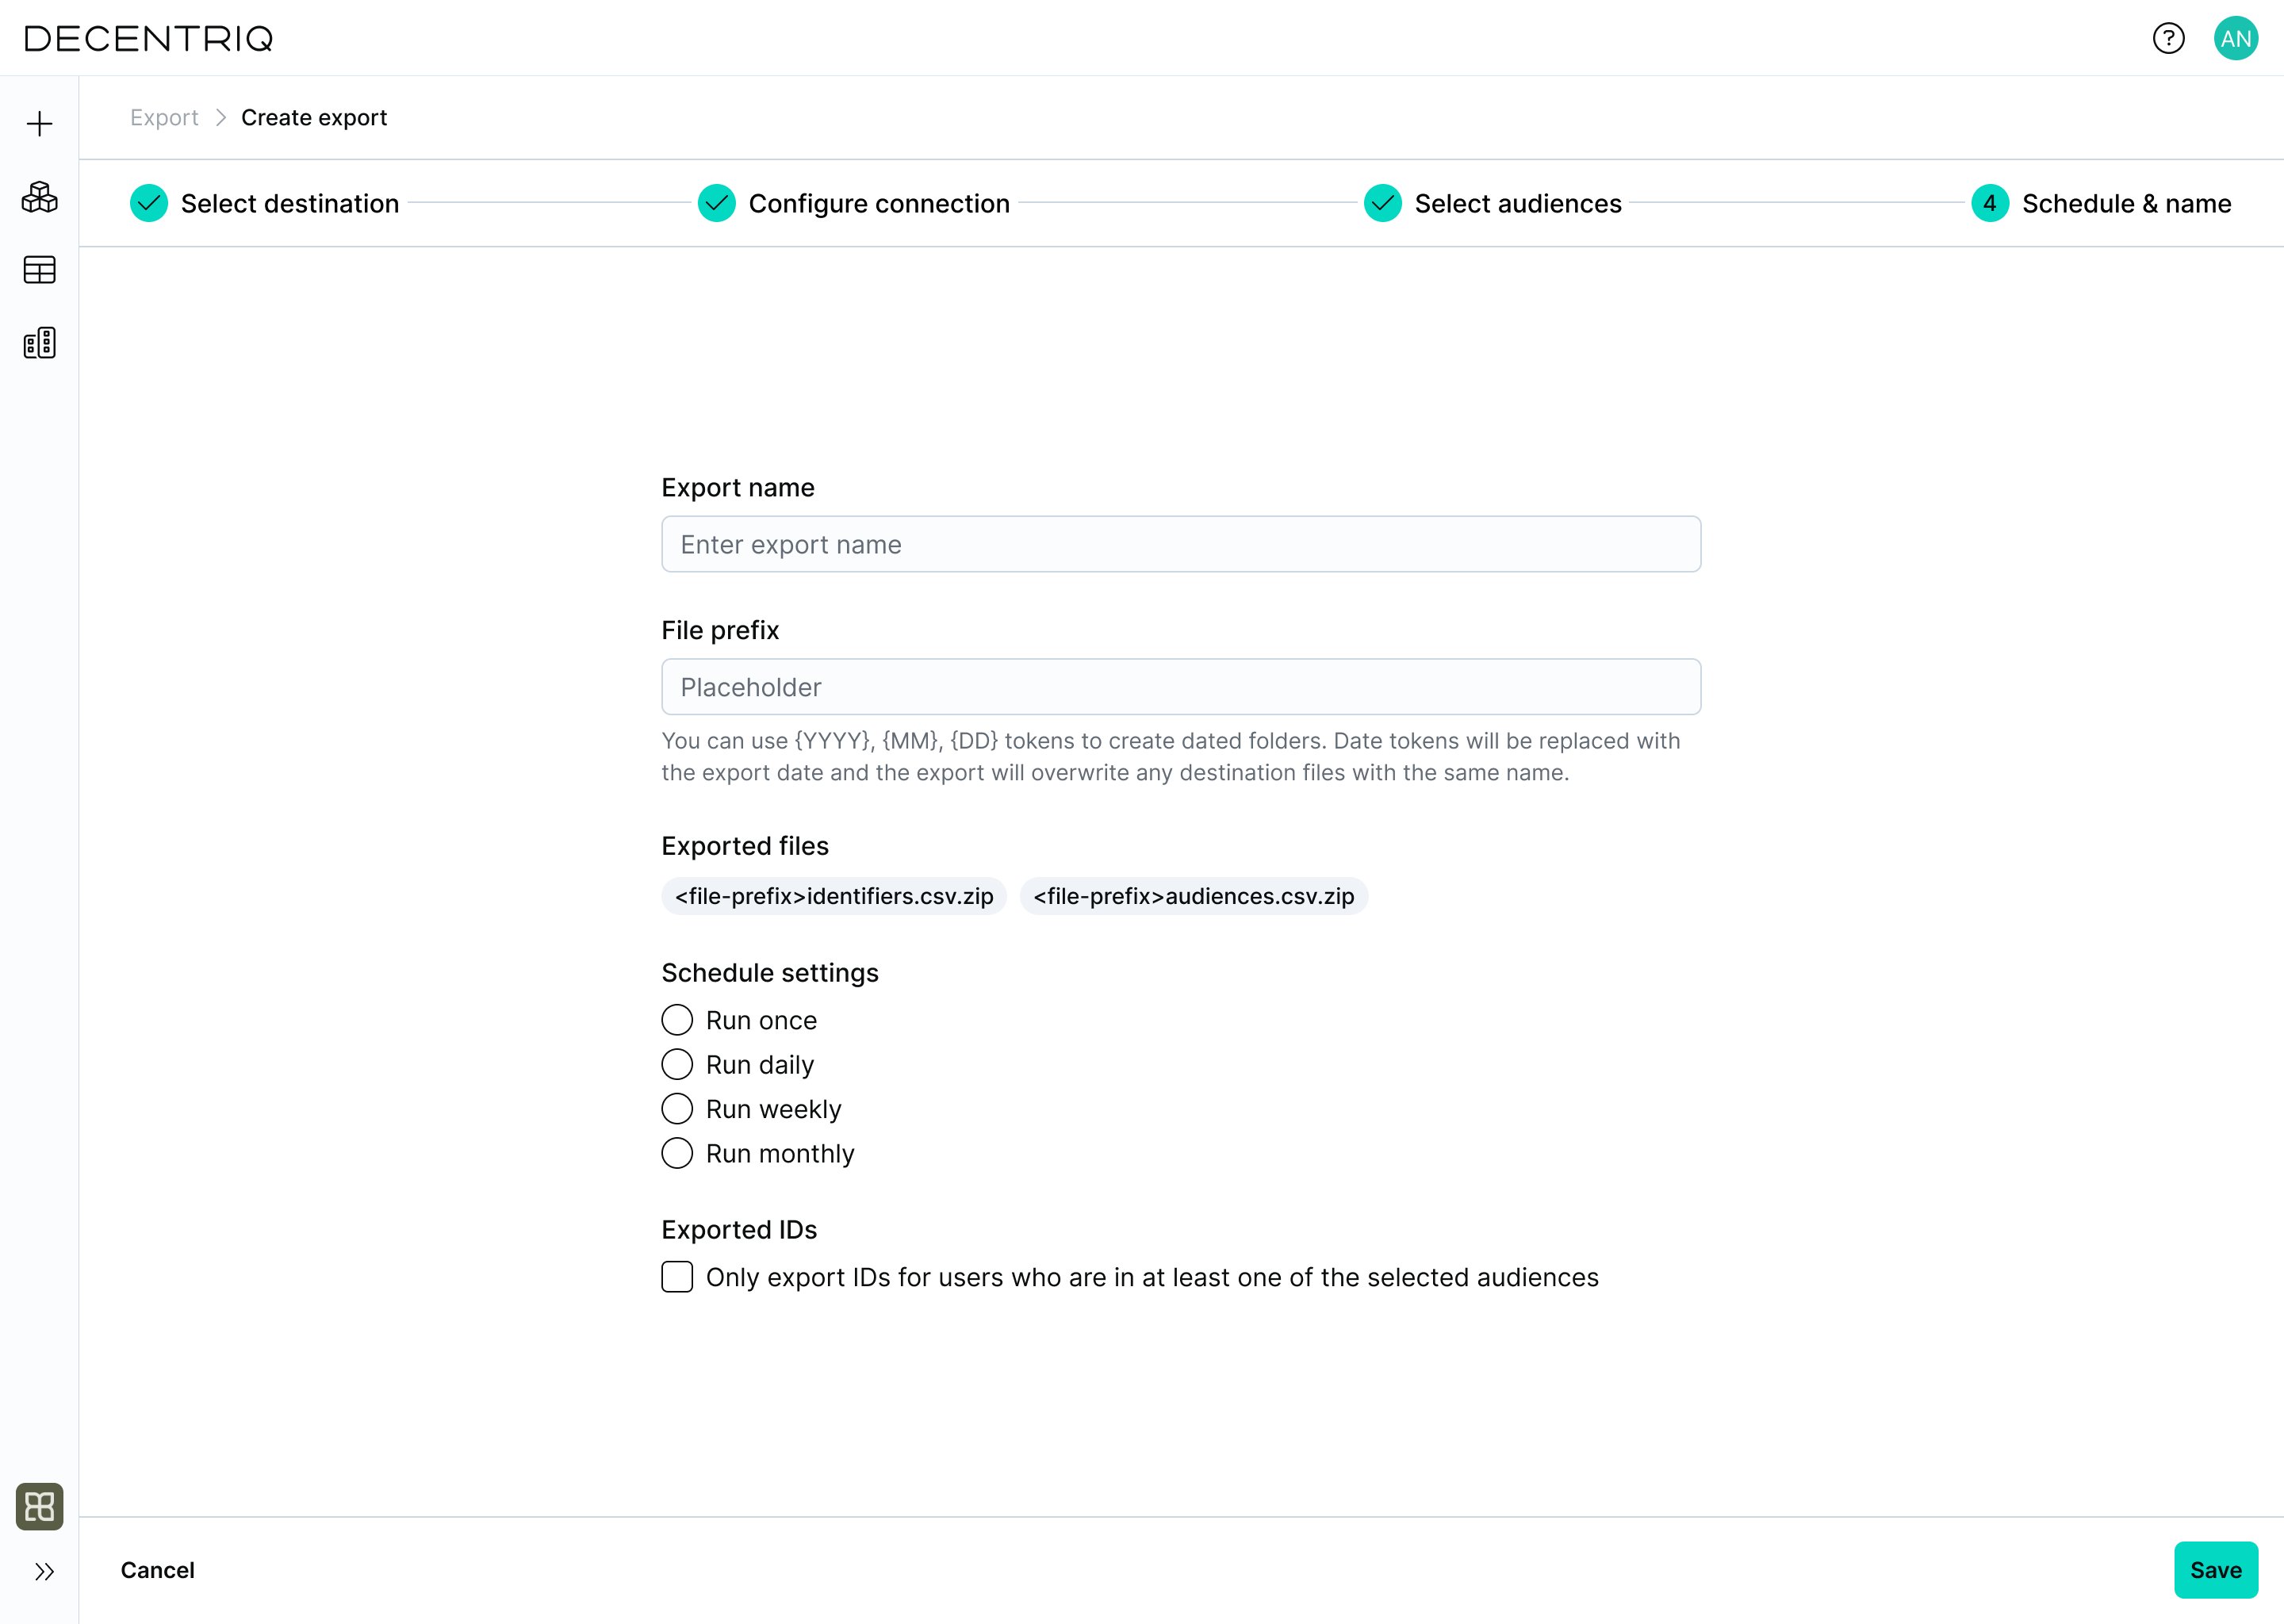
Click Continue to proceed to export configuration. Enter the export configuration:
- Export name: A user-defined name for this export.
- File prefix: An optional prefix used to structure exported files. Date tokens can be used to create dated folders.
- Schedule settings: Define how often the export should run (run once or on a recurring schedule).
- Exported IDs: Choose whether to export only IDs for users included in the selected audiences.
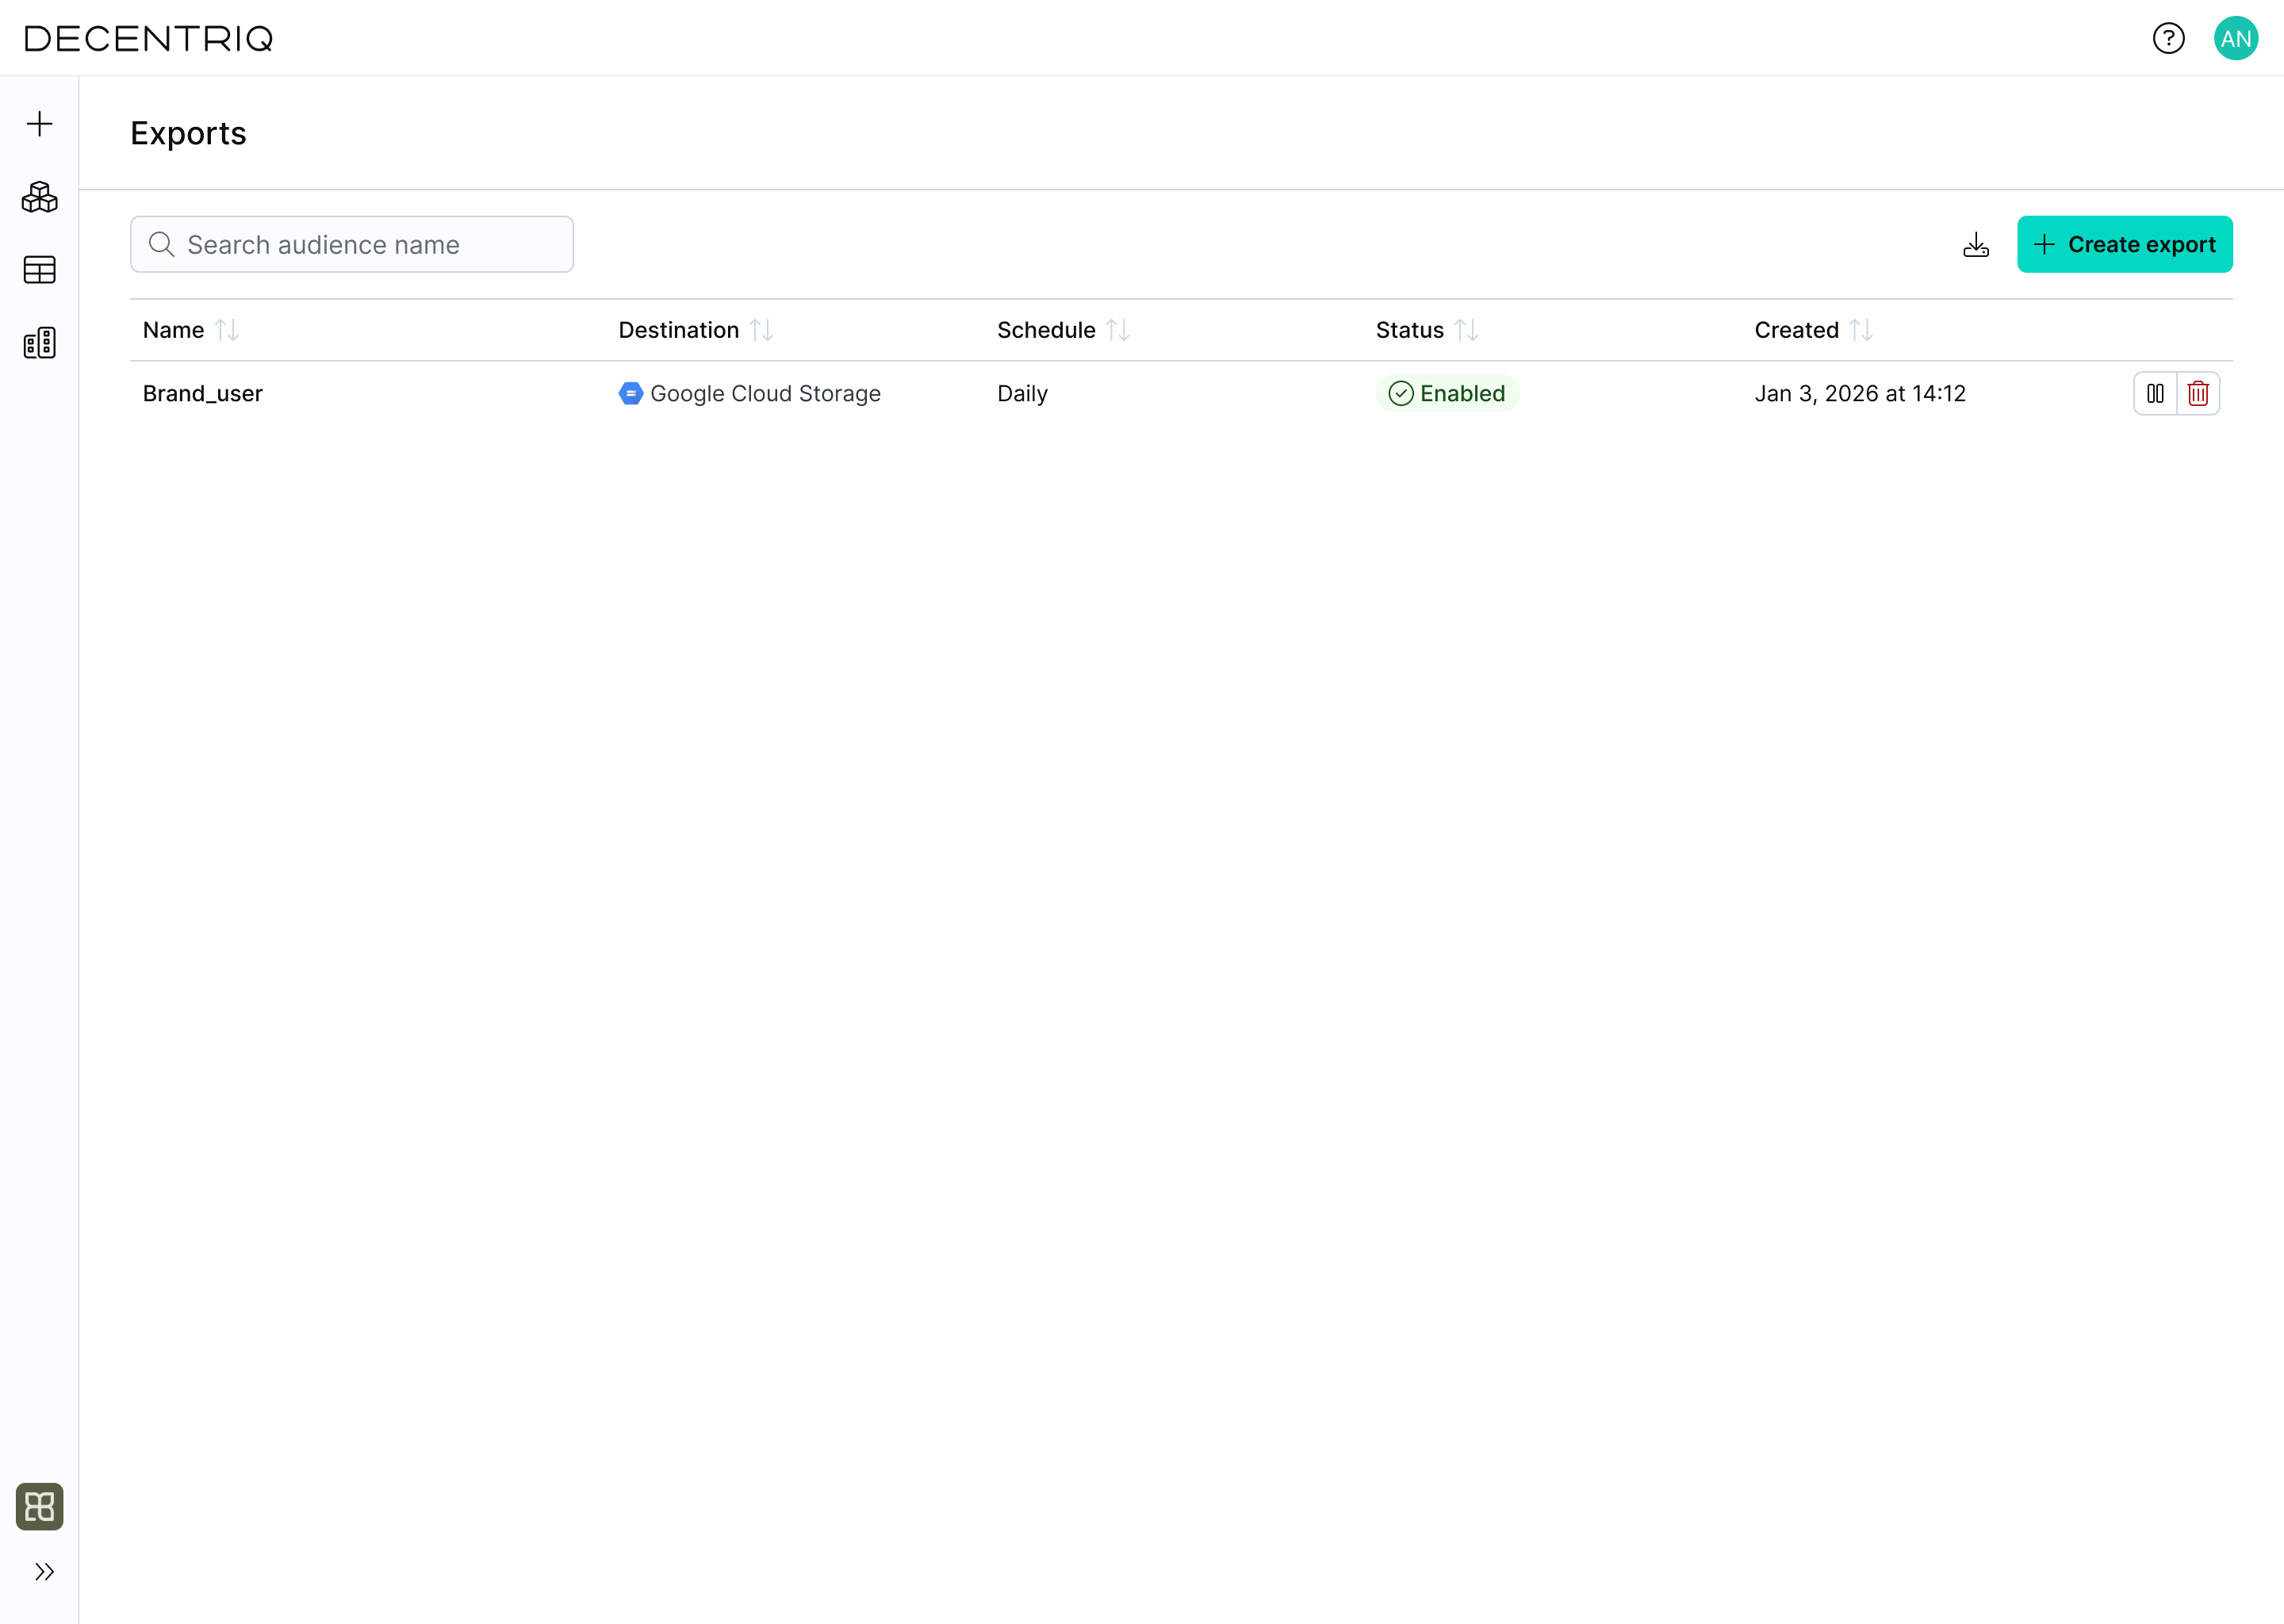
Step 5: Create the export
Click Continue to create the export. Once created, the export appears in the Exports table with the export name provided in the previous step. From there, you can monitor its status, review execution history, and manage future runs.