Overview
The Permutive connector provides a convenient way of exporting data directly from the Decentriq platform to Permutive. Data is uploaded to a Google Cloud Storage bucket from which it is accessible to Permutive.
The Permutive connector requires a setup configuration. If it is not yet active, please contact your customer success manager or support@decentriq.com.
Note: You can alternatively export the audience directly using the GCS connector.
While the Permutive connector conveniently sets up the segment code, name and formats the file as expected by Permutive, the GCS connector allows more flexibility
Prerequisites
- Have a Permutive API key.
- Have a Google Cloud Platform account associated with the Permutive tenant.
- Have an existing Cloud Storage bucket where data can be uploaded.
- Have existing service account credentials from Google Cloud Platform.
Step-by-step guide
1. Set up Permutive to receive a new audience
- Create a new import audience in Permutive
- Audience / Imports: click on
Create importand input the required fields:- Import name: Whatever name to recognize it (e.g.
Decentriq). No spaces is better - Identifiers: Pick the same activation ID that you imported in Decentriq. The output of the data clean rooms are expressed in the activation ID, that needs to be compatible with the Permutive ID translation service. This is derived by the acive identifiers in your account (Check insights / identity).
Note: Only admins or users with appropriate permissions can access this. Regular users won't have access and will be blocked at this step.
- Import source: GCS
- Continue
- Import name: Whatever name to recognize it (e.g.
- Set up fields in
step 2:- GCS bucket: Select from dropdown of auto-filled from existing bucket list. You need to have a GCS bucket connected to the Permutive account. Otherwise, leave the value
<blank> - Upload access account: Add the same user that can extract the audience from the data clean room. If it is a service account, label it as such
- Read access account: Leave blank
- Advanced options: Check ‘create new GCS bucket’
- Continue
- GCS bucket: Select from dropdown of auto-filled from existing bucket list. You need to have a GCS bucket connected to the Permutive account. Otherwise, leave the value
- Review the summary that all the information are correct, then click ‘Submit’
- Audience / Imports: click on
- In Permutive, go to settings / keys and create a new Permutive API key (Private Key). This will be used by the Decentriq connector import
2. Use the connector from the Decentriq web interface
Go to dataset, select the audience file and click on ‘Export’ (Follow the steps to select a dataset for export)
Select Permutive among the available options
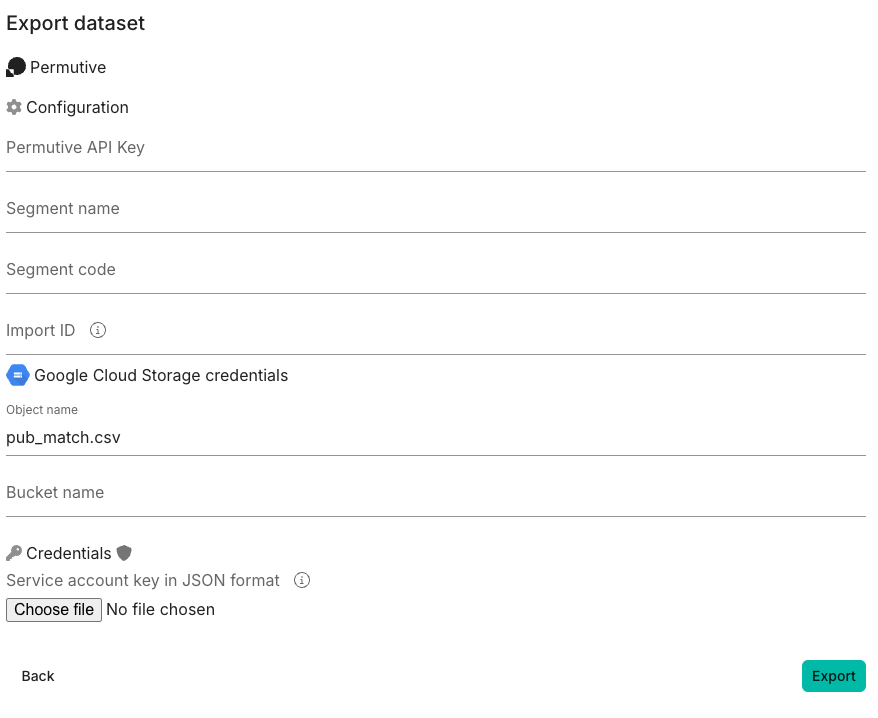
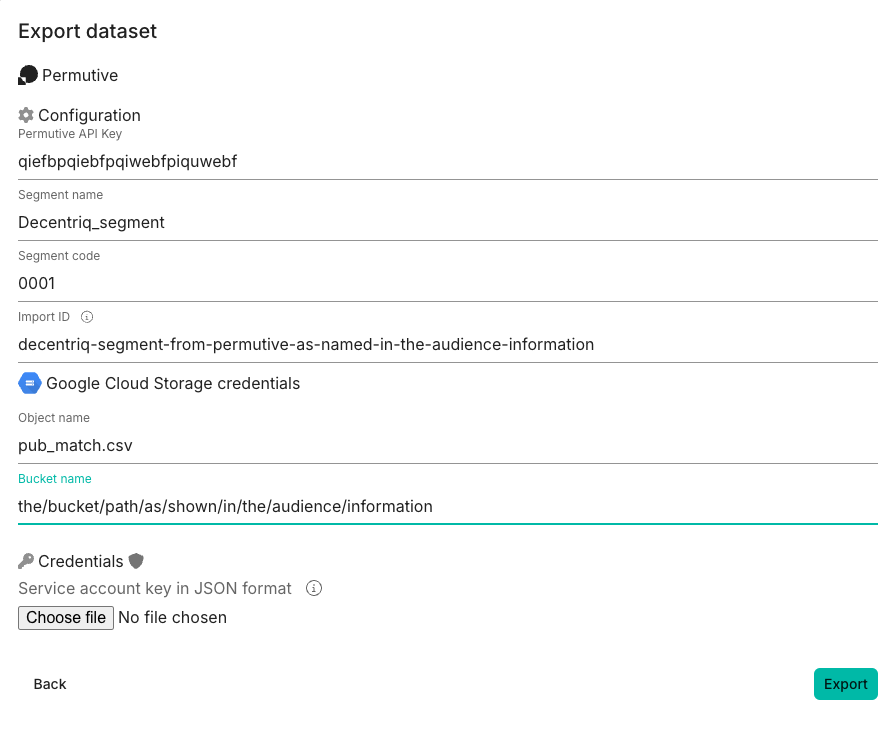
Fill in the relevant information
- Permutive API key: Paste here the API key you generated in
#2.. This will allow Decentriq to create the correct taxonomy for you in Permutive - Segment name: A segment name of choice (like
Decentriq_segment) This will be used to create the taxonomy in Permutive - Segment code: A numerical value of choice (like
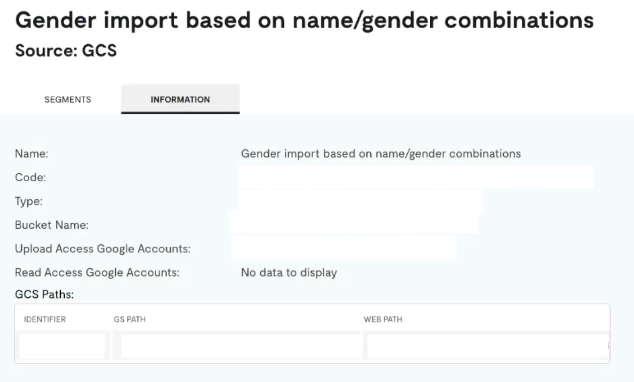
0001) This will be used to create the taxonomy - Import ID: The unique code of the new audience -
code. You find it opening the created audience, in the ‘Information’ tab
- Permutive API key: Paste here the API key you generated in
- Object name: A file name of choice with the
.gzextension, e.g.audience.gz- Permutive requires uploaded files to be in
.gzformat
- Permutive requires uploaded files to be in
- Bucket path: This is shown under GS path, after
gs:// - GCS credentials: Set up the JSON file with the credentials of your GCS account (Set account keys) as explained HERE, with write permissions
Note: All the information and credentials input at this step are not available to Decentriq and are not stored. The export is managed directly by the confidential computing environment, guaranteeing that this information stays encrypted and unaccessible during the process.
Click on ‘Export’
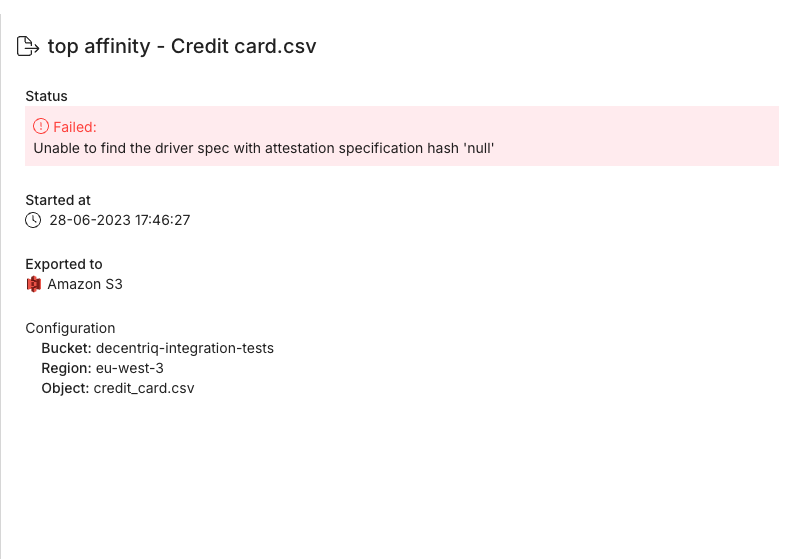
The export might take several minutes. You can now safely close the window and the Decentriq page: the export will run in the background. You can see the status from the Decentriq Dataset / Import/export page. If there is any issue, it will have the status
FAILEDand you can check the error by clicking on it
Decentriq will now take care of exporting the file in the required format into the GCS bucket and create the taxonomy in Permutive programmatically. If you want, you can do either manually as described in the Permutive documentation
Check that the file correctly landed in Google, and that Permutive correctly identified and read the file and imported the audience