Overview
The Permutive connector provides a convenient way of importing data directly from Permutive into the Decentriq platform.
The Permutive connector requires a setup configuration. If it is not yet active, please contact your customer success manager or support@decentriq.com
Note: You can import the audience using the GCS connector or the AWS connector as well. While the Permutive connector conveniently retrieves metadata, you can use the other connectors for more flexibility
Prerequisites
- Have a Permutive API key
- If using Amazon S3 as the cloud storage:
- Have an Amazon S3 account associated with the Permutive tenant.
- Have an S3 bucket where data can be downloaded from.
- Have IAM credentials with write permissions for the above bucket (See the AWS connector docs for detailed steps to set this up).
- The access key and secret key are required when importing.
- If using Google Cloud Storage as the cloud storage:
- Have a Google Cloud account associated with the Permutive tenant.
- Have an existing Cloud Storage bucket where data can be downloaded from.
- Have existing service account credentials for your GCS bucket. If you cannot generate the required credentials, please contact your Google Cloud Platform admin.
Step-by-step guide
Prepare the data in Permutive
Note: We suggest involving your Permutive customer support representative if it is your first time, as each Permutive tenant may have different configurations.
Define which matching ID will be used with the advertiser. This guide assumes the use of hashed emails which must be collected on-site using Permutive's identity framework under the tag name email_sha256. For other matching ID types, identify the correct tag to use when extracting the relatvie user list from Permutive.
If you have the routing module:
Follow this guide to prepare your data for export from Permutive.
Open your query environment (i.e. the Bigquery account integrated with your Permutive tenant). If you are unable to access this environment, request access from your admin or ask an authorized person to run the following steps:
- Run the queries described in the Permutive guide to prepare the CSV files.
- Push the query results files into your GCP bucket or S3 bucket.
If you do not have the routing module
- Manually extract the hashed email tag together with the Permutive ID. This will be your matching table.
- Extract the cohort of each relevant segment code under audience > cohort activation. Permutive’s customer support can help to do this for all your segments and ensure they are combined correctly.
- Combine the cohort extraction in one unique file, creating a 2-column CSV in the format of [Permutive_ID ; cohort_code].
- Substitute the cohort code with the cohort name.
- Push the two files into your GCP or S3 bucket.
Use the connector on the Decentriq web interface
- Follow the steps to select a dataset for import and choose Permutive from the list of connectors.
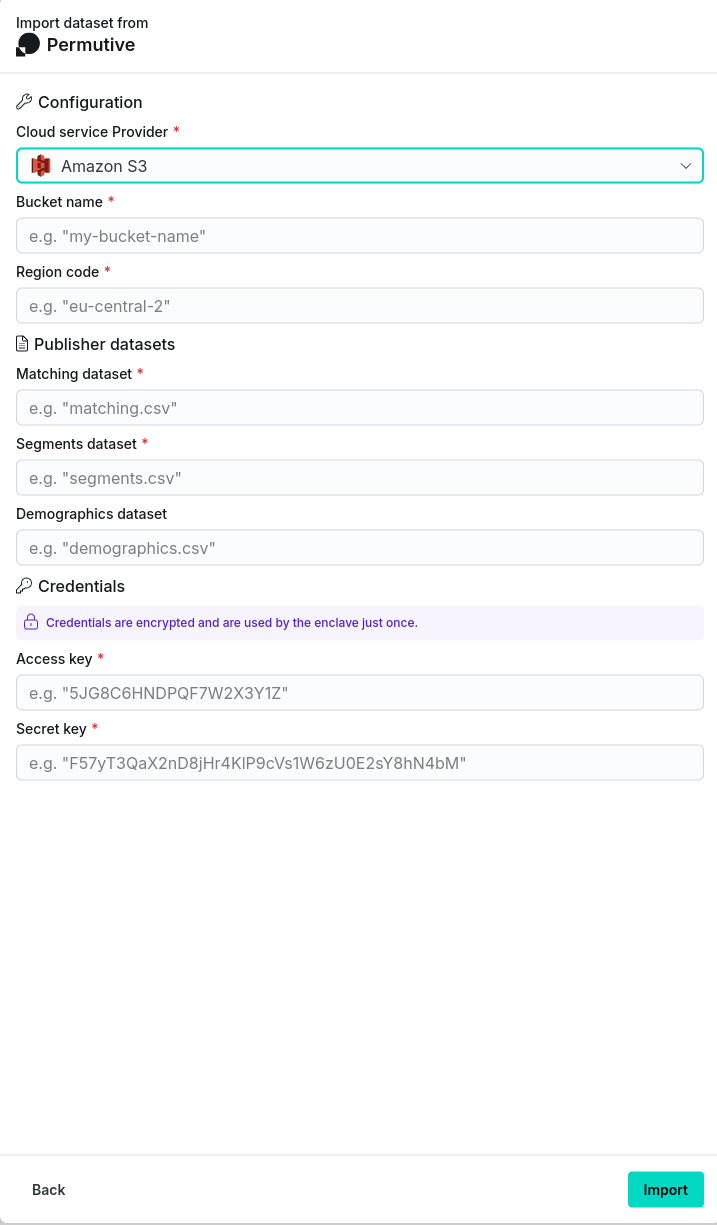
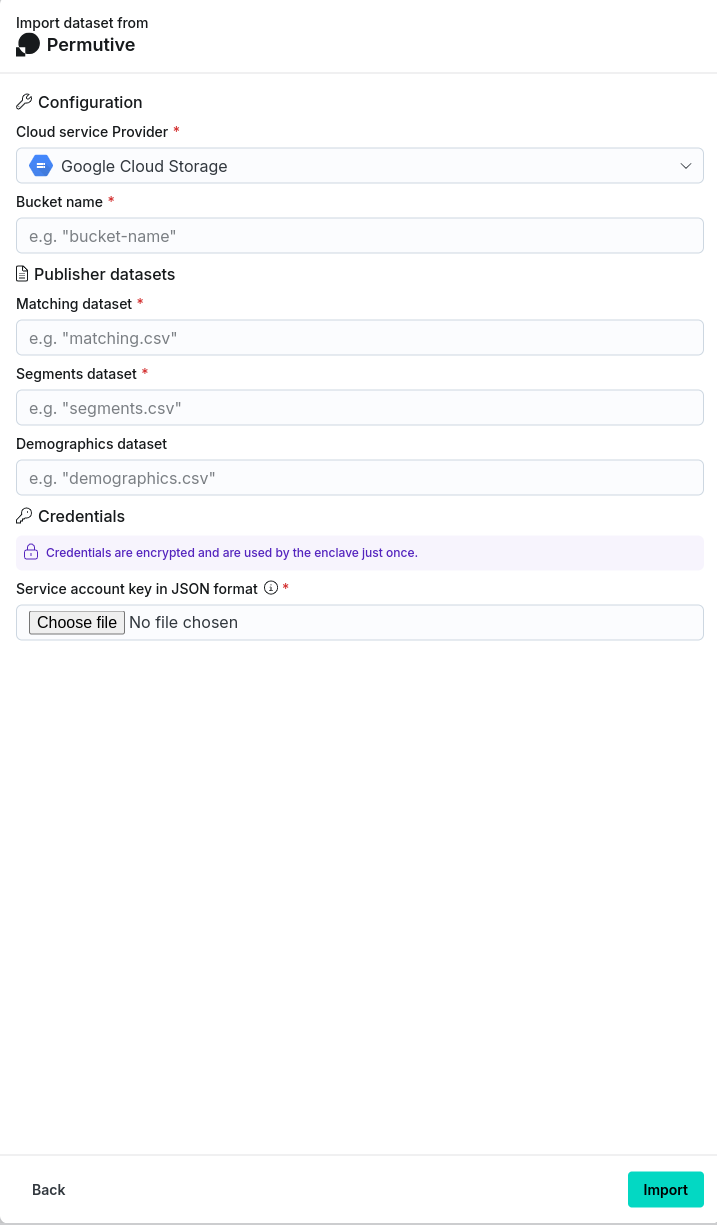
- Input the requisite information:
- Cloud service provider: Identity of the cloud service used to provide the storage. Either Google Cloud Storage or Amazon S3 may be selected.
- Bucket name: Name of the AWS S3/GCS bucket where the data should be imported from.
- Region code (required for Amazon S3 only): Geographical region of the bucket.
- Matching dataset: Name of the matching dataset to import.
- Segments dataset: Name of the segments dataset to import.
- (optional) Demographics dataset: Name of the demographics dataset to import.
- Credentials:
- For Google Cloud Storage, the credentials information is stored in a downloadable JSON file when setting up the service account (see the Google documentation for more details). This includes the following:
- type: Identifies the type of credentials (this will be set to service_account).
- project_id: The ID of your Google Cloud project.
- private_key_id: The identifier for the private key.
- private_key: The actual private key used for authentication - in PEM format.
- client_email: The email address of the service account.
- client_id: A unique identifier for the service account.
- auth_uri: The URL to initiate OAuth2 authentication requests.
- token_uri: The URL to retrieve OAuth2 tokens.
- auth_provider_x509_cert_url: The URL to get Google's public certificates for verifying signatures.
- client_x509_cert_url: The URL to the public certificate for the service account.
- universe_domain: The domain of the API endpoint.
- For Amazon S3:
- The access key and secret key associated with the Amazon S3 account.
- For Google Cloud Storage, the credentials information is stored in a downloadable JSON file when setting up the service account (see the Google documentation for more details). This includes the following:
- Cloud service provider: Identity of the cloud service used to provide the storage. Either Google Cloud Storage or Amazon S3 may be selected.
After clicking the Import button, navigate to the Imports/Exports tab on the Datasets page to track the status of the import.
Once complete, the dataset will be visible in the Datasets page under the Datasets tab with the stored dataset name provided in step 2.