Creating a Datalab
Step 1: Determine which data you need
Pick the Media DCR collaboration types your Datalab will support. The collaboration types determine which datasets are required — see Required datasets and prepare your data accordingly.
Step 2: Create your Datalab
Go to Datalabs in the sidebar and click Create Datalab. The creation wizard walks through four steps.
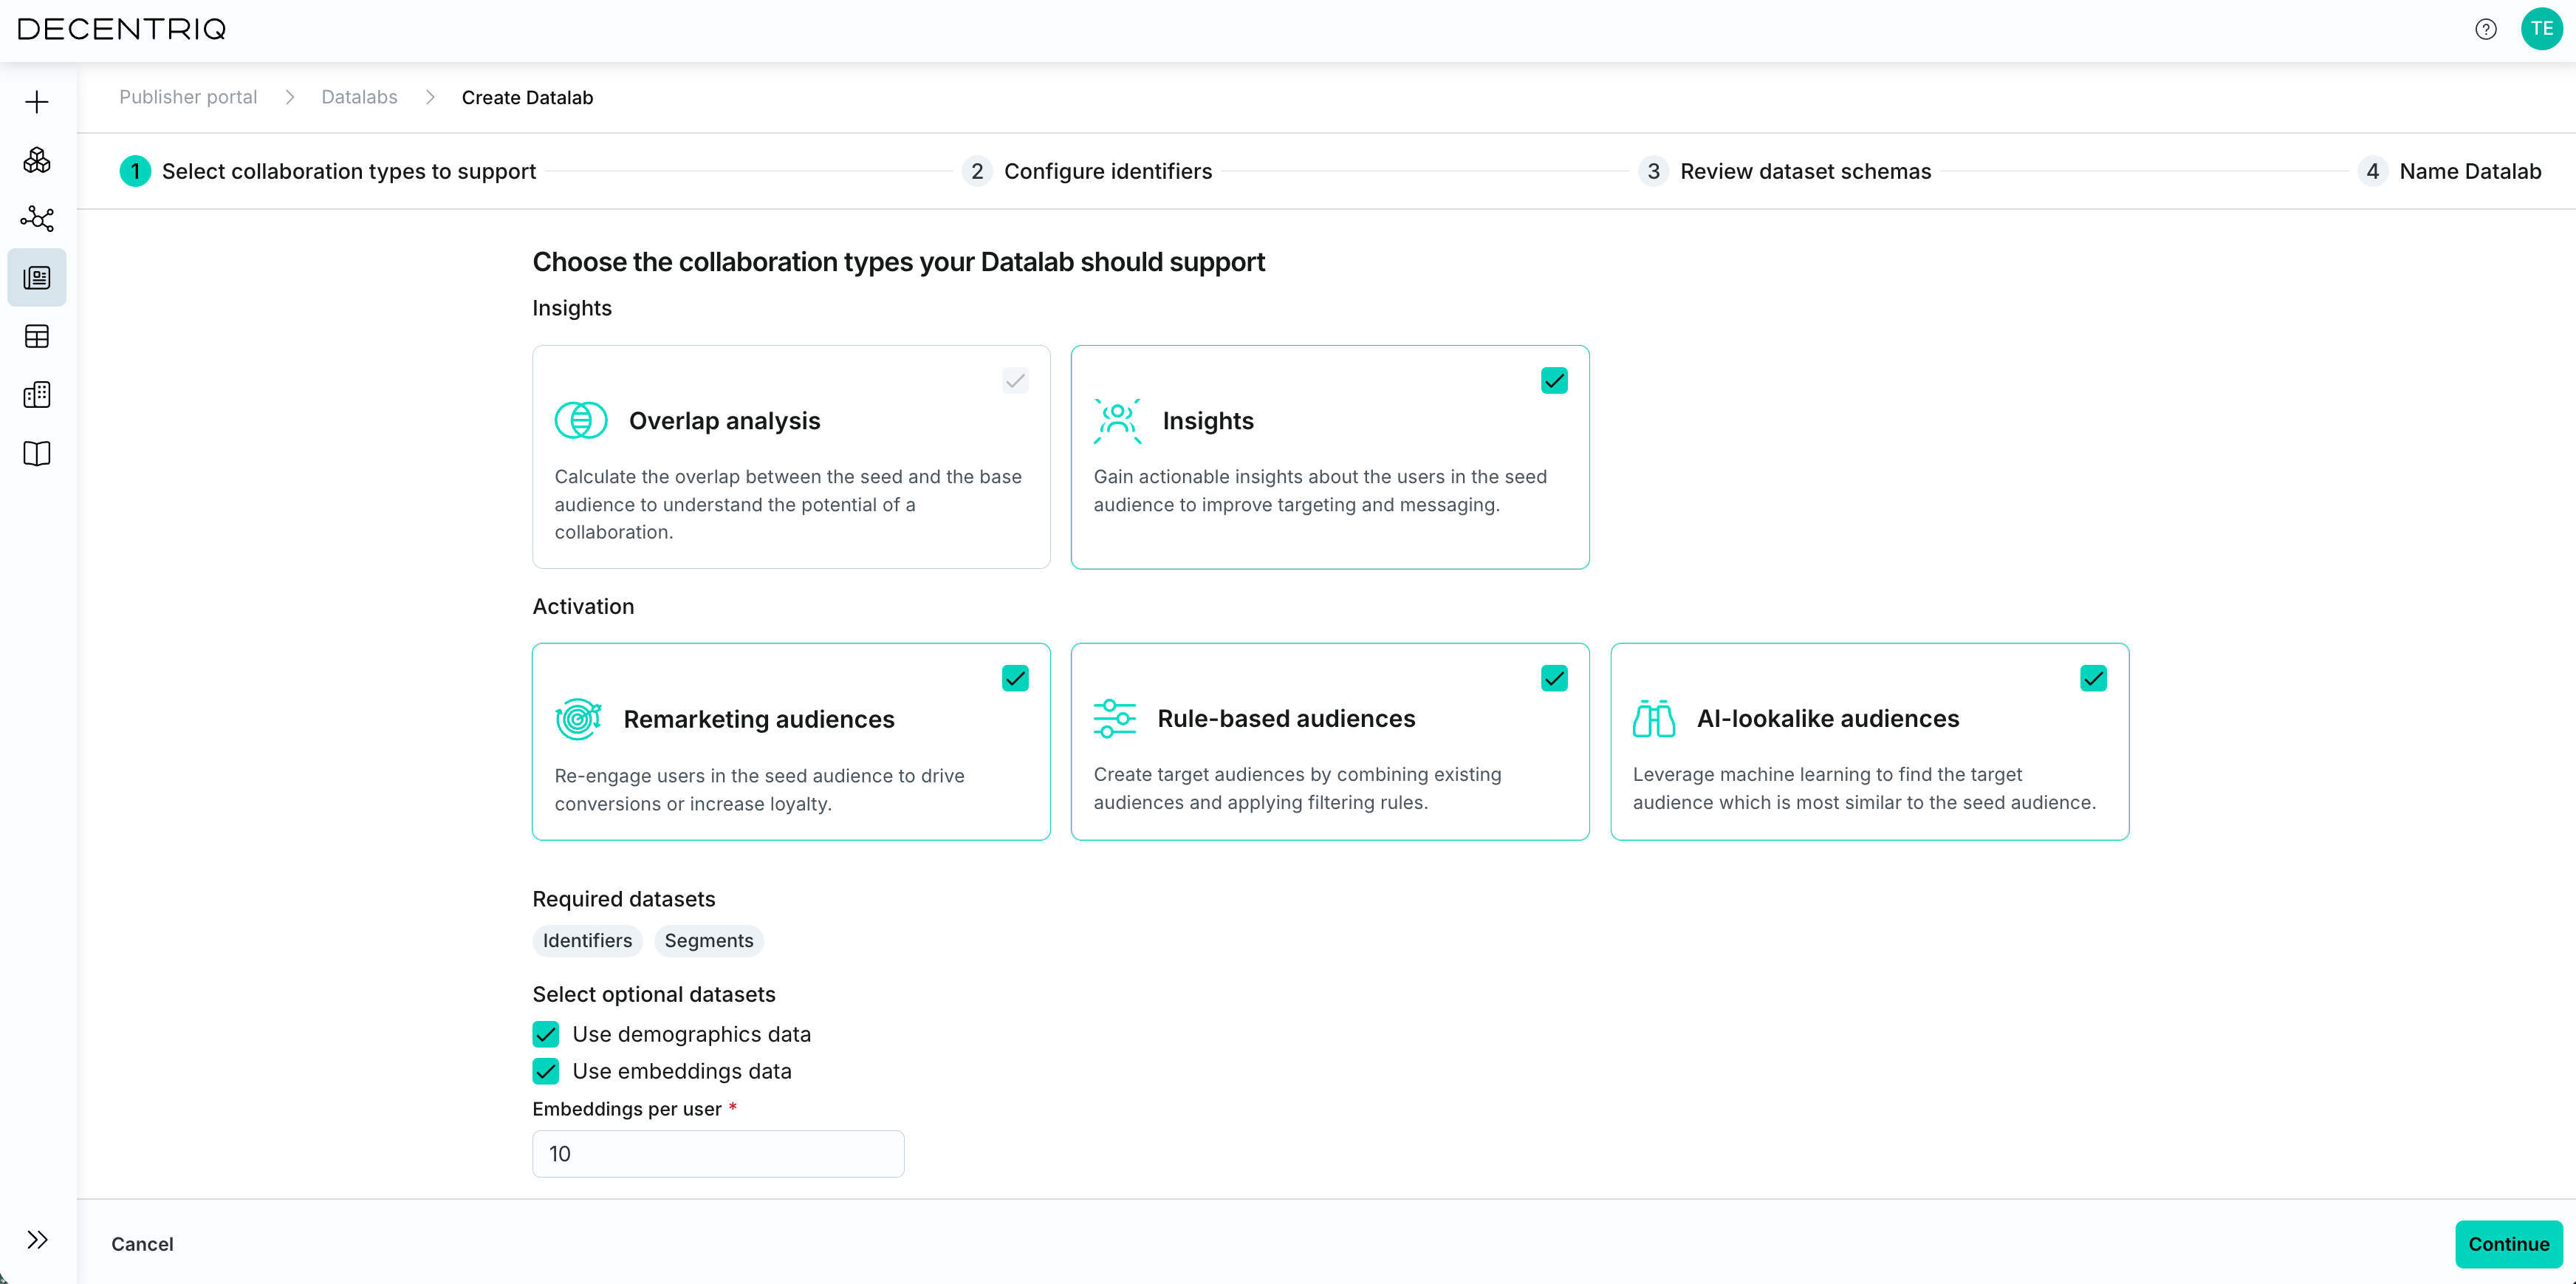
1. Pick collaboration types
Pick the collaboration types you want this Datalab to support. The selection drives which datasets you'll need to provide and which identifier roles are required.
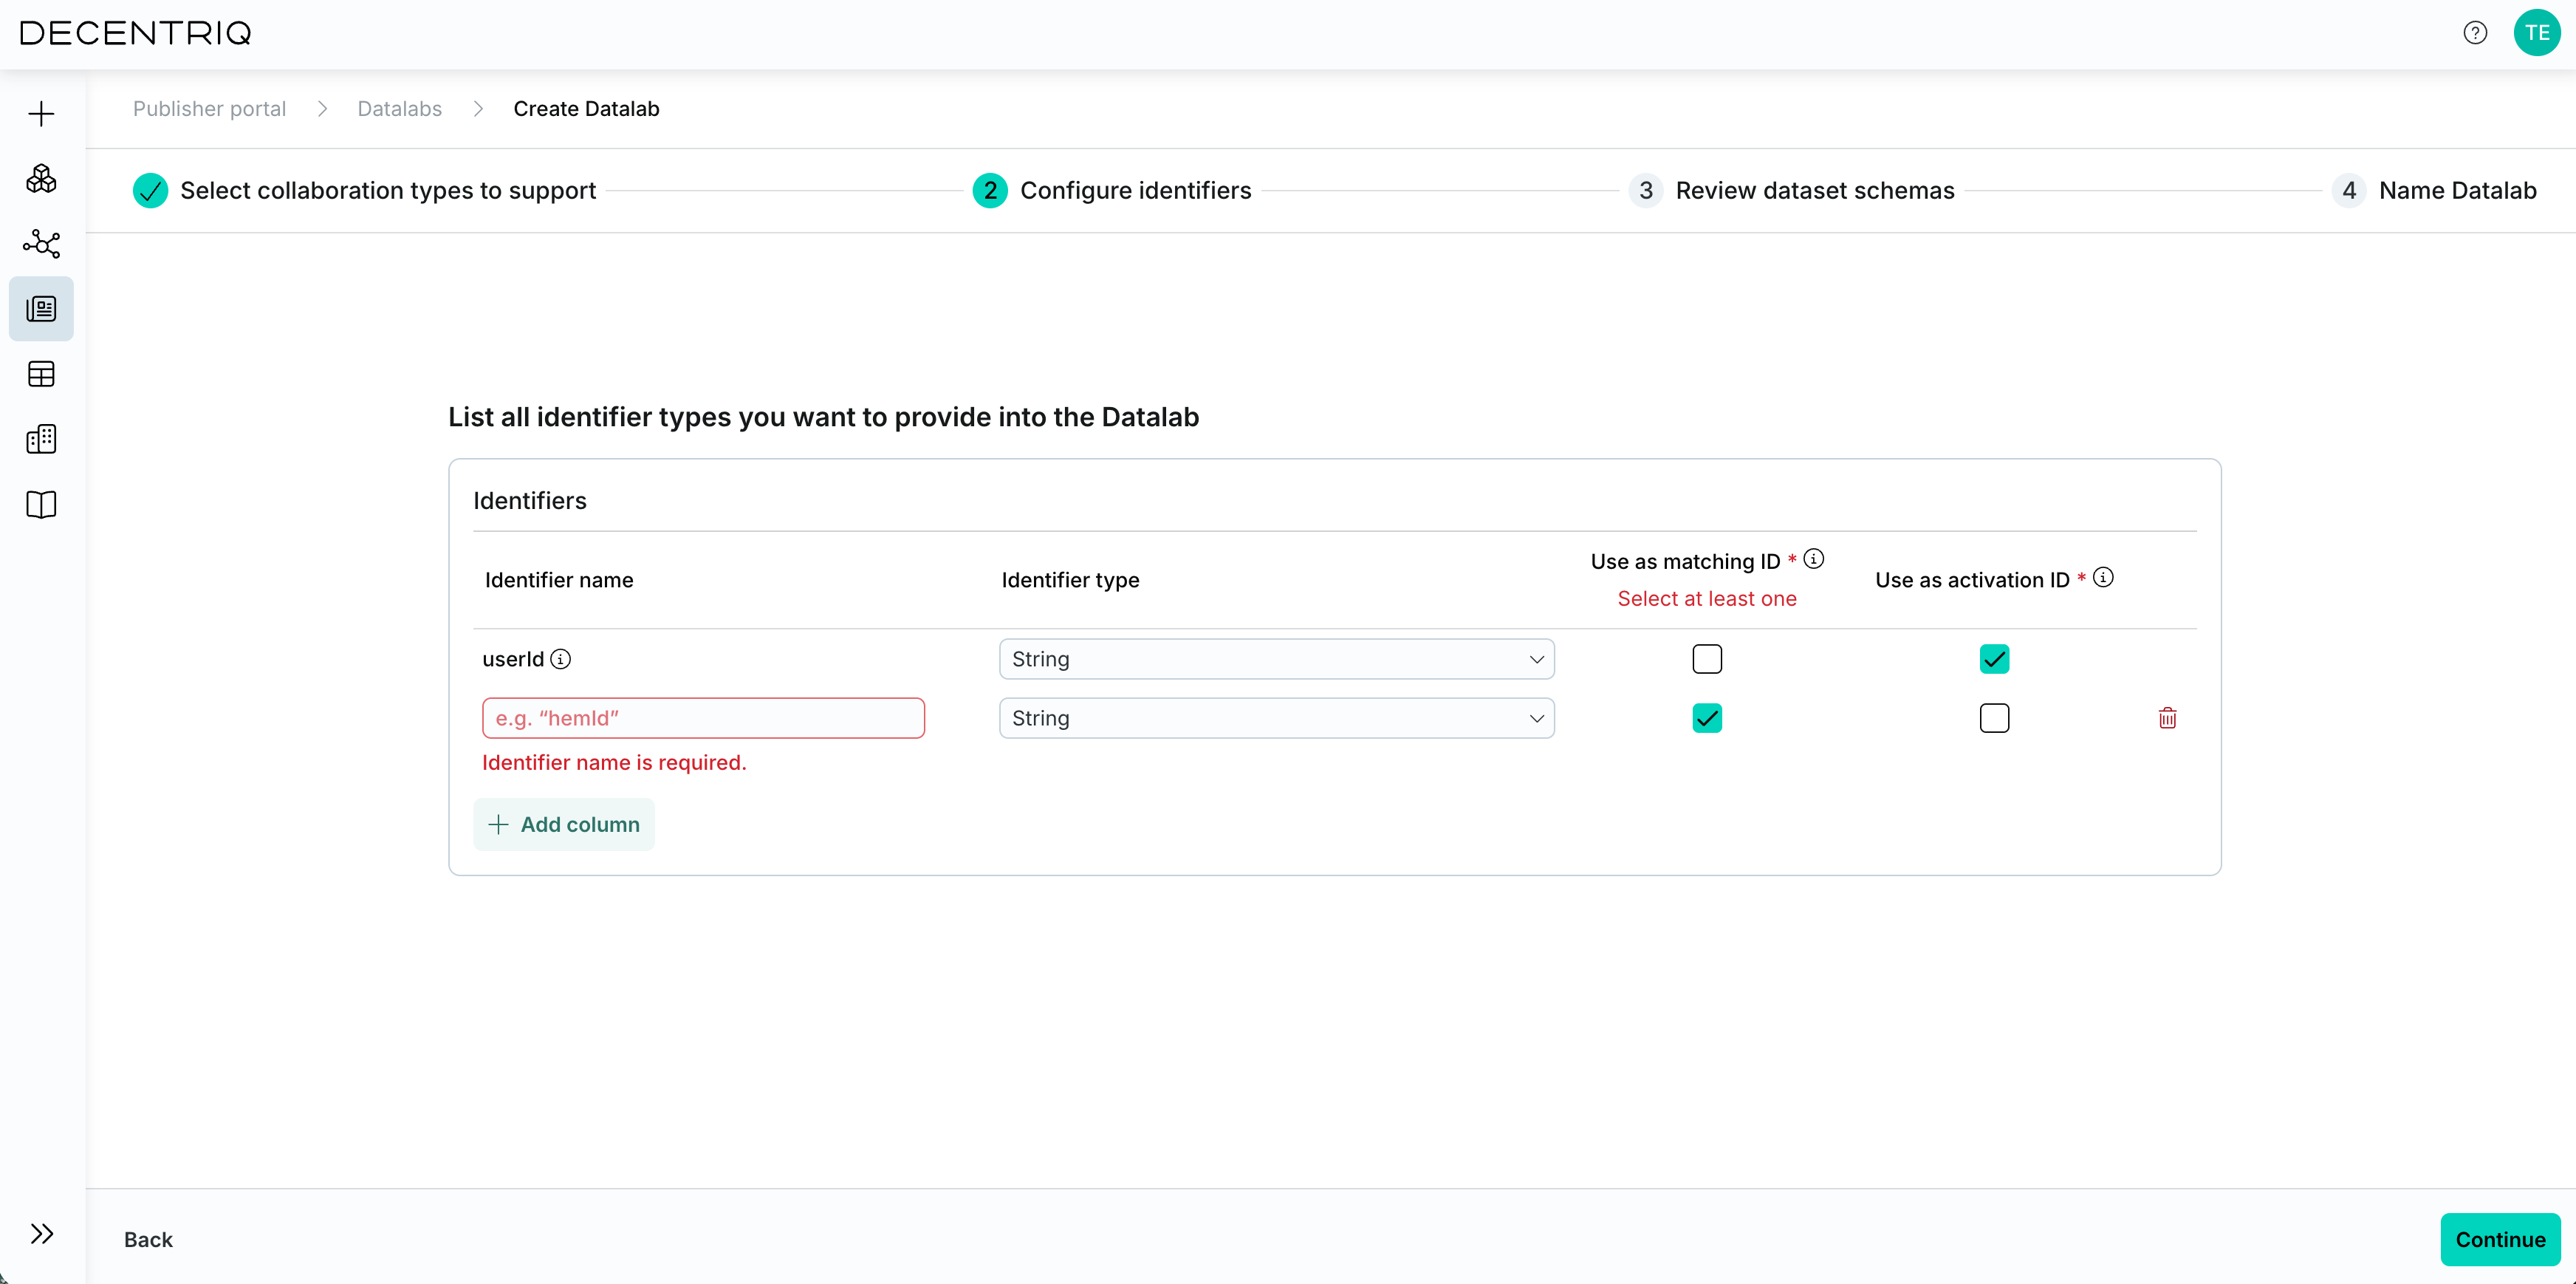
2. Configure identifiers
Add the identifiers you'll bring into the Datalab. For each identifier, set:
- Identifier name — your label (one identifier must be named userId)
- Identifier type — the format (see supported types)
- Matching ID — whether the identifier is used to match against the seed audience in a Media DCR
- Activation ID — whether the identifier can be exported as part of audiences
The same identifier can play any combination of roles. See Identifiers configuration for the full rules.
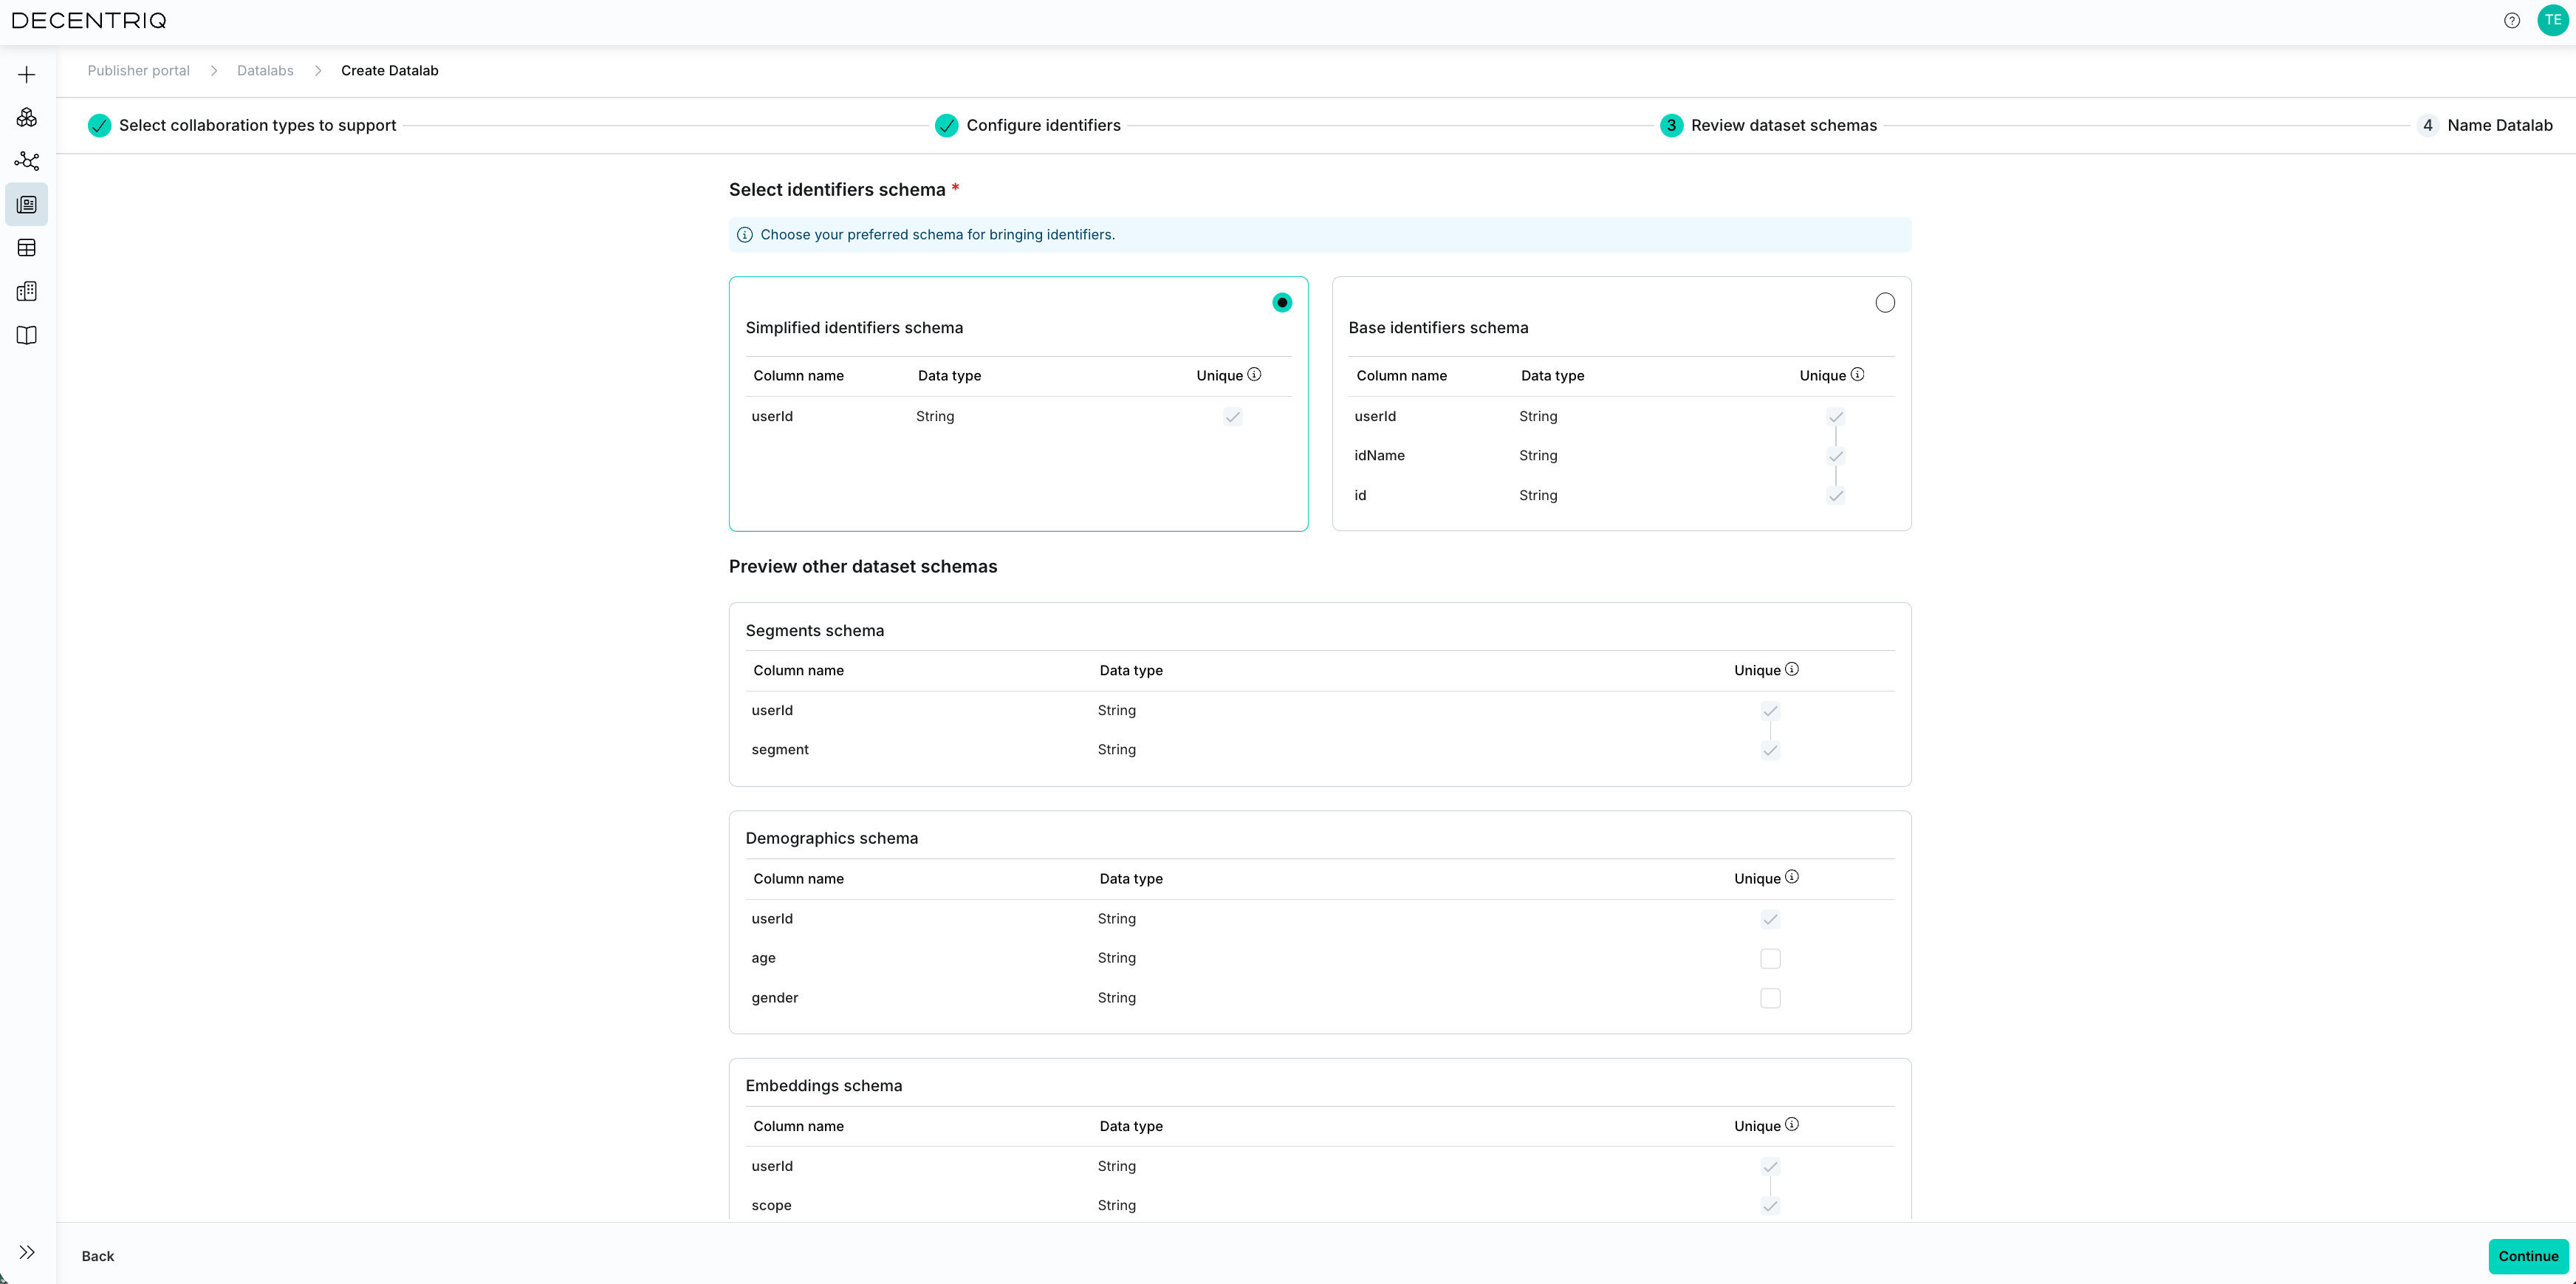
3. Choose the identifiers schema
Choose the identifiers schema that matches your file format. The base schema is always available. With 1 or 2 identifiers, you can also choose a simplified schema. With 3 or more identifiers, only the base schema is available.
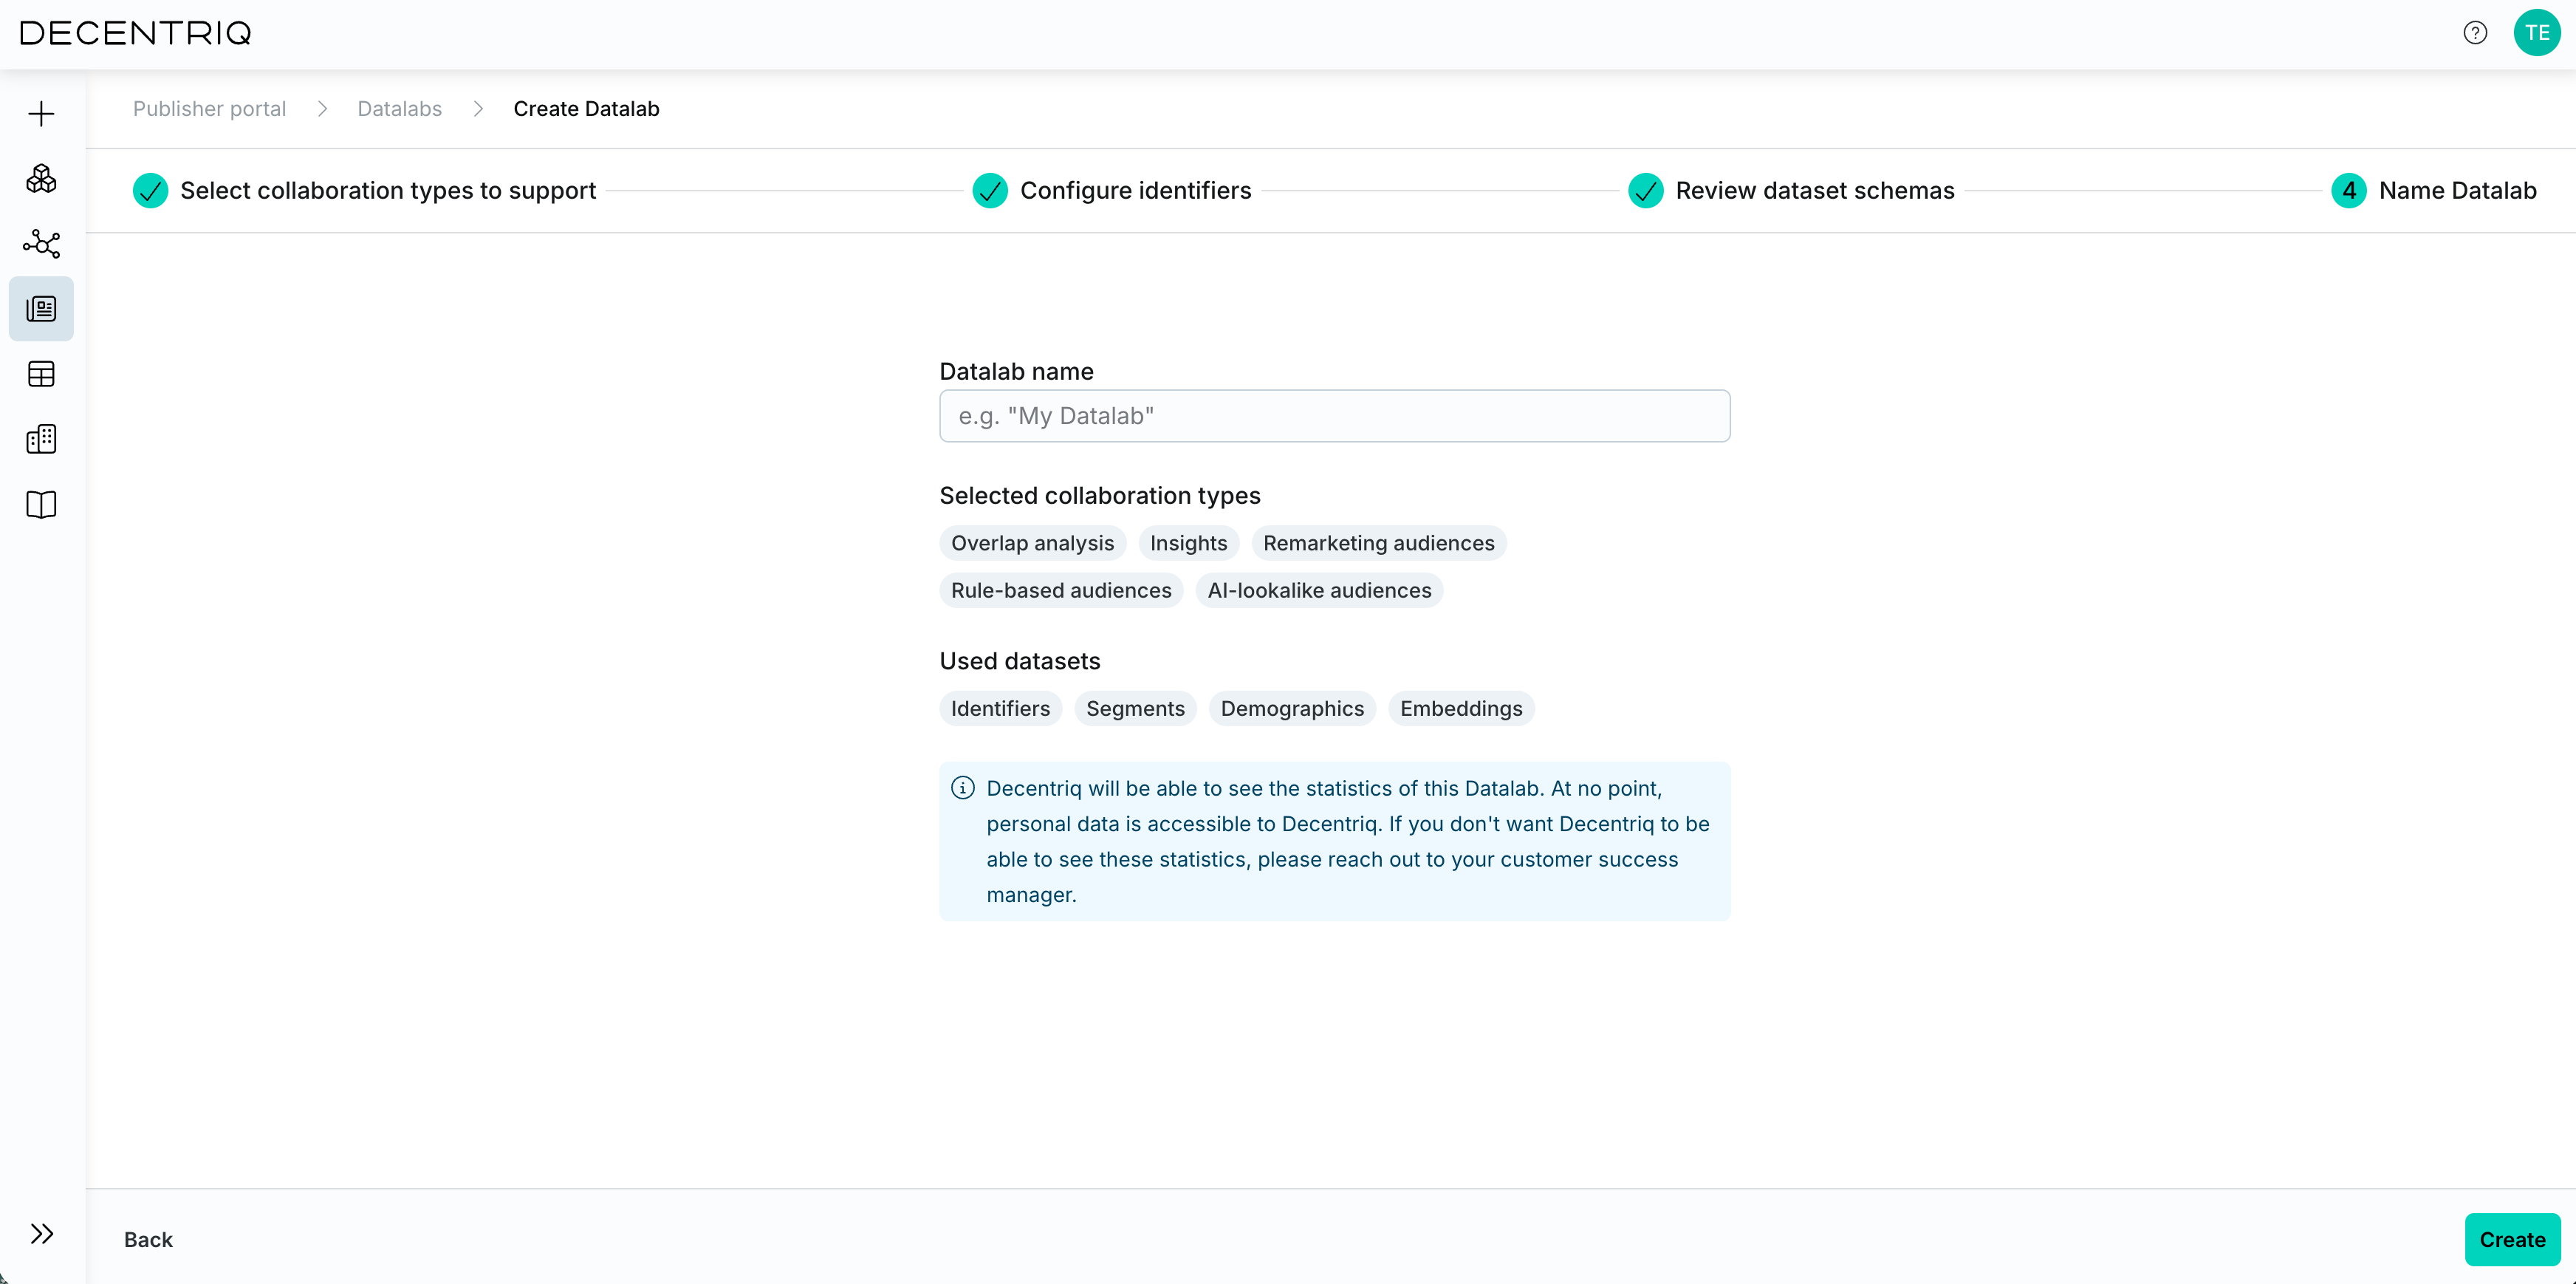
4. Name and review
Give the Datalab a name and review the summary. If your organization has statistics sharing with Decentriq enabled, an information banner reminds you here. The setting is captured at this point, so it stays attached to this Datalab even if the org-wide setting changes later.
Once the Datalab is created, see Using a Datalab to upload data, provision it into the Datalab, validate, and provision the Datalab to Media DCRs.