Upload a table dataset
This section explains the steps to upload a file as a table dataset. The schema of the dataset is determined by the DCR it is uploaded to.
Note that data is only uploaded in the last step of this flow.
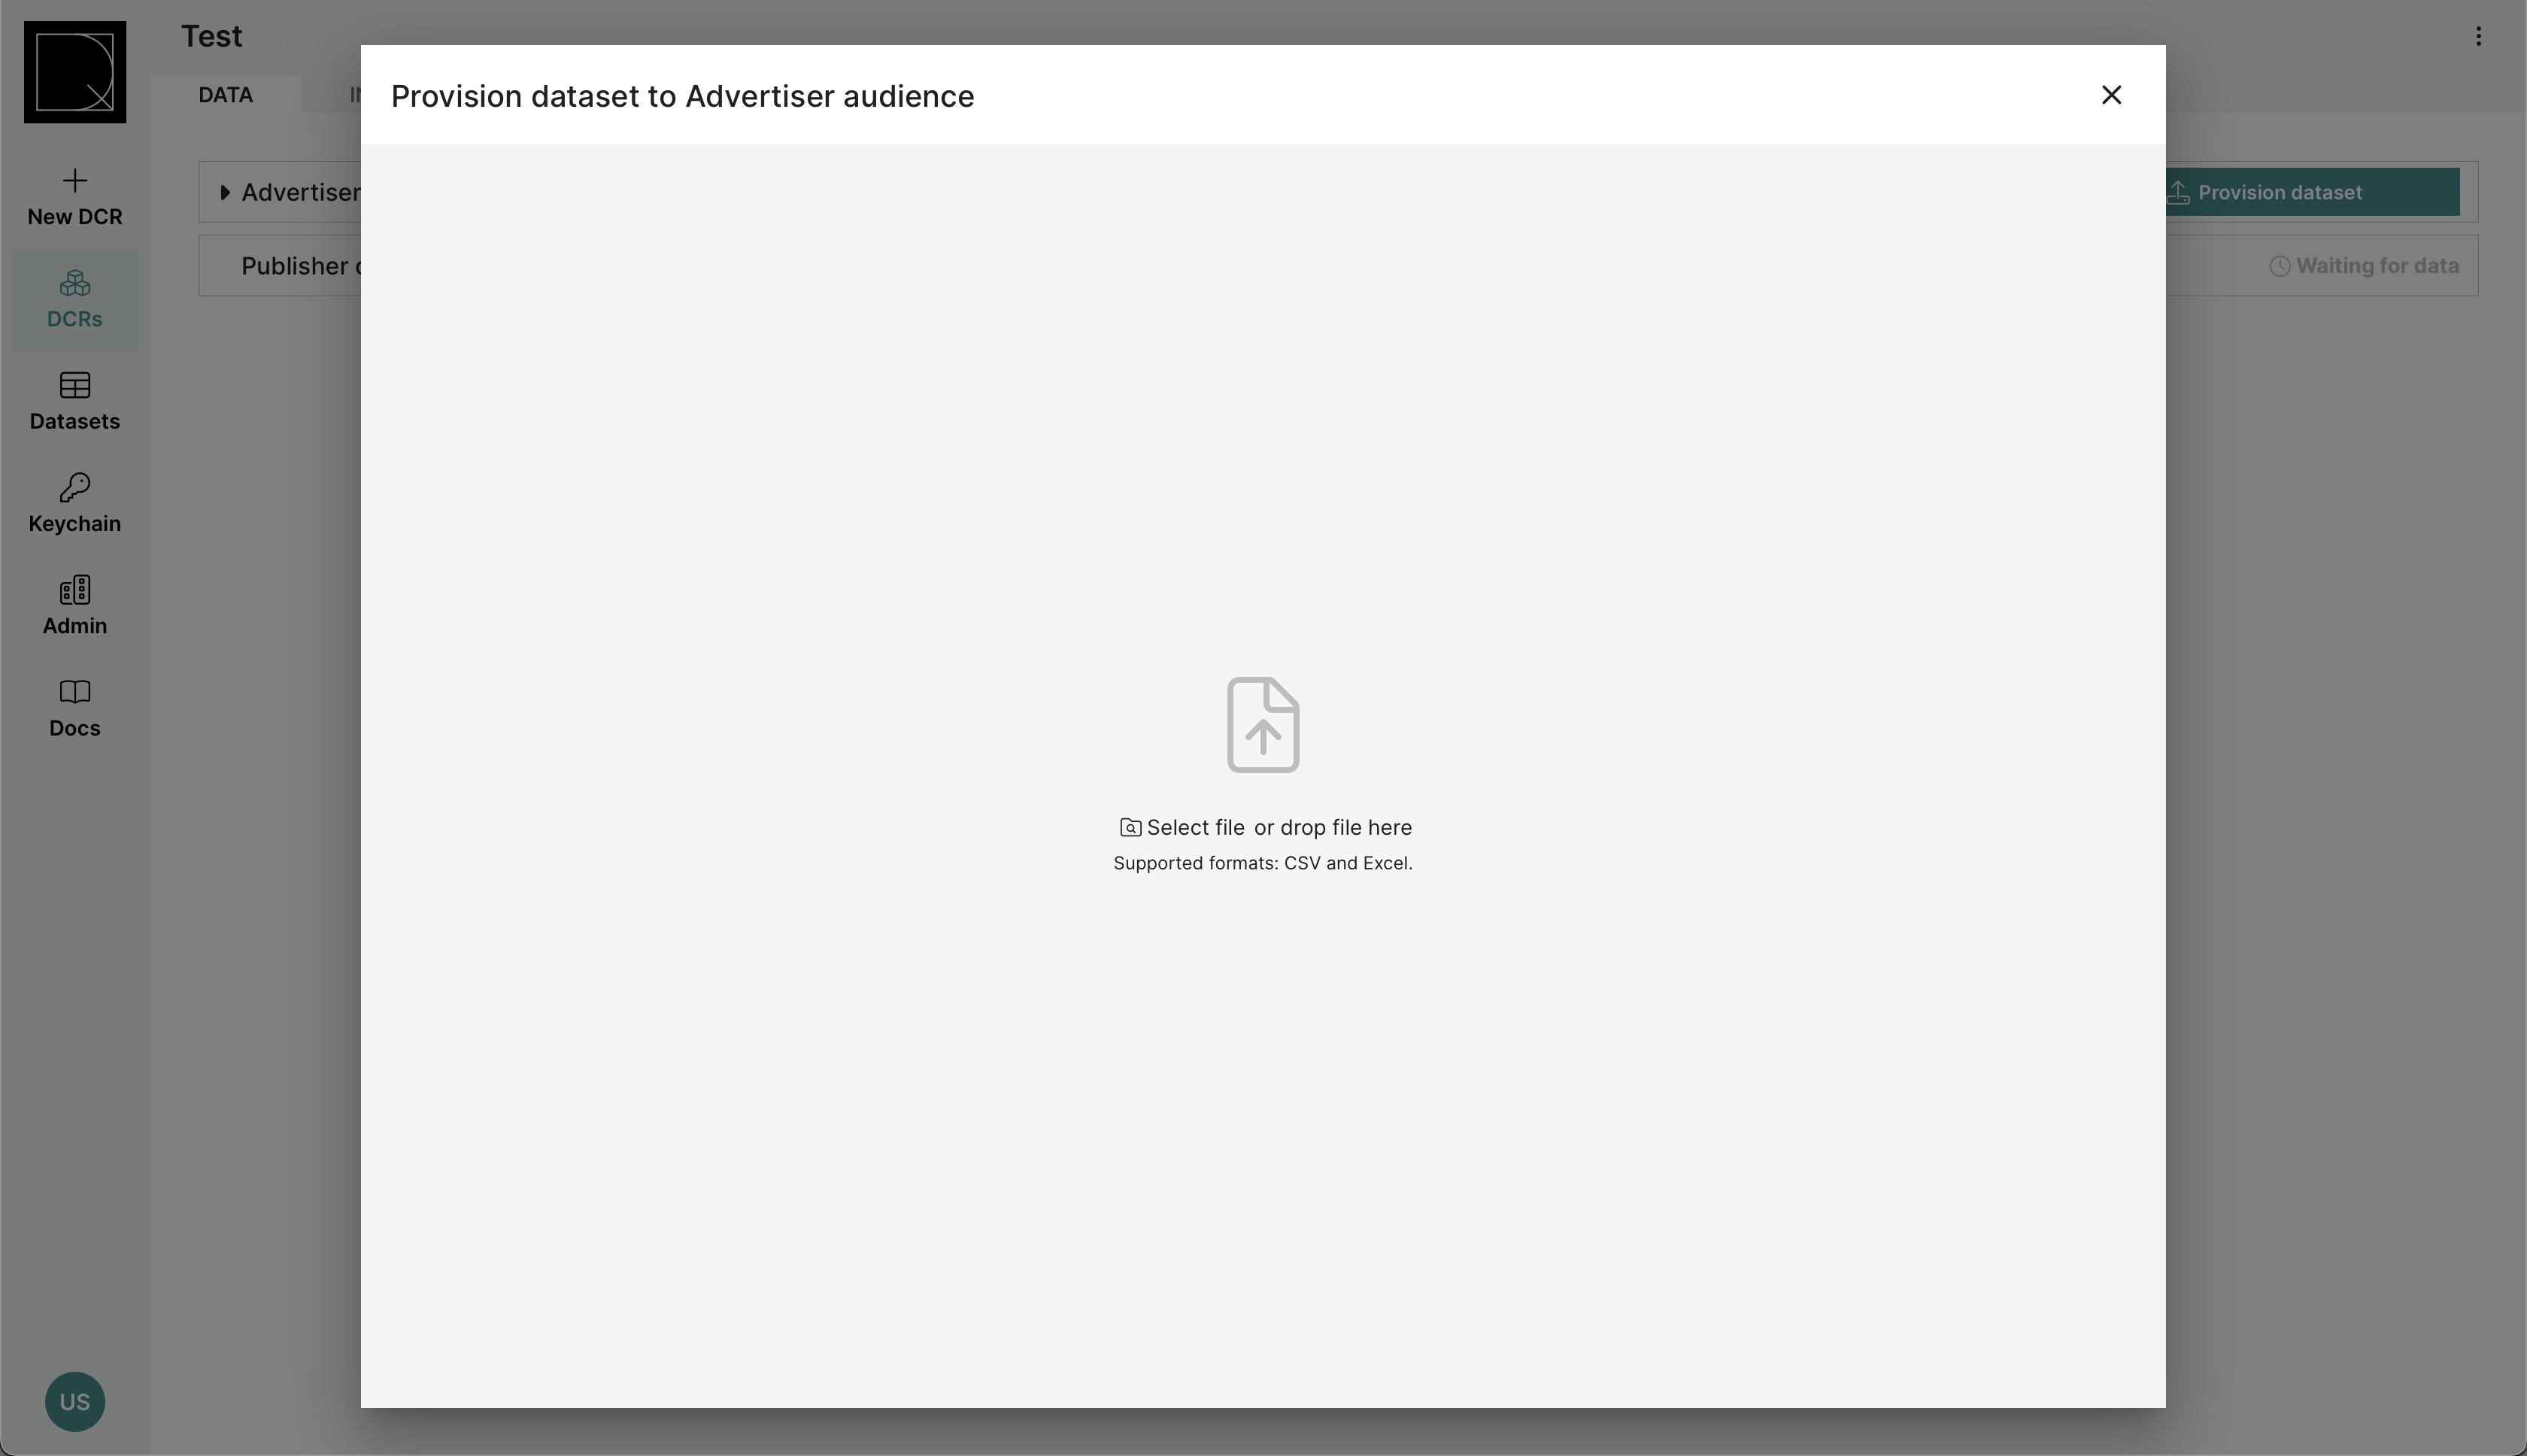
Select file
Decentriq supports CSV and Excel formats. In CSV files, comma, semicolon, tab and pipe character are acceptable separators. In Excel files, only the first sheet is used.
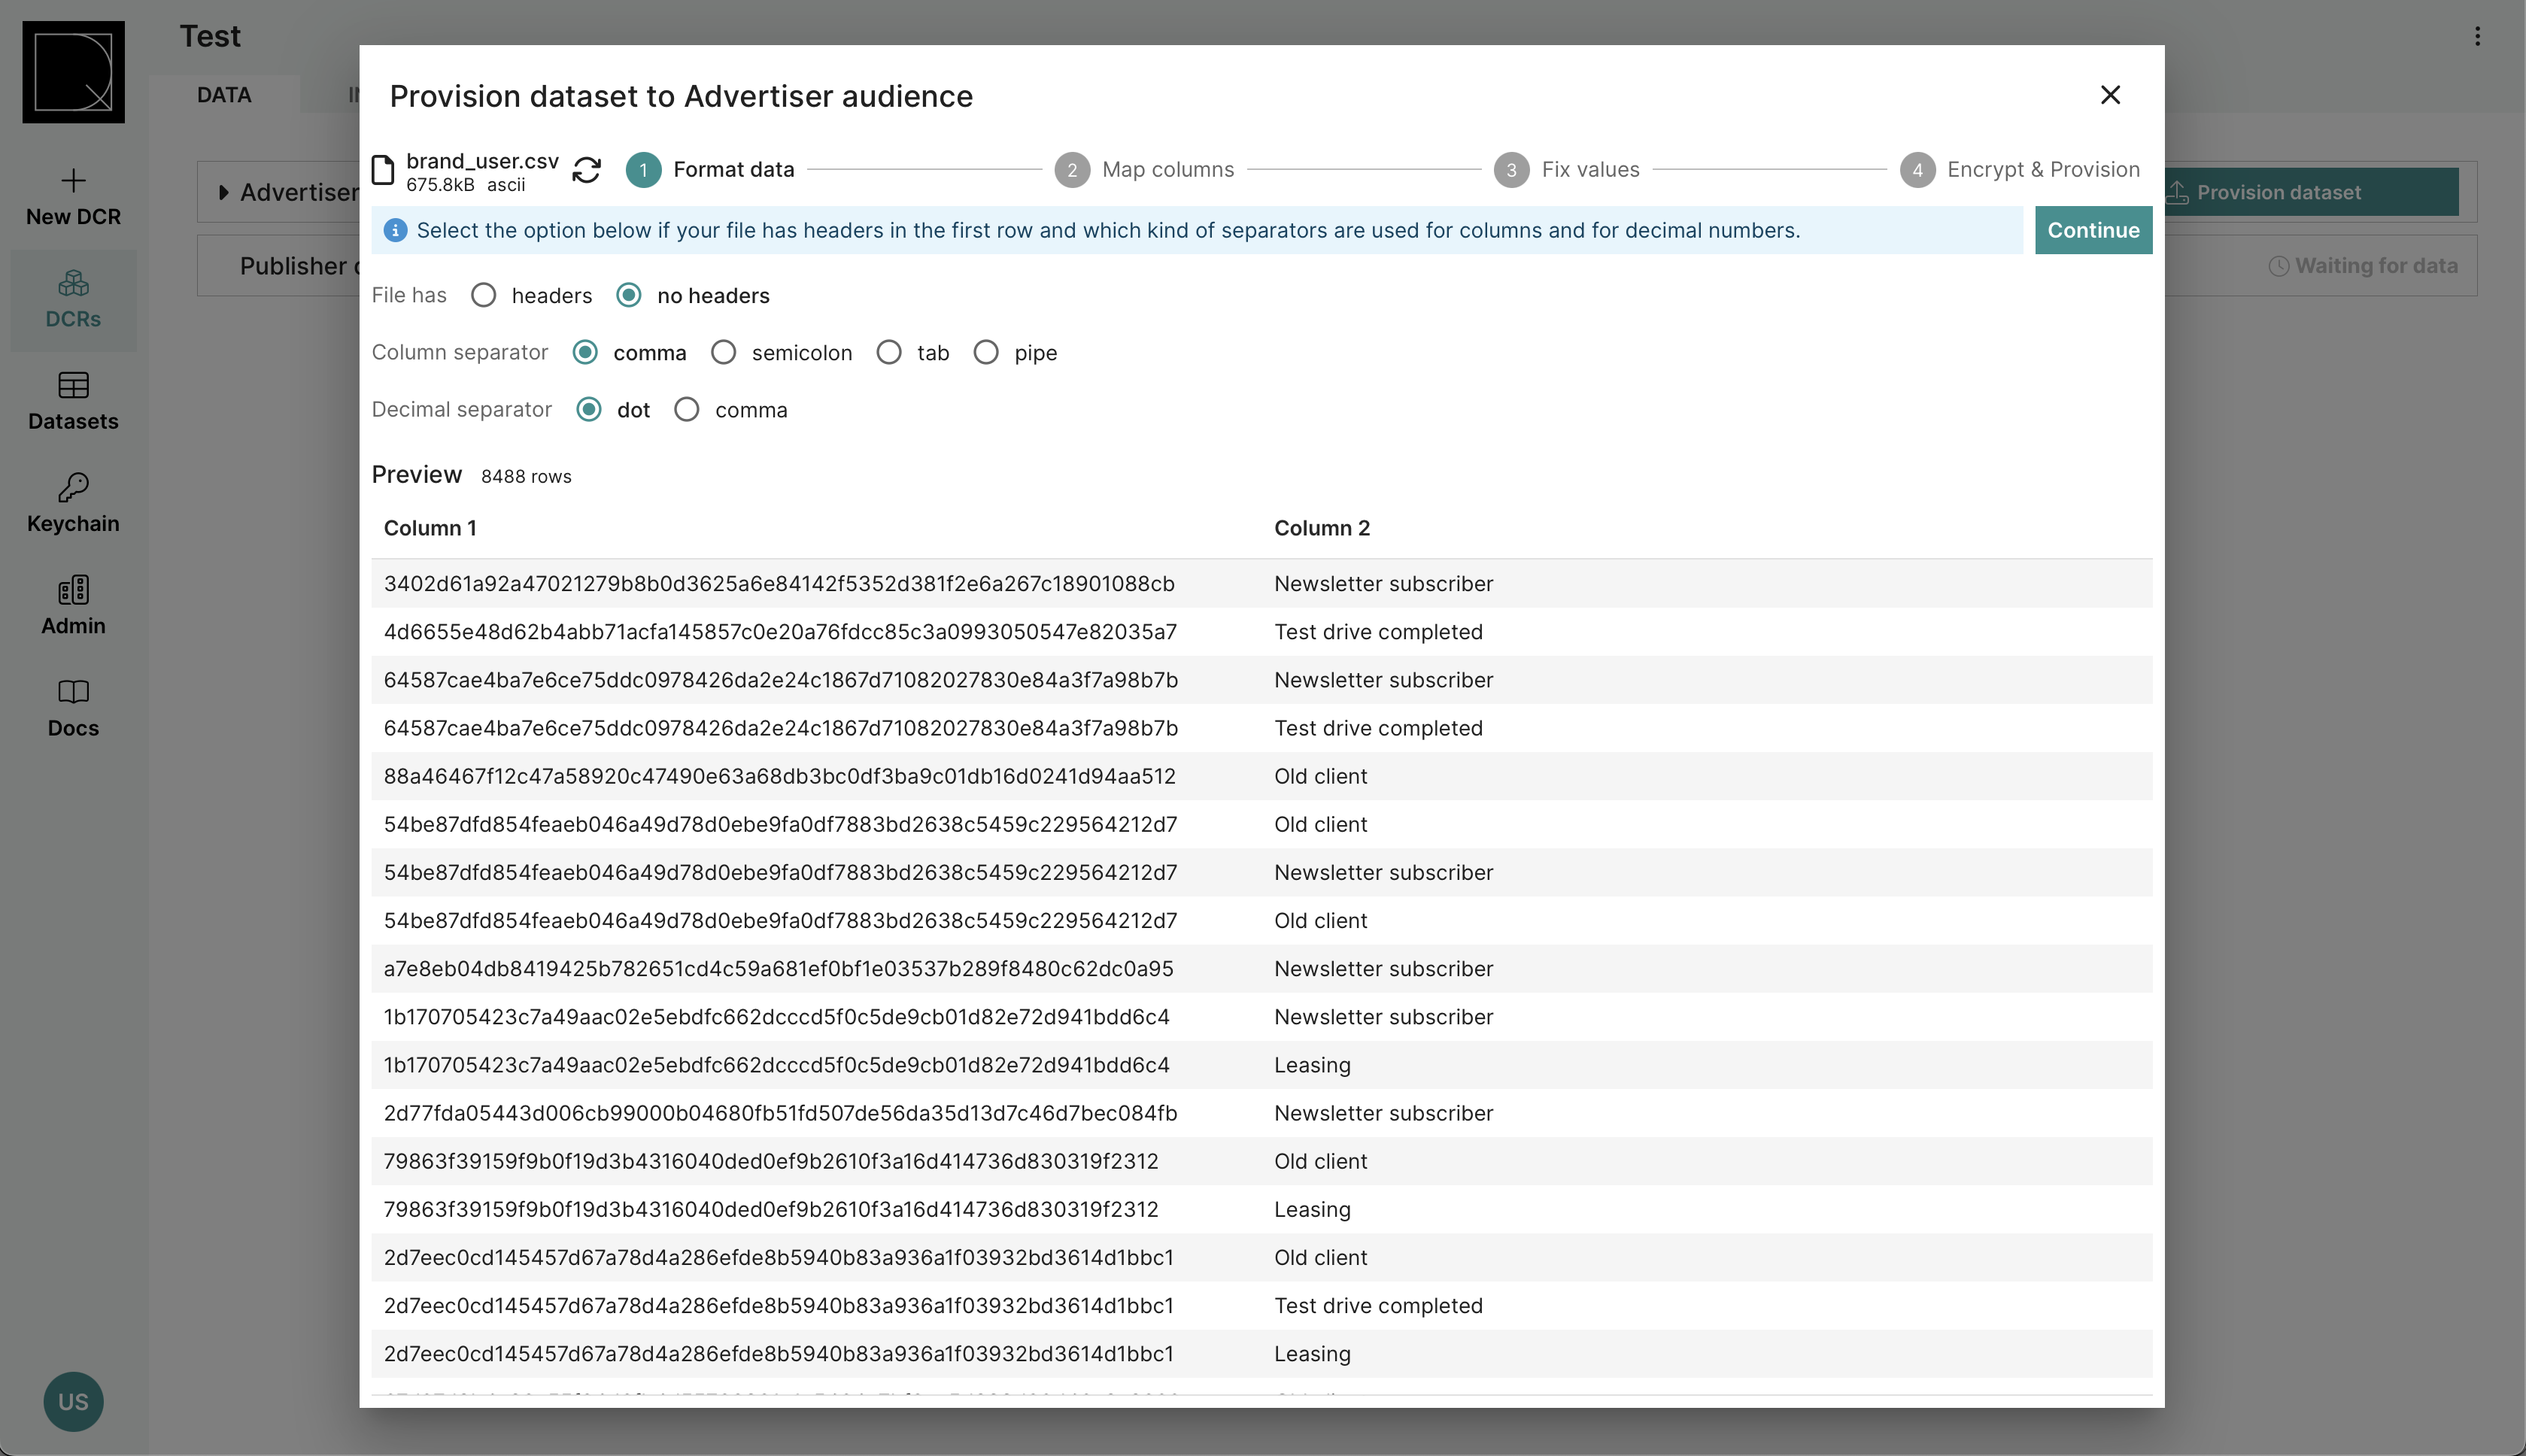
Step 1: Format data
In this step, the user selects if the file includes a header row, column and decimal separators.
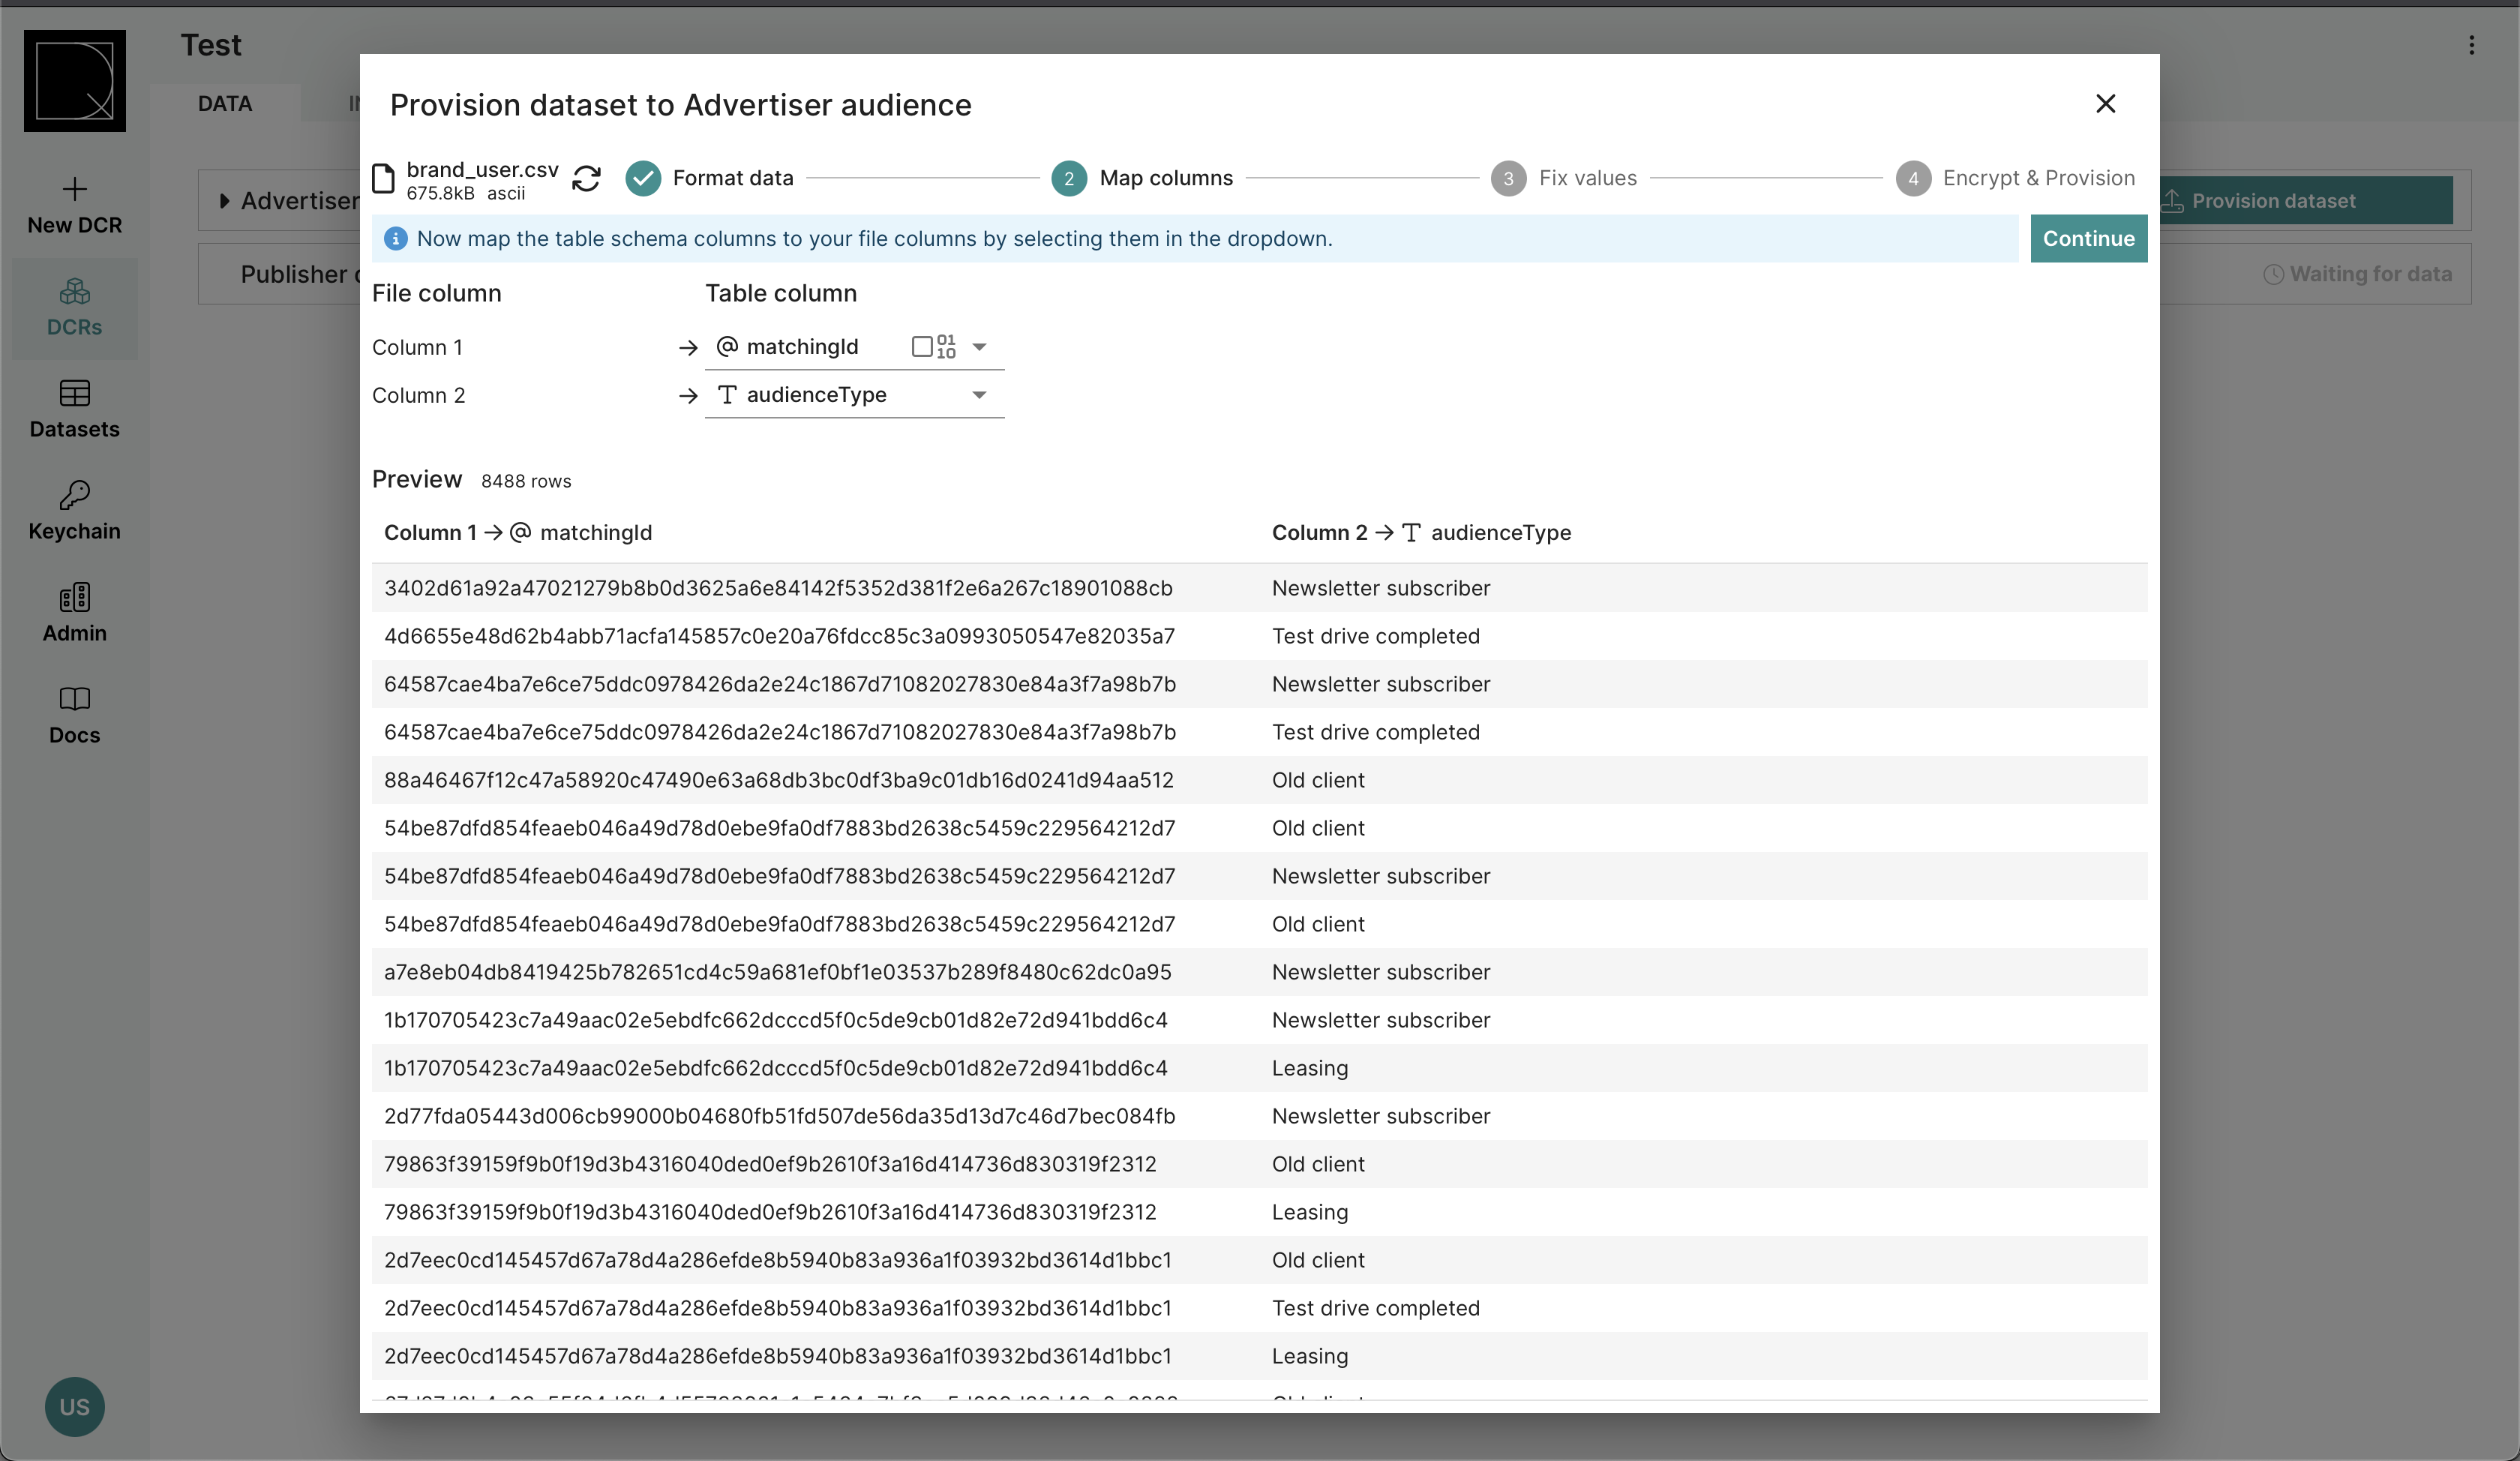
Step 2: Map columns / Adjust schema
In this step, the user maps the columns of their file with the columns in the expected schema. The expected schema is determined by the DCR where this file is to be uploaded. By default the columns are mapped in order of appearance in the file.
If the data is uploaded in the Dataset Portal, this step is replaced by an Adjust schema step.
Hashing data during upload
For columns which have a “hashed” data type, there is a “should hash data” checkbox in the drop down. This will apply unsalted SHA-256 hashing before uploading the data.
Step 3: Fix values
In this step, the data is compared against the expected schema. Data can only be uploaded, once all type mismatches have been addressed.
The number of type mismatches ("failed values") are reported in the top bar. You can hover over individual cells to learn more about the nature of the specific mismatch.
Type mismatches can be addressed either by
- Applying a data type-specific “fix failed values” operation (for example in the case of email addresses it will apply lower-casing of the strings)
- Dropping rows which still contain type mismatches
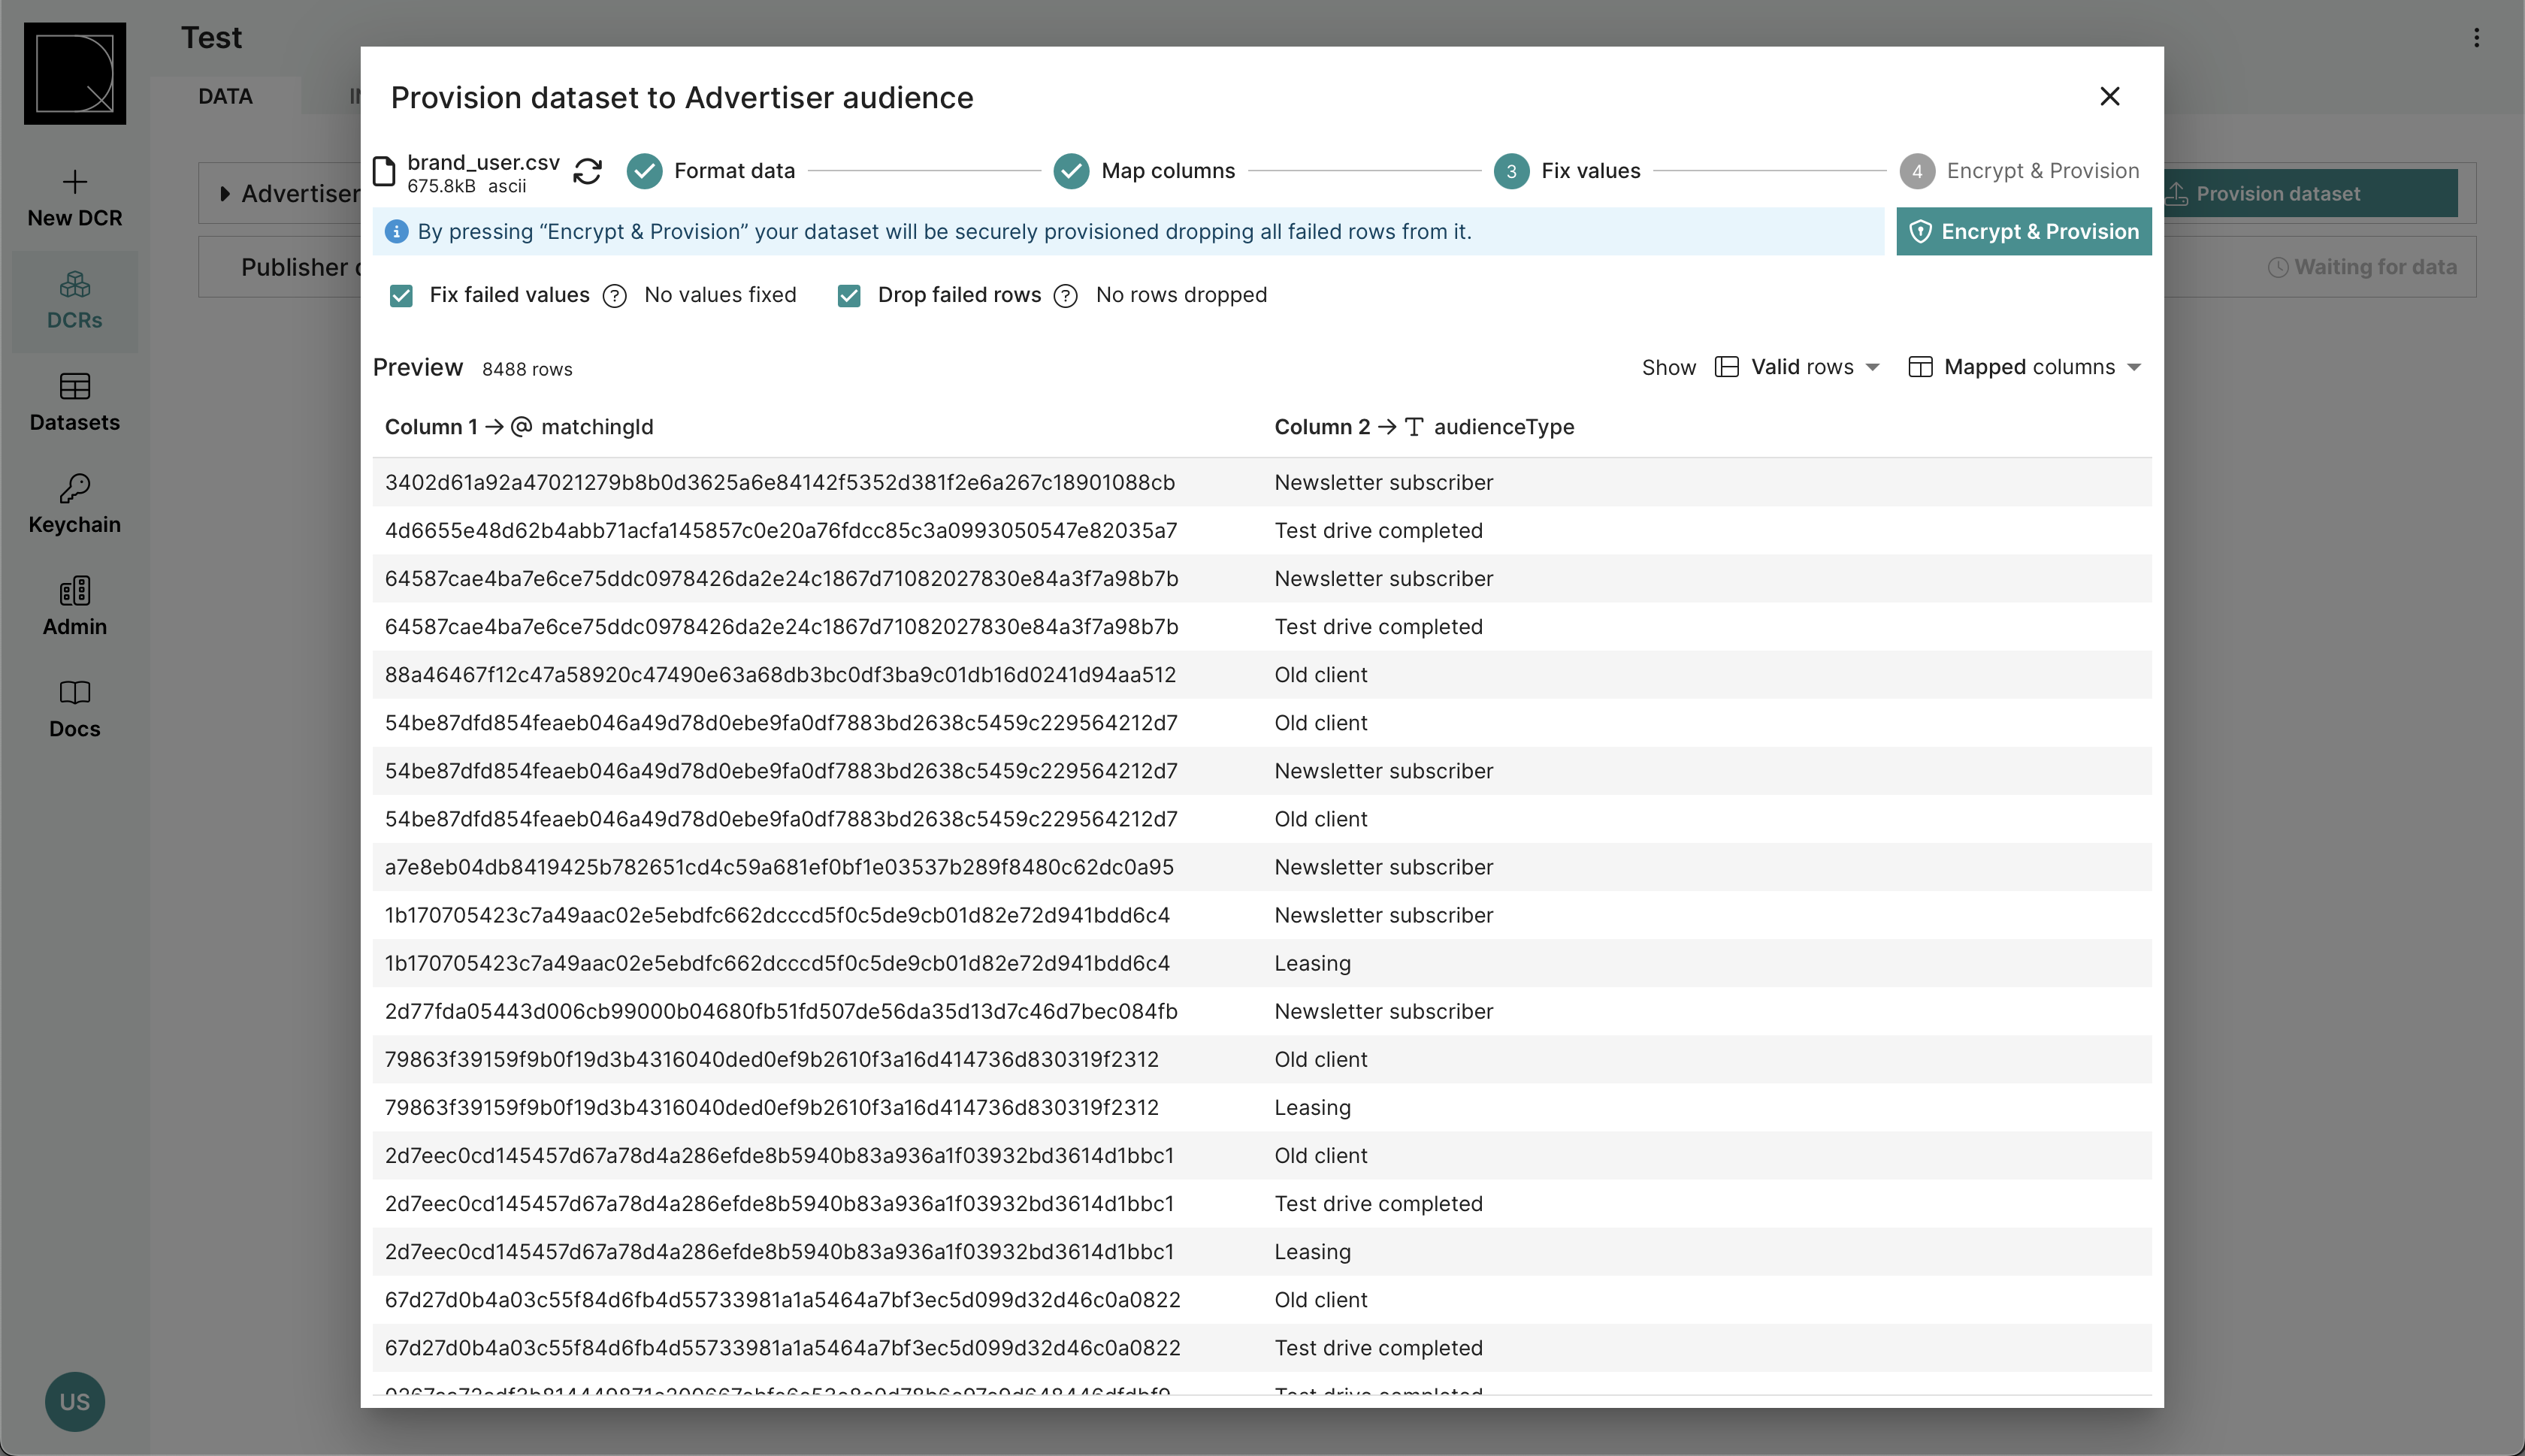
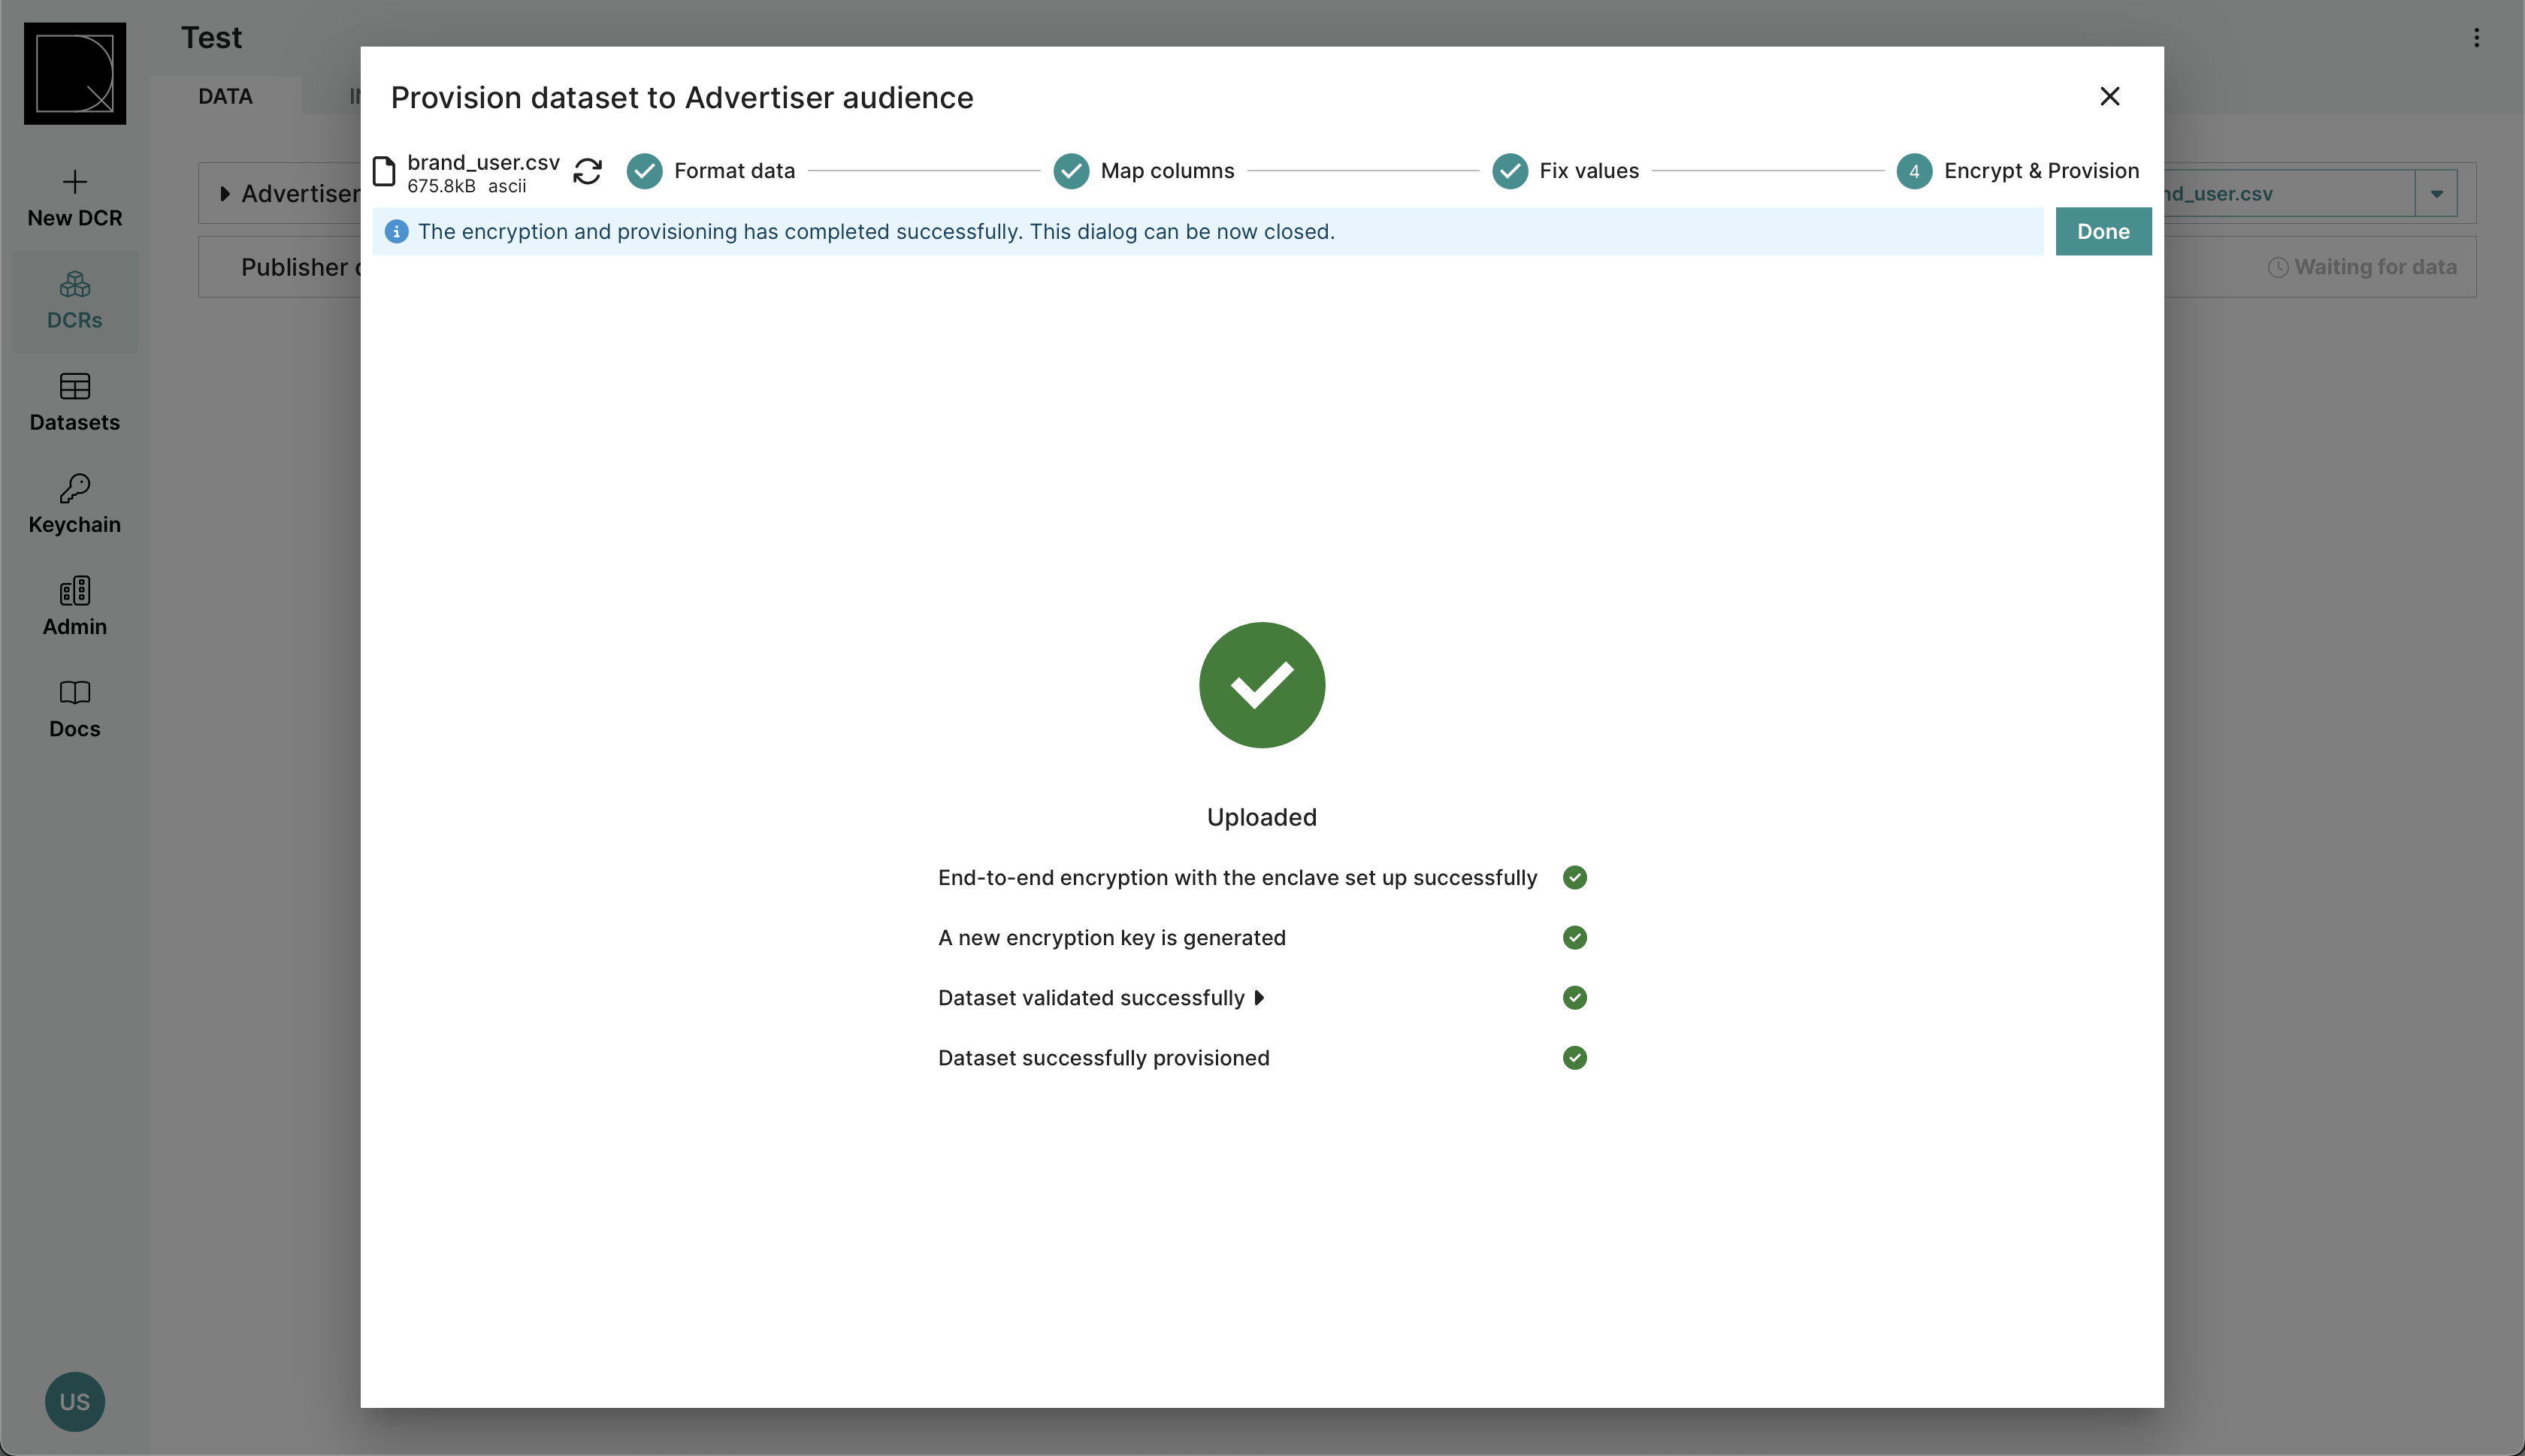
Step 4: Encrypt & provision
In this step, the data is locally encrypted and uploaded. The uploaded data is also validated server-side. In case of validation problems, a validation error report is returned. For large datasets, this step may take several minutes. Green checkmarks will indicate a successful upload.
After this step, the file has been successfully uploaded.