Creating a Media DCR
Your organization needs an active license and must be media enabled to create Media DCRs. All listed users must have active Decentriq accounts for the Media DCR to be published. If you have questions, contact your customer success representative or support@decentriq.com.
Step 1: Start the Media DCR creation
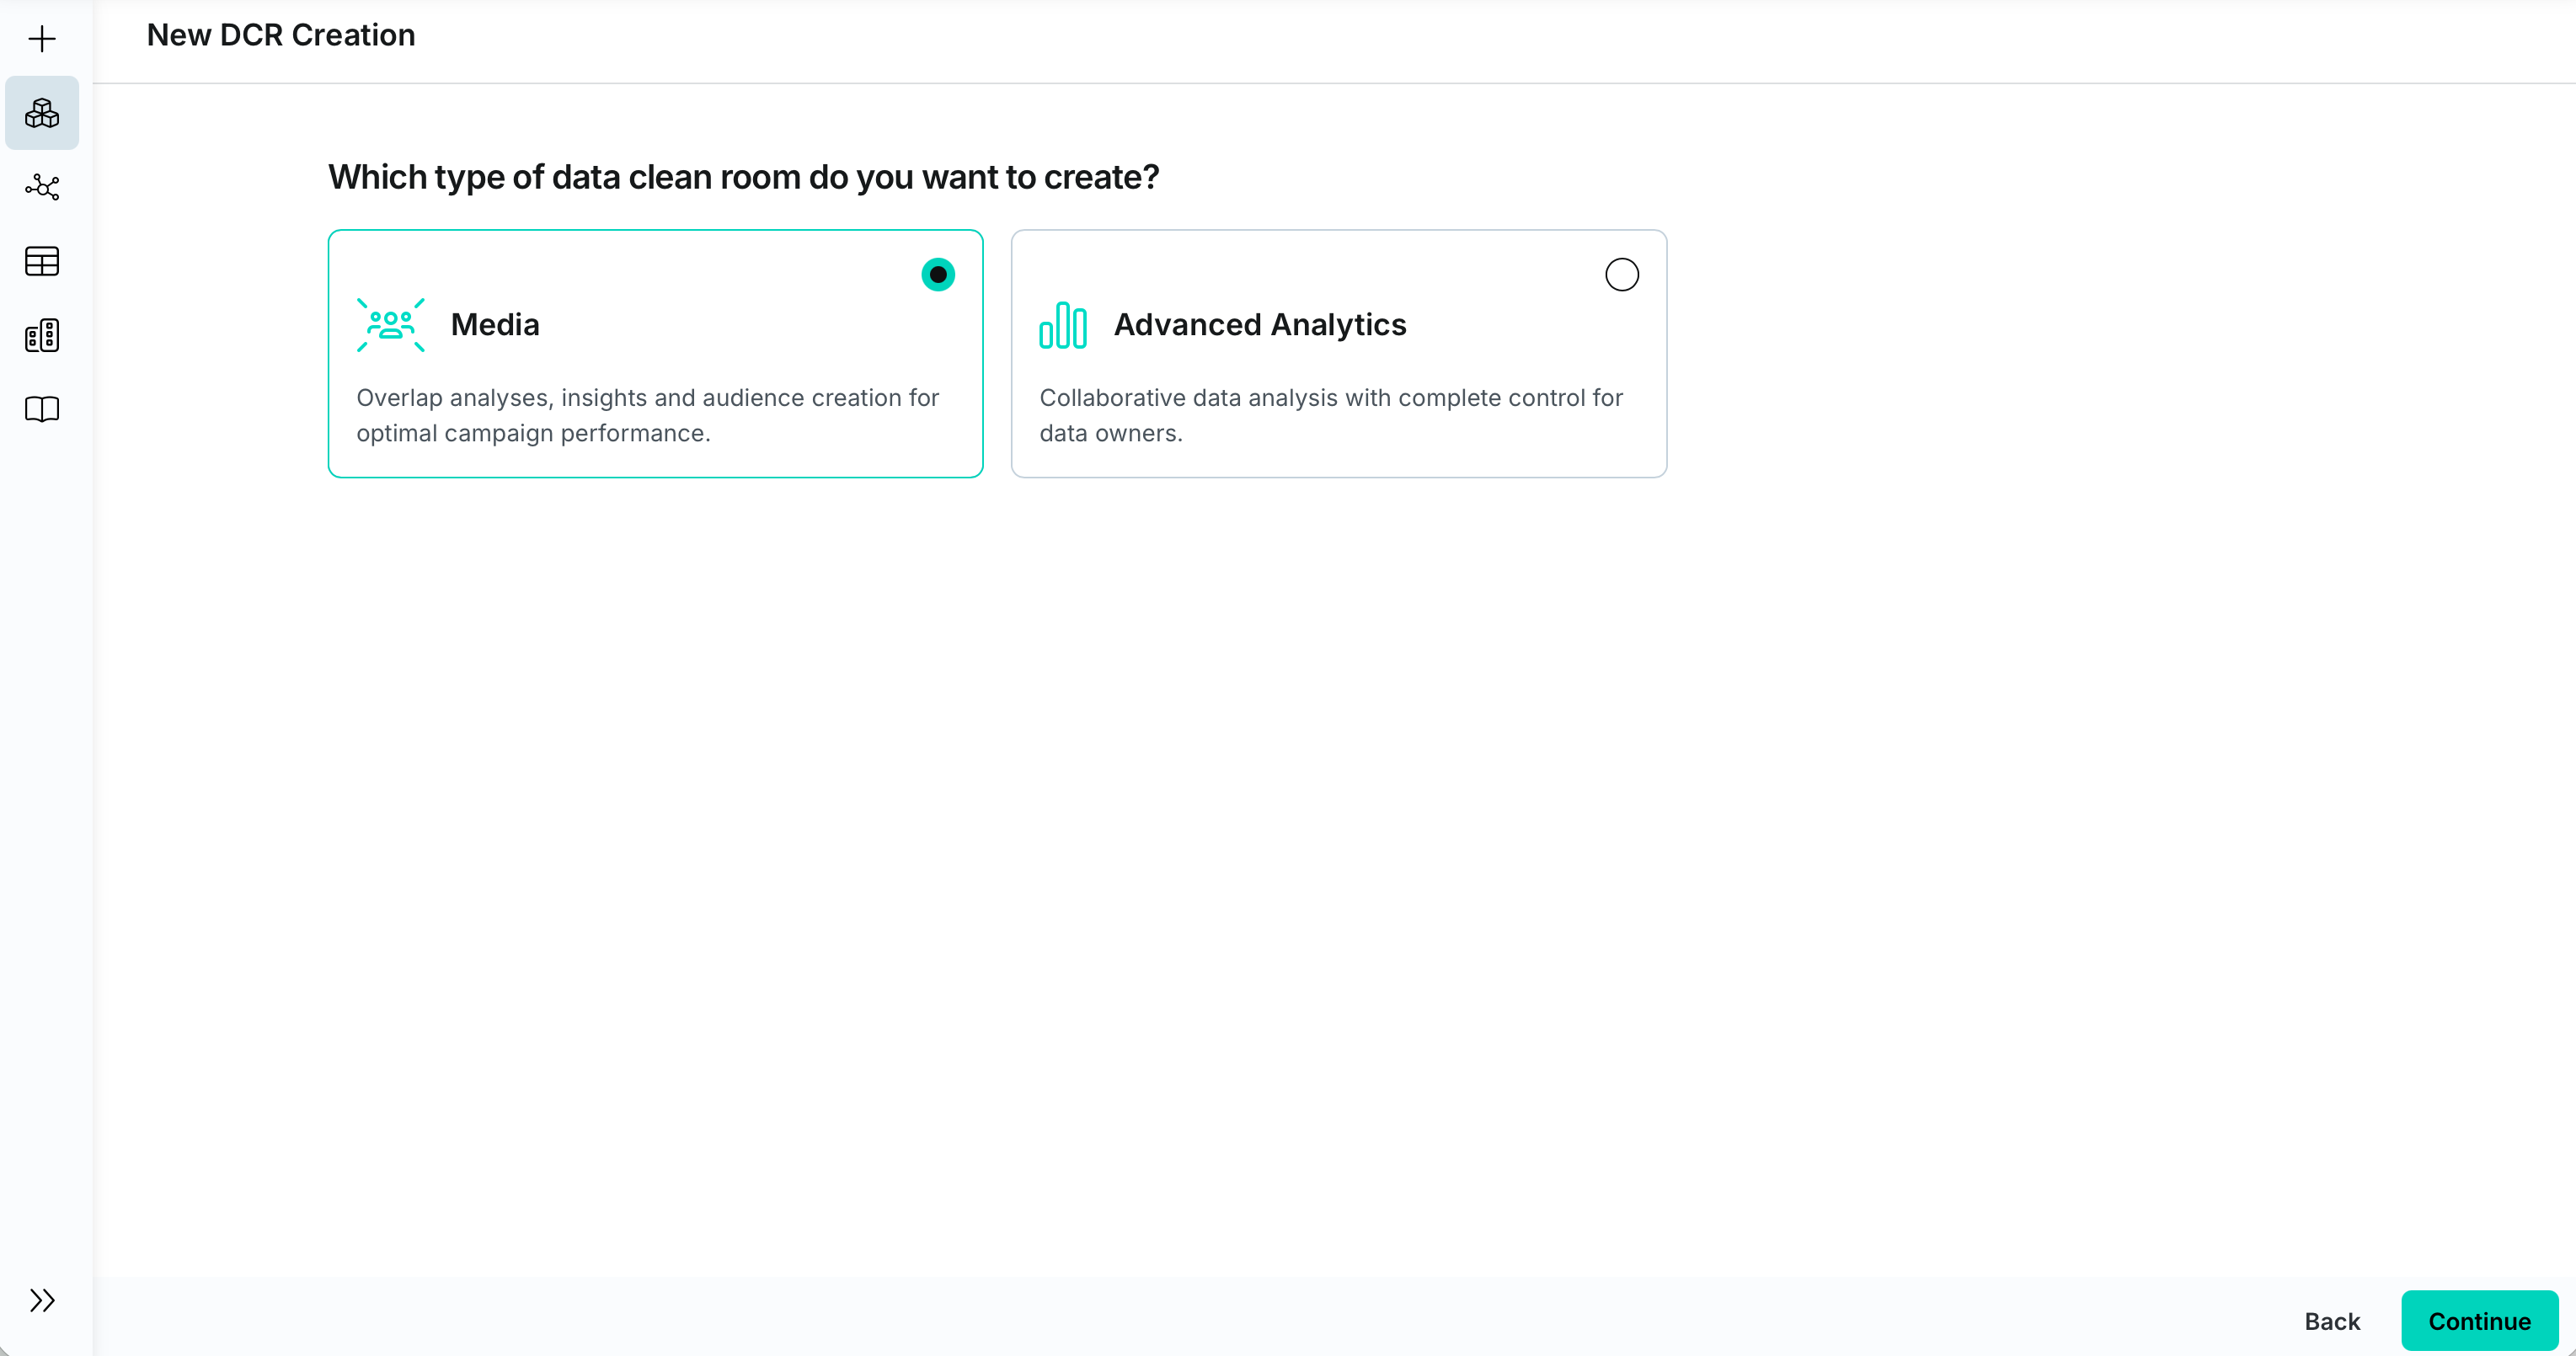
You can create Media DCRs in two ways:
- Click on the + New DCR button in the sidebar and - if you see multiple DCR options - select Media.
- Select an eligible publisher or data partner in the Decentriq Network and click on Invite to Media DCR
Step 2: Add participants
In this step, you select the participants who should be part of this Media DCR. A participant represents an organization in the DCR and may include multiple users of this organization. For the Media DCR to be usable, you need at least one participant providing the base audience and one participant providing the seed audience, see Media DCR: Getting started.
To add a participant, follow these steps:
- Click on + Add a new participant
- Choose a role for the participant. The role determines the default (but editable) permissions of this participant. The next step depends on the selected role.
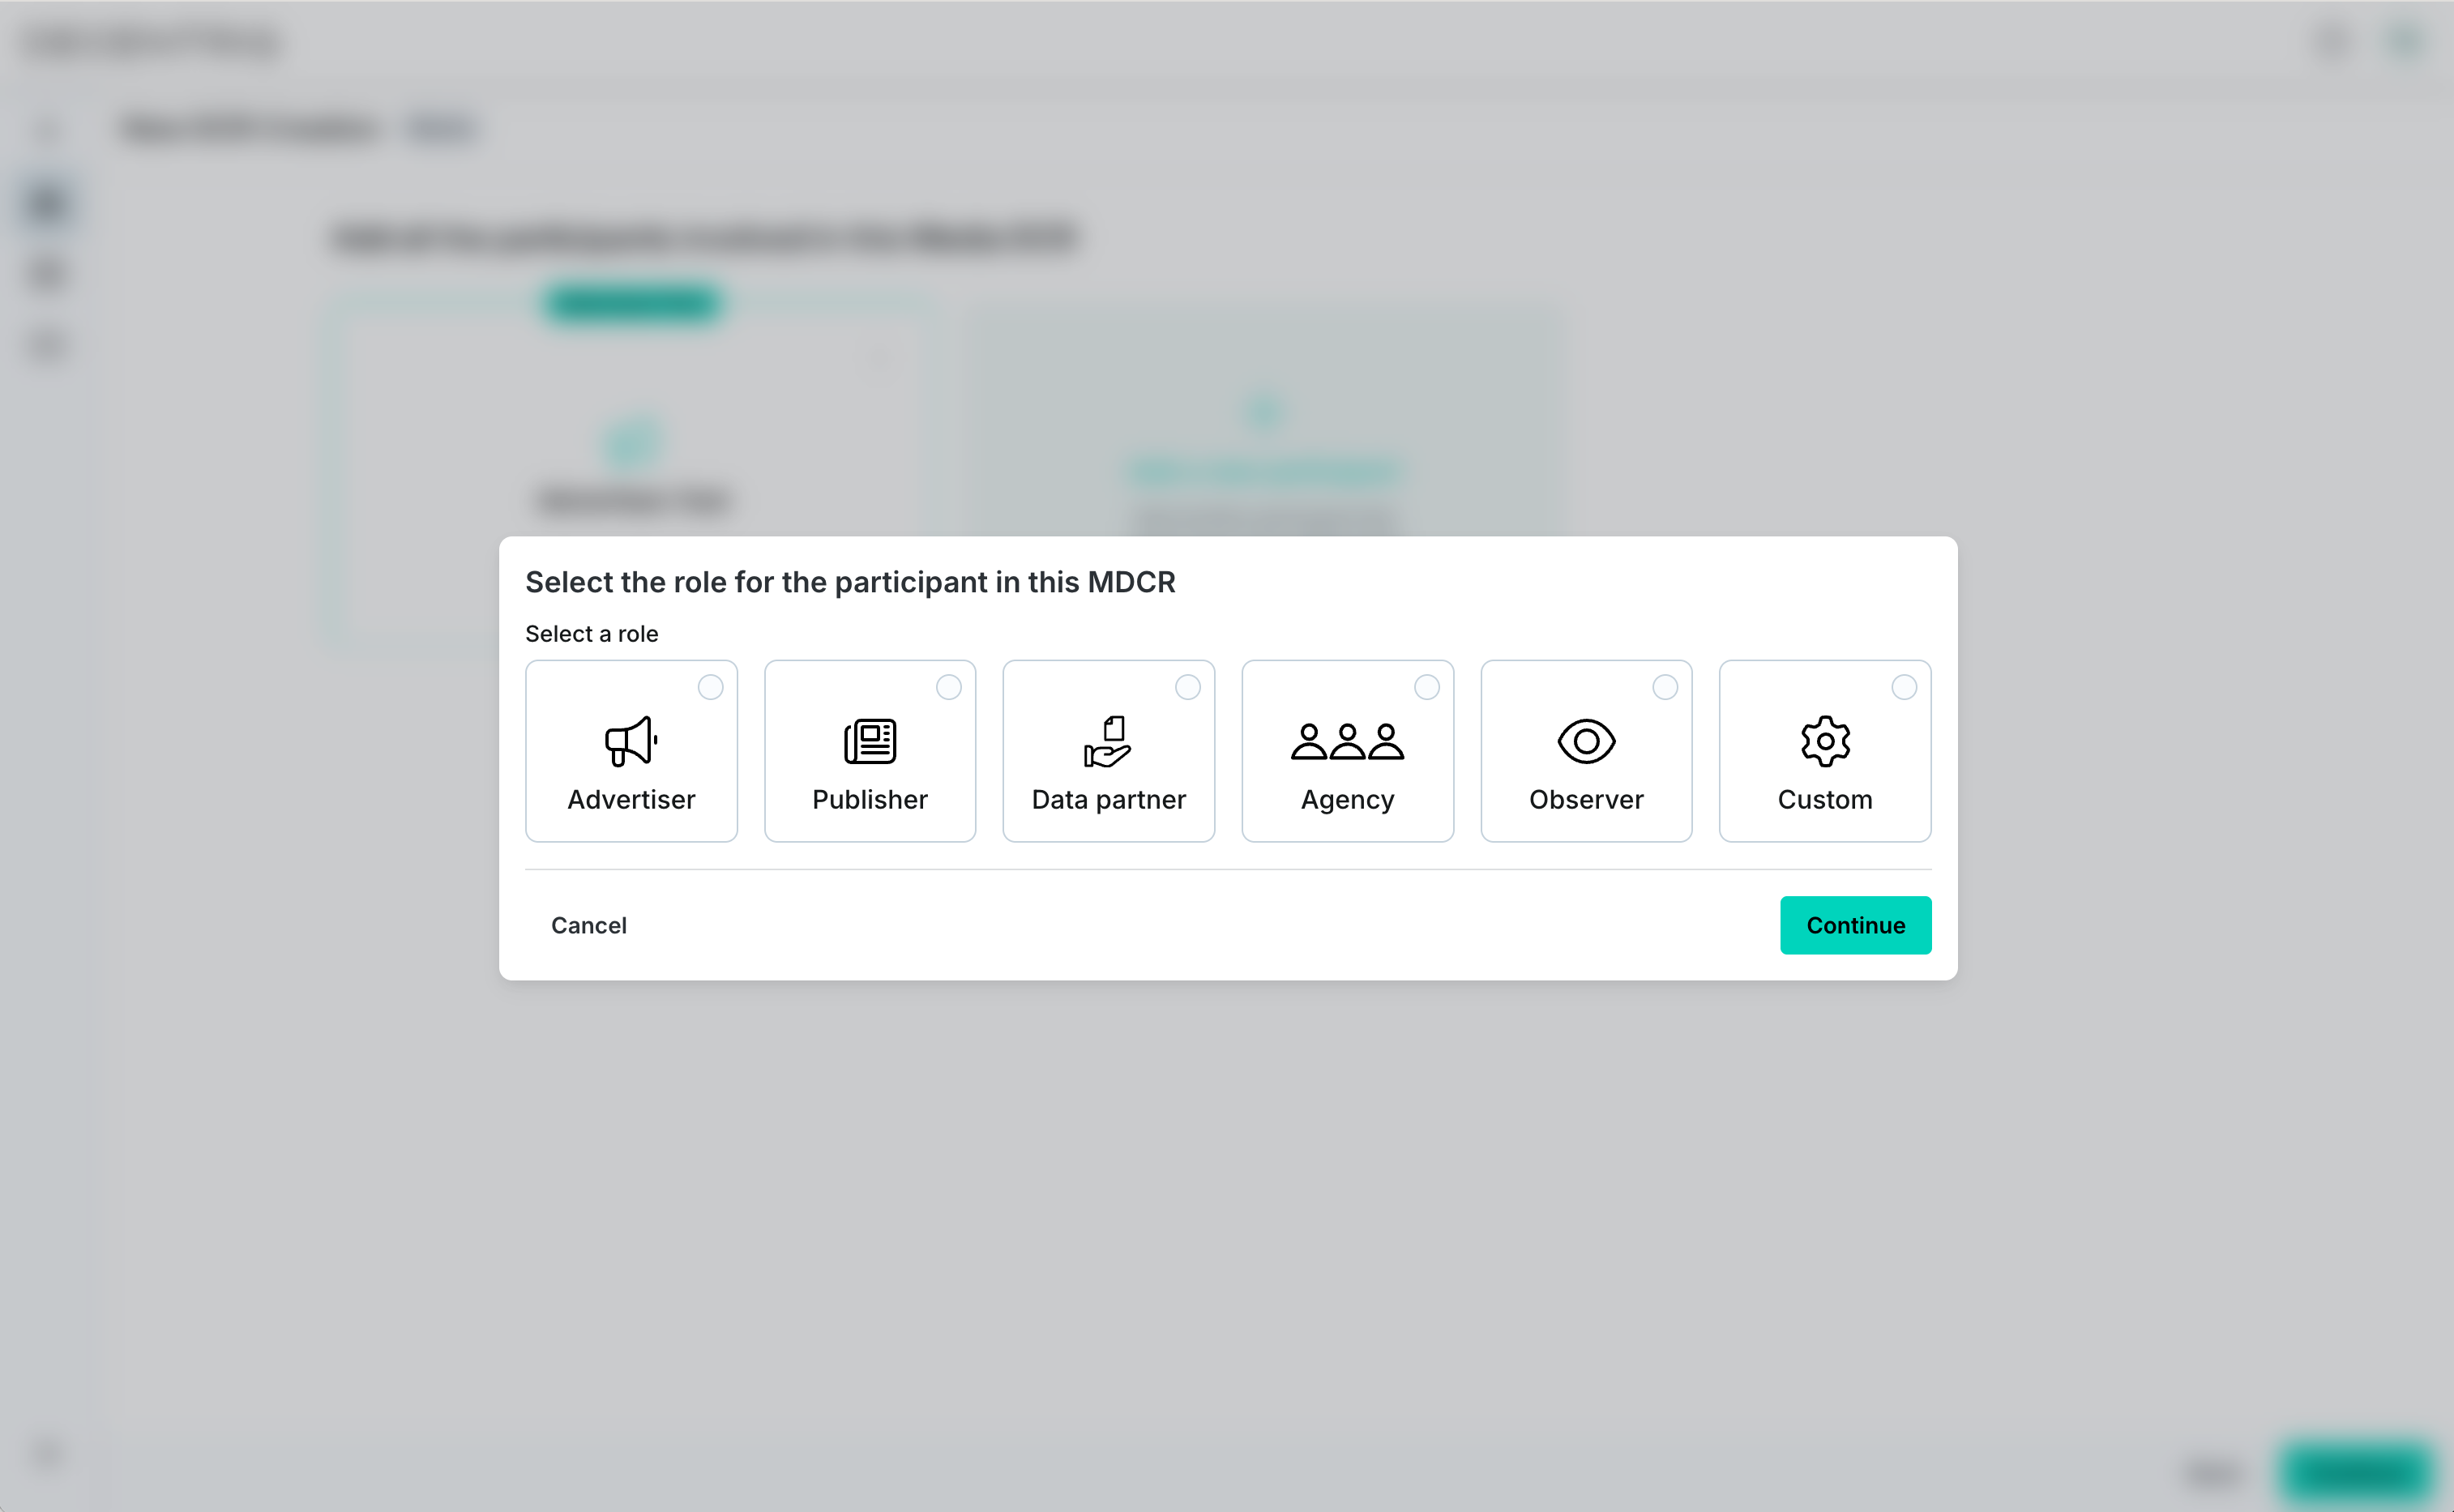
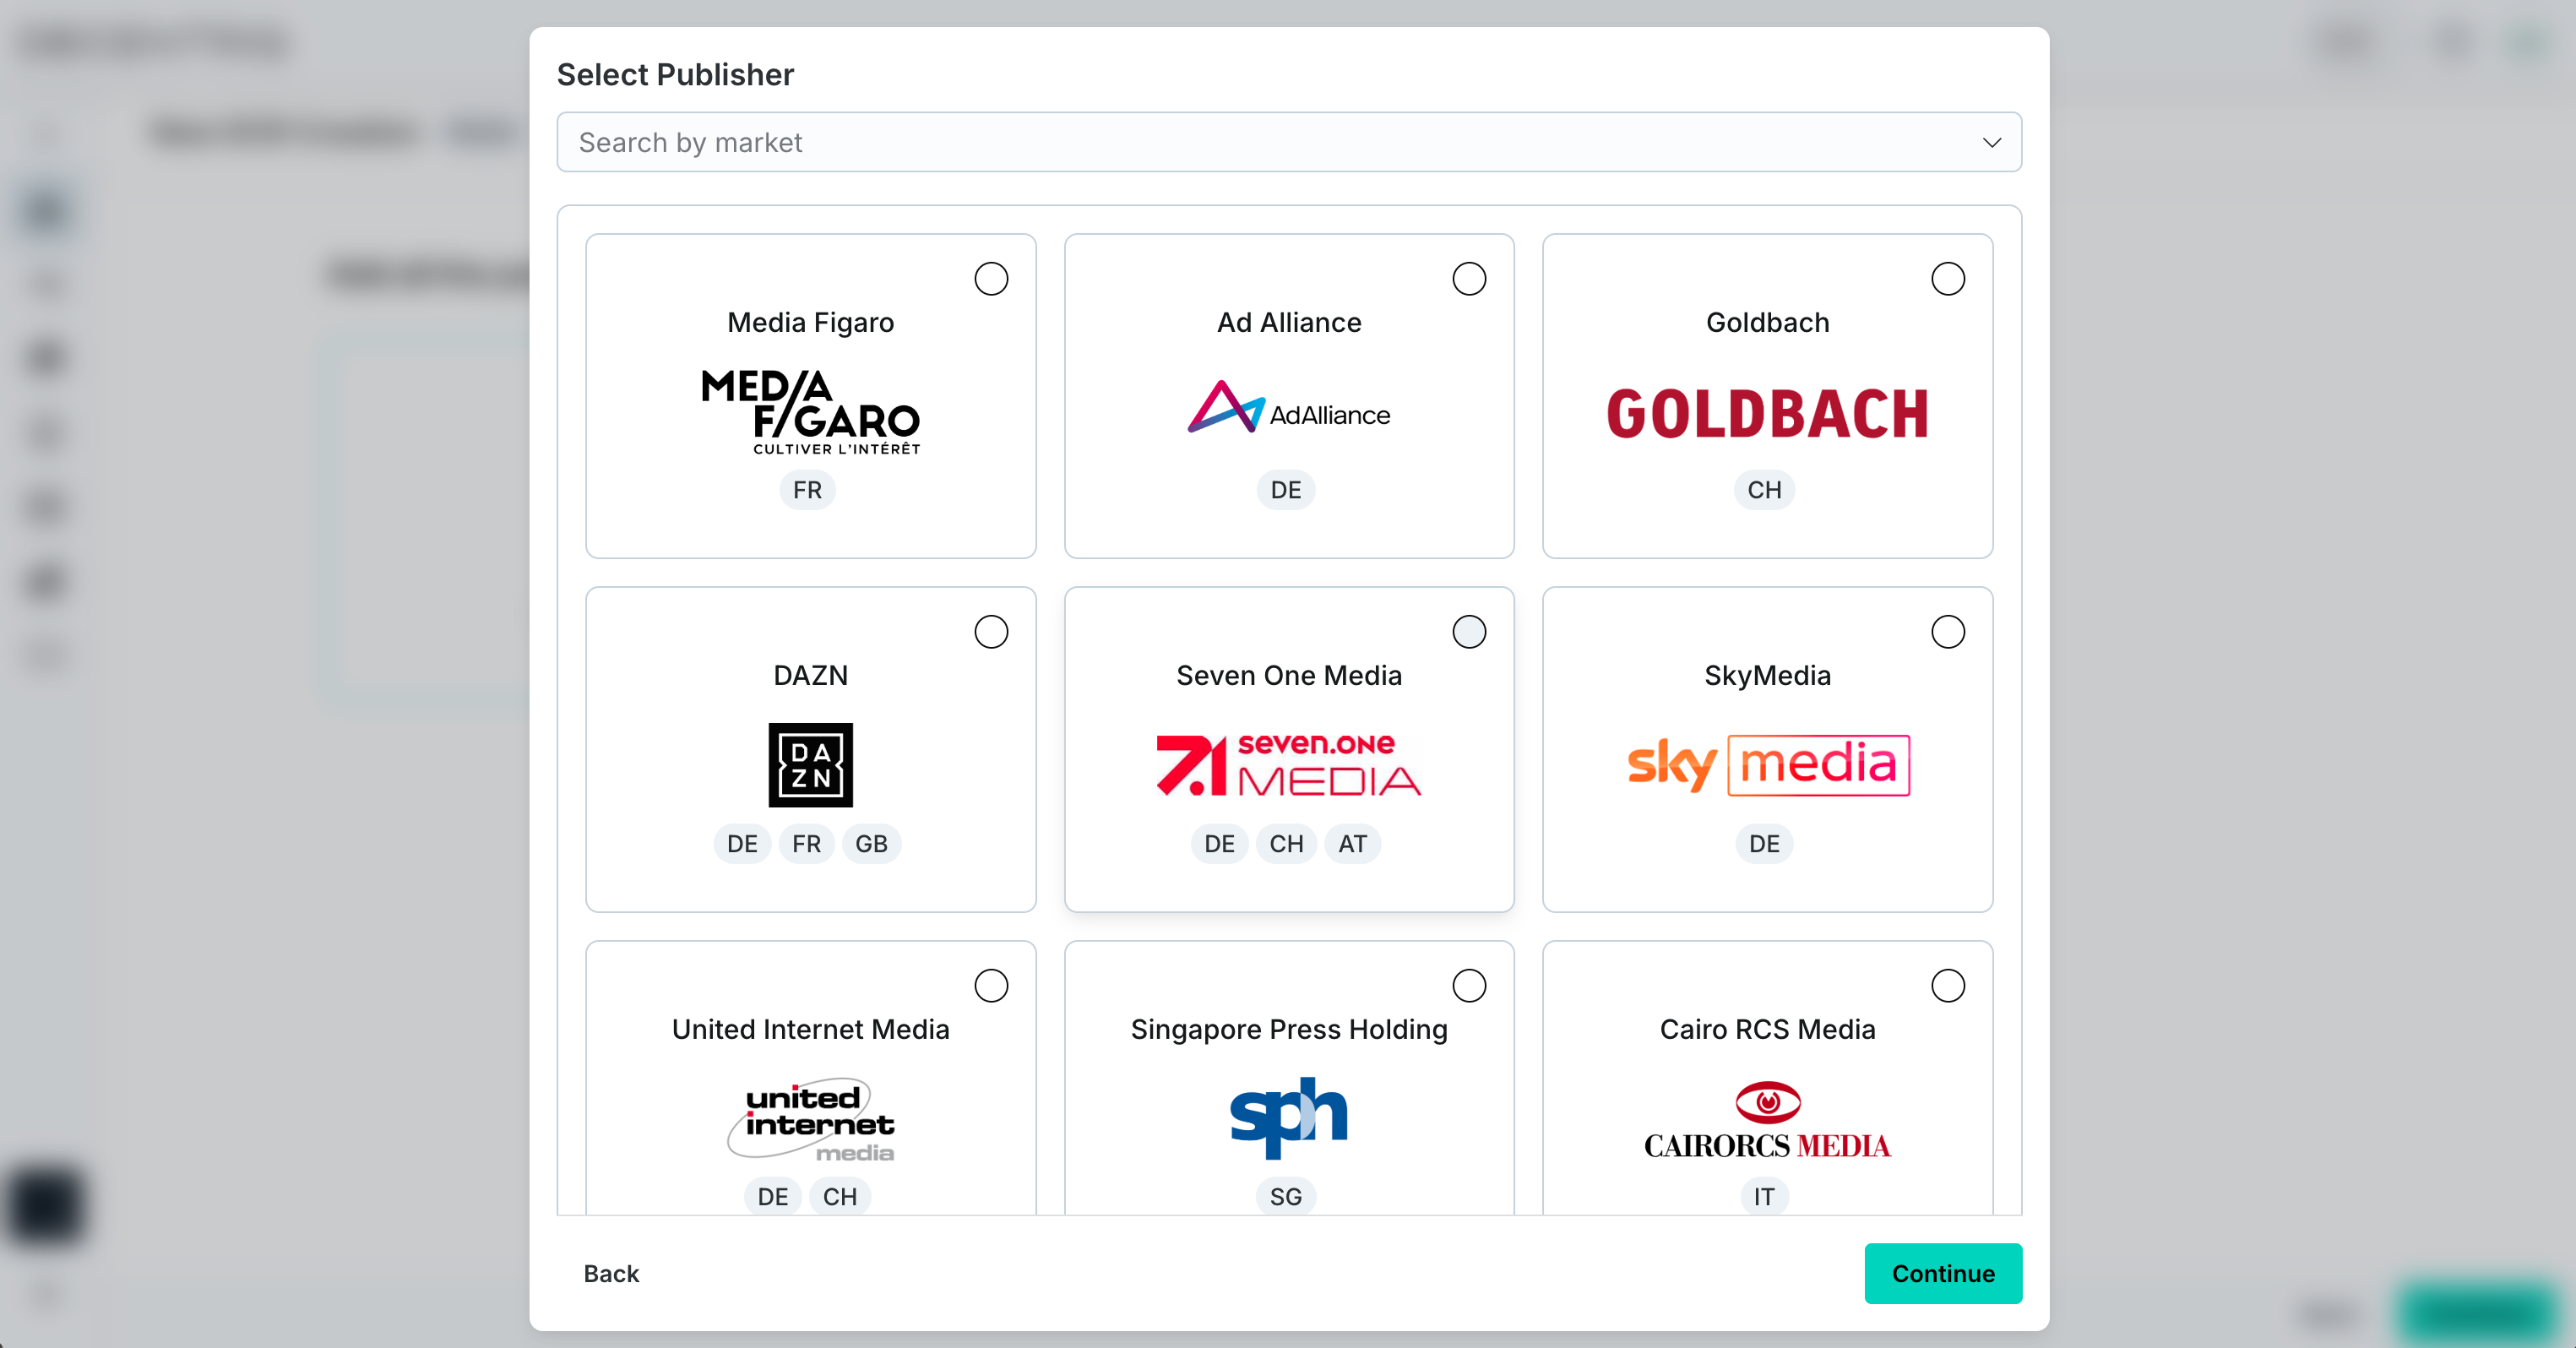
- a) If you are inviting a publisher or data partner, you can select them from the Decentriq Network and then click Continue.
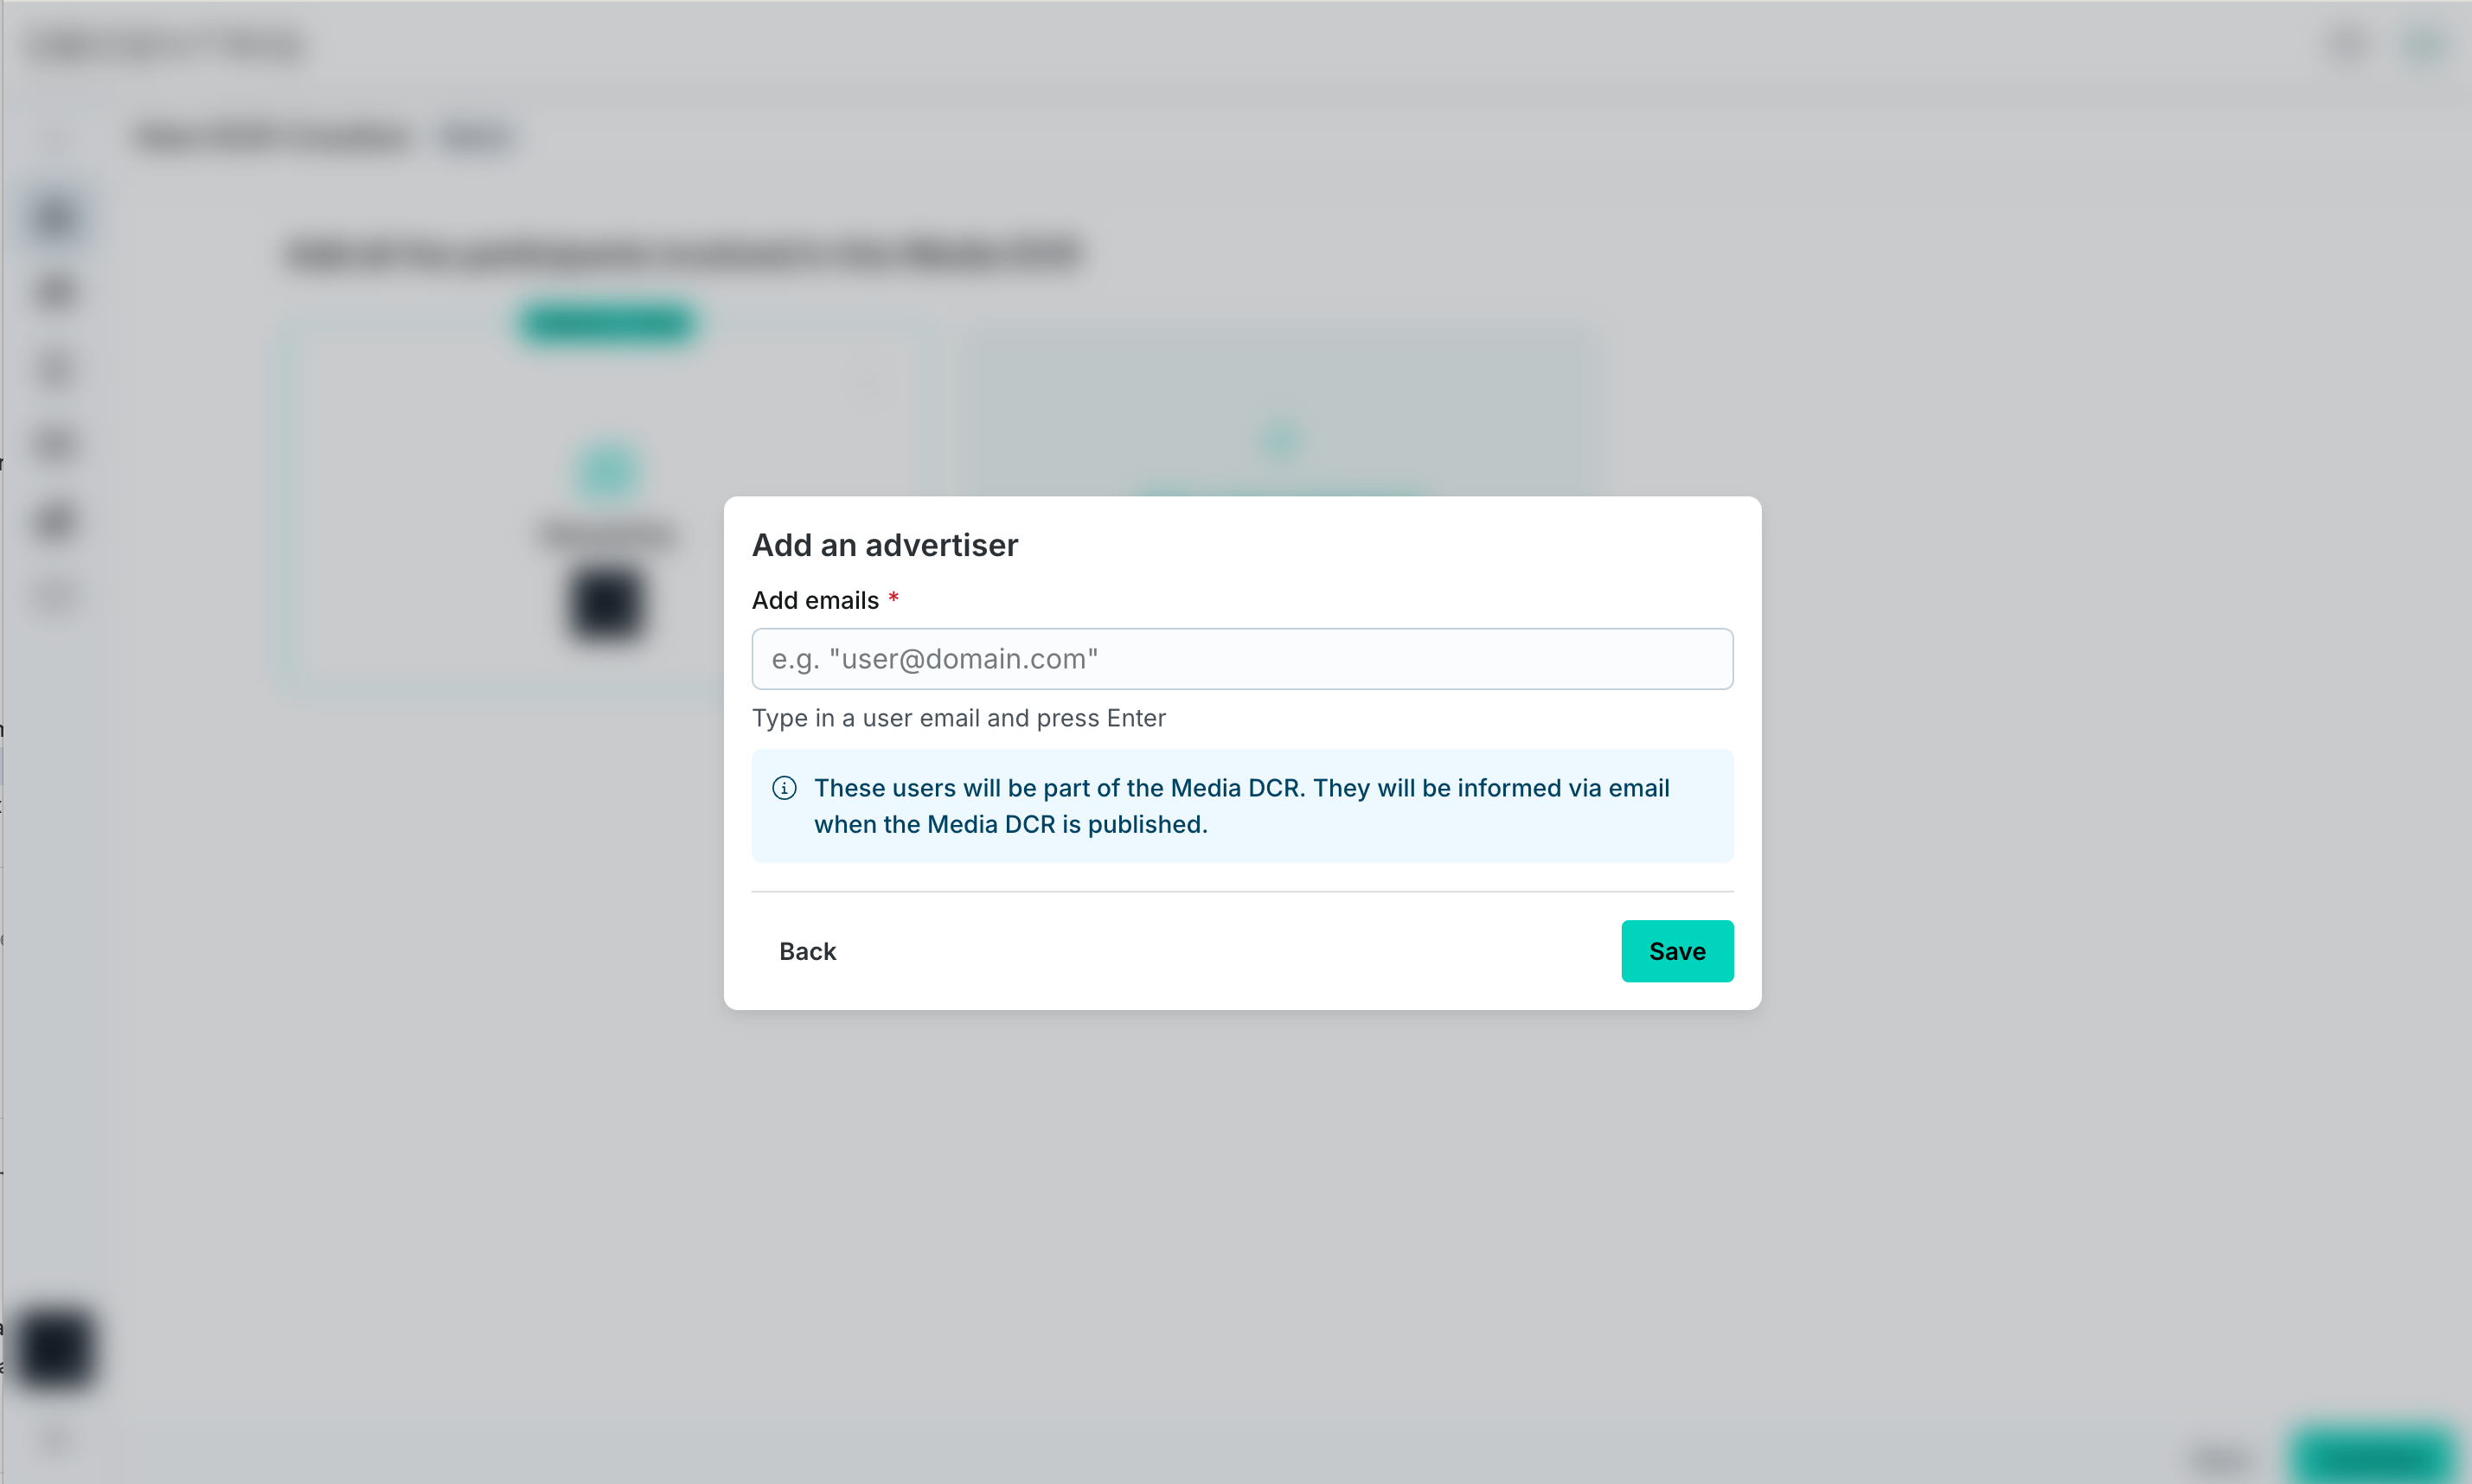
- b) If you are inviting an advertiser, agency, observer, or custom role, enter the collaborator's work email and click Save.
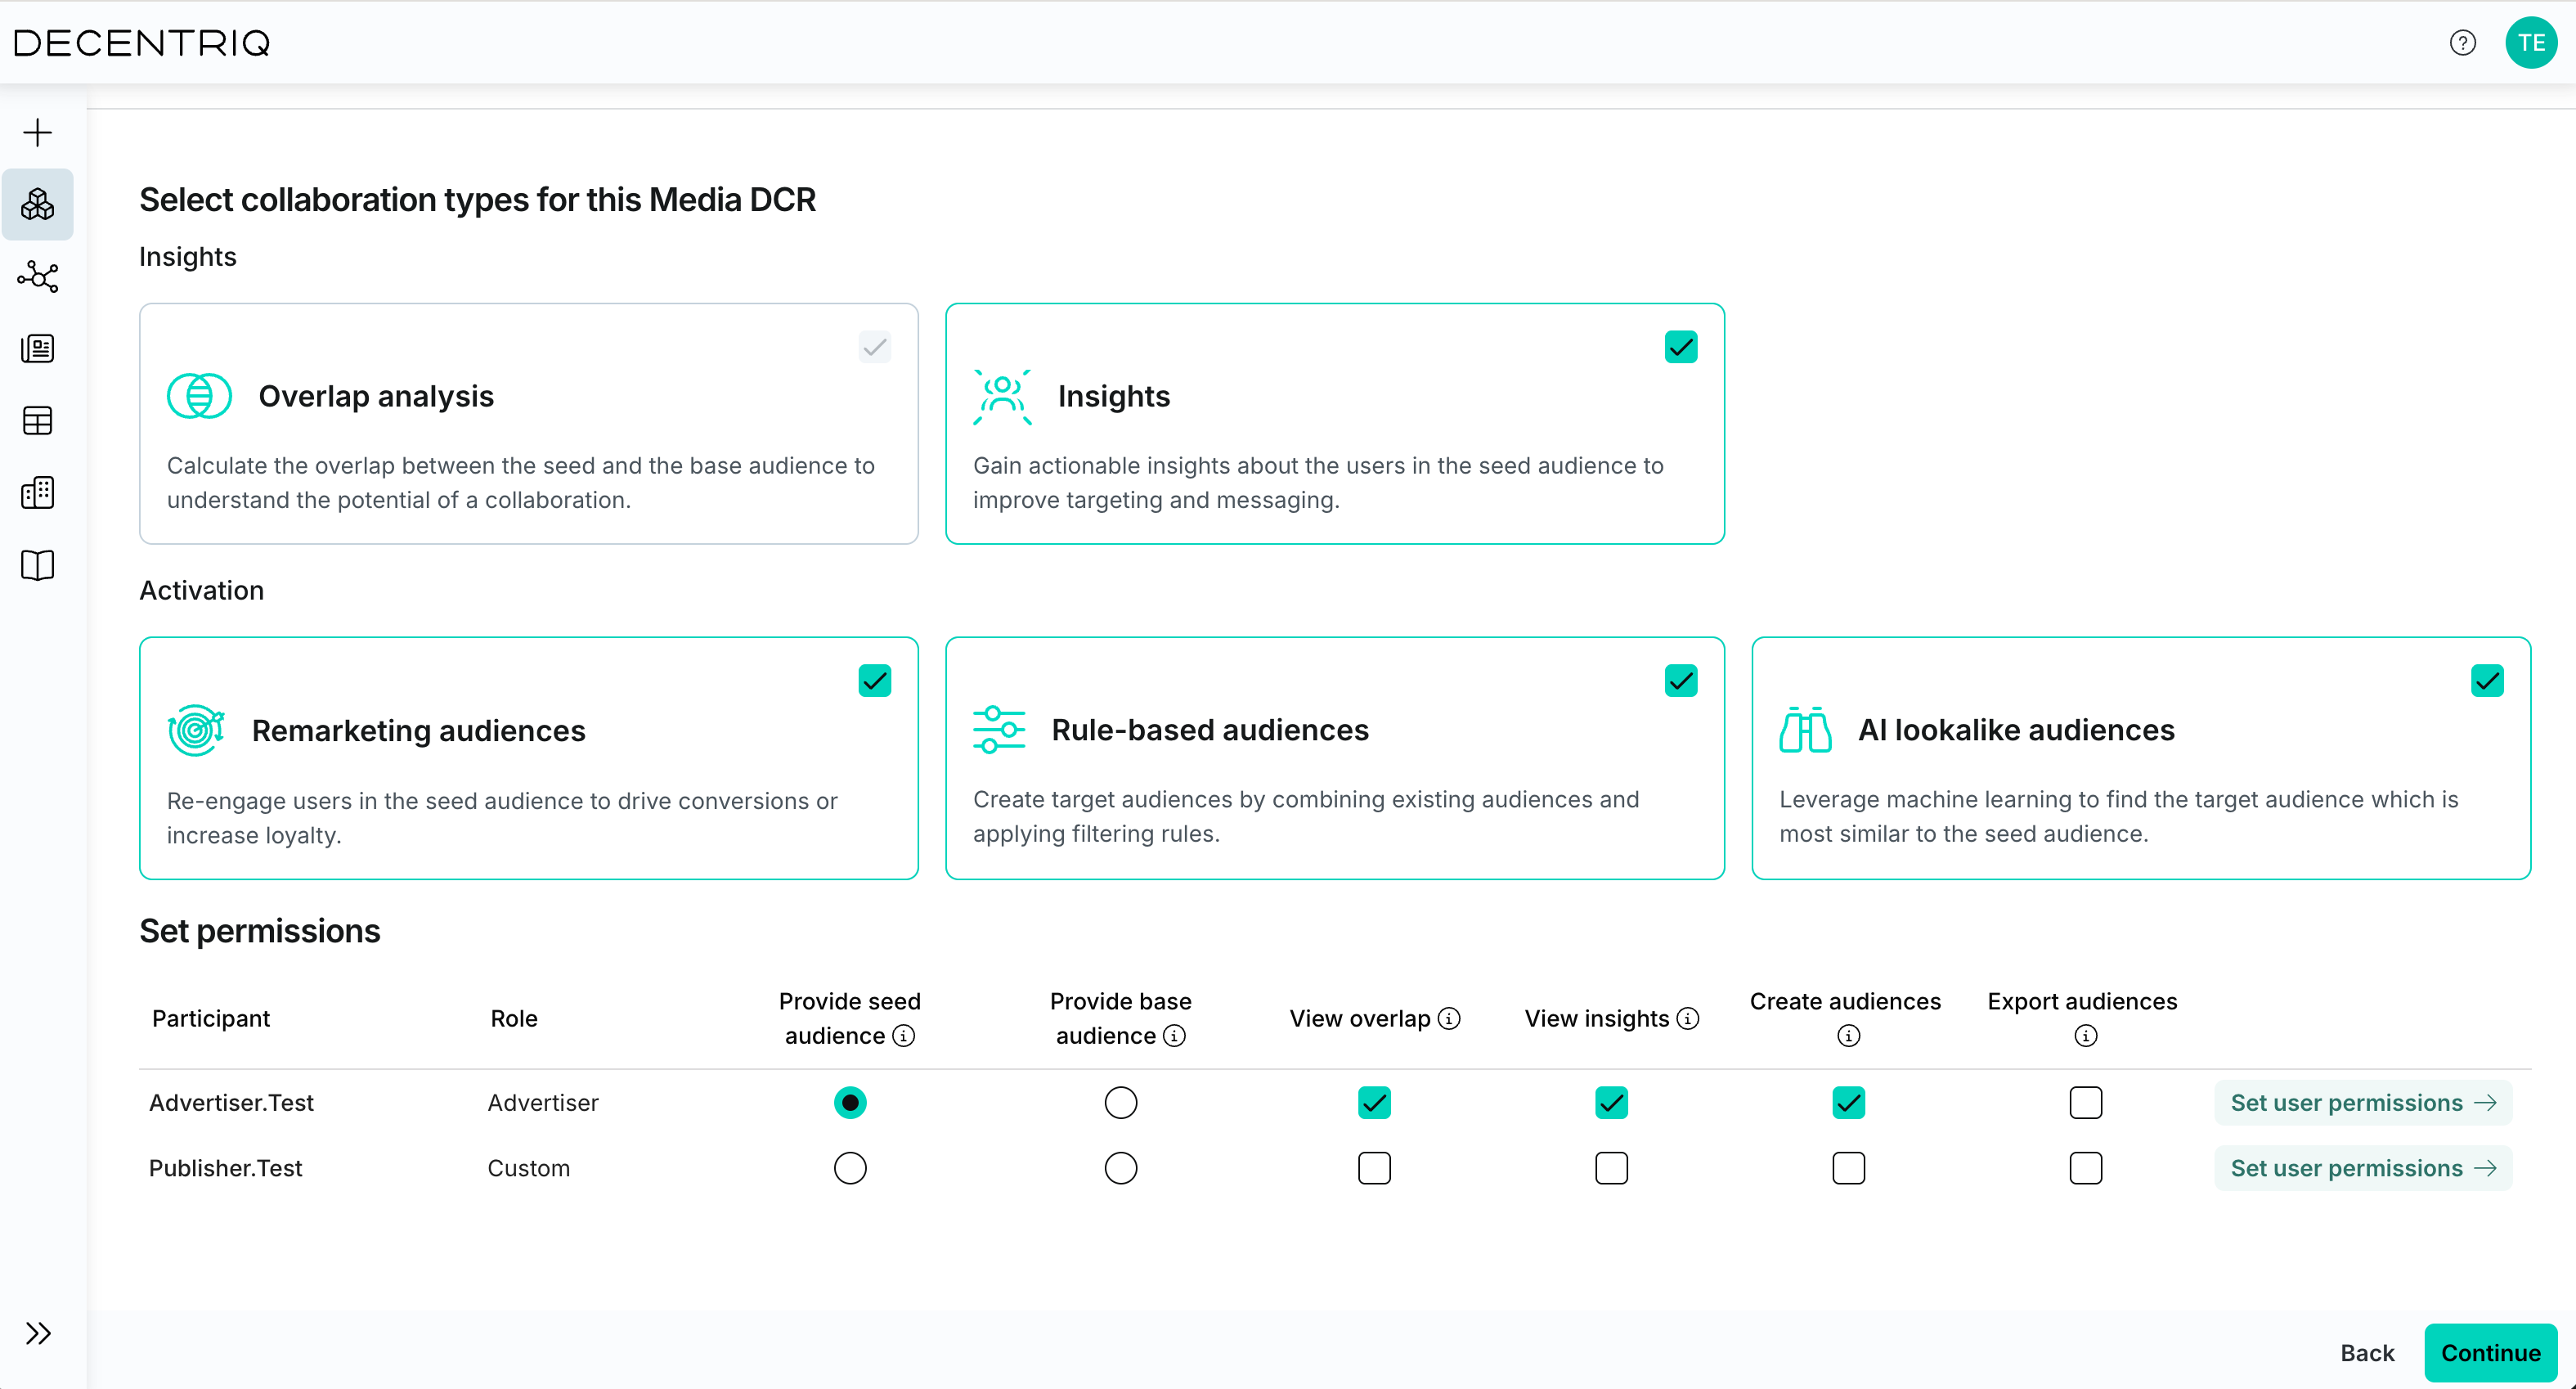
Step 3: Set collaboration types and permissions
Collaboration types
The collaboration types control the features the Media DCR supports. See Media DCR: Getting started for a description. Depending on the chosen collaboration types, permissions to these features have to be granted in the next step.
Permissions
The permissions available to select in this step depend on the chosen collaboration types. Each participant has been assigned default permissions based on their role which can be edited in this step.
The permissions are:
- Provide seed audience – If enabled, this participant will have to provide the seed audience. Exactly one participant must have this permission and it cannot be the same as for Provide base audience.
- Provide base audience – If enabled, this participant will have to provide the base audience. Exactly one participant must have this permission and it cannot be the same as for Provide seed audience.
- View overlap – If enabled, this participant will have access to the overlap statistics. Overlap analysis is enabled by default and cannot be deselected.
- View insights – If enabled, this participant will have access to the insights dashboards.
- Create audiences – If enabled, this participant can create audiences and collaborate with other participants. Note that to export audiences from the DCR, the Export audiences permission is needed.
- Export audiences – If enabled, this participant can export audiences from the DCR. This includes audiences they created as well as audiences that were collaborated with them.
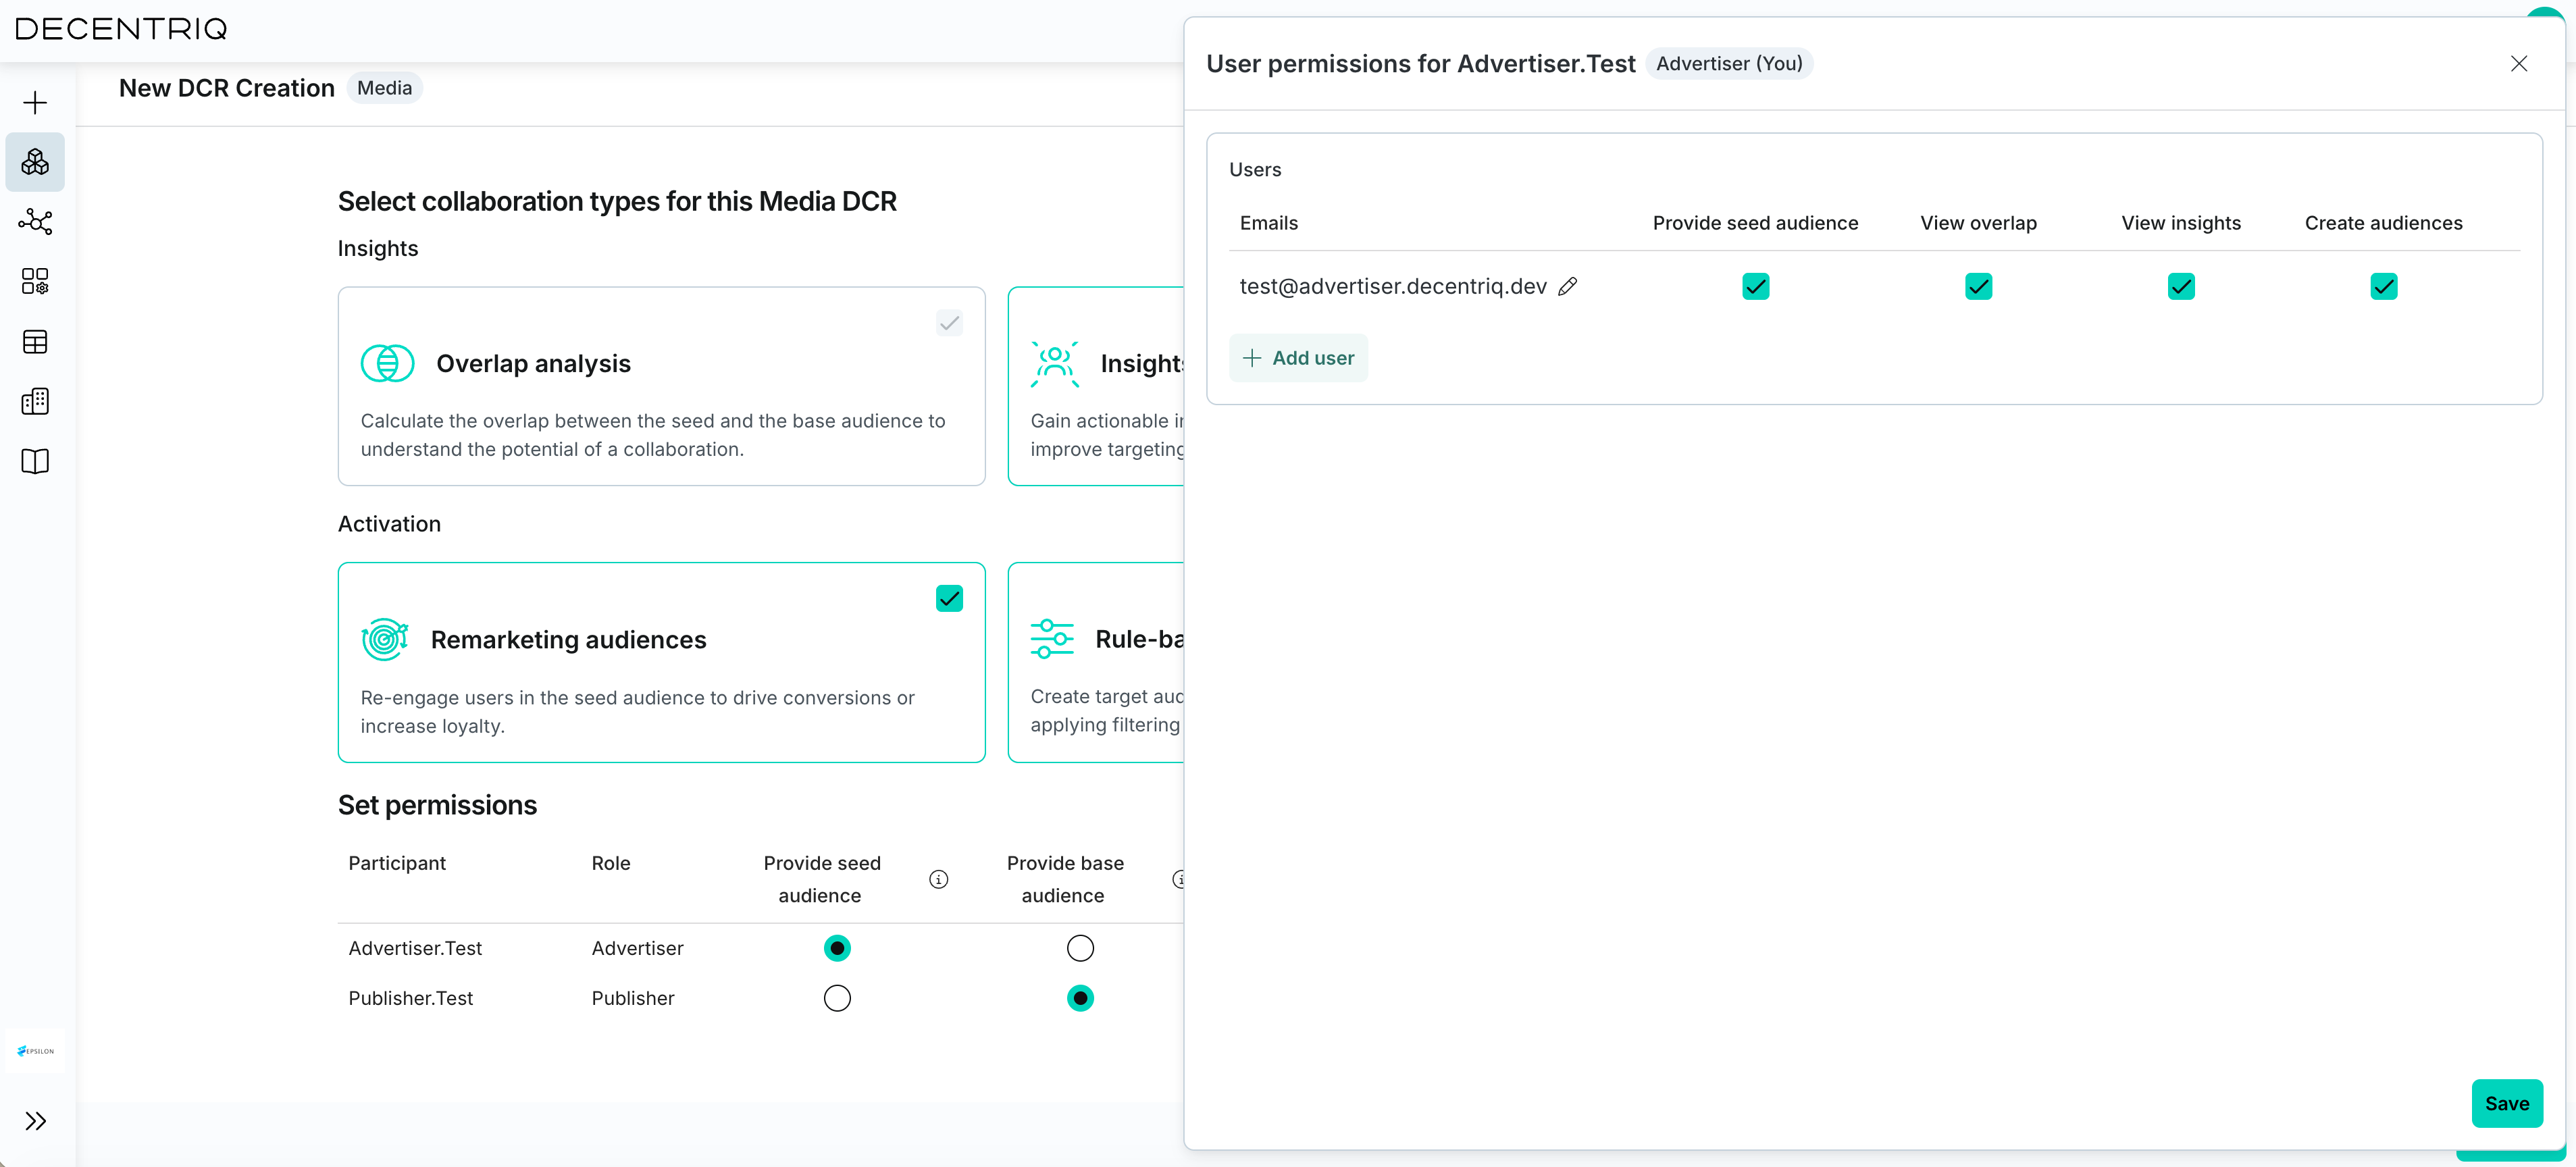
User-level permissions
Permissions can also be set on a user level within each participant. Click on Set user permissions to configure individual user permissions. Note that individual user permissions cannot exceed those assigned to their organisation.
Step 4: Final configuration
Name
Enter a name for the Media DCR, choose the matching ID type, and adjust optional settings as needed.
Matching ID type
Set the type of ID used to match the base and seed audience. Hashed email is most commonly used, but Decentriq also supports any other identifier such as phone numbers, MAIDs, and universal IDs. When you invite a publisher or data partner from the Decentriq Network, the matching ID type is pre-selected based on their configuration. See ID types for a full list of supported types.
A Datalab can carry multiple matching IDs, but only one is used in any given Media DCR. The Media DCR's matching ID type selects which one. The Datalab and the Media DCR are compatible only if the Datalab provides a matching ID of the selected type.
Show matching statistics
Media DCRs offer two controls for how matching statistics are shown to collaborators:
- Show absolute audience sizes: If enabled, exact audience sizes appear in overlap statistics, insights statistics, and the Audiences tab. If disabled, absolute sizes are hidden.
- Show match rate: If enabled, the match rate is displayed in overlap statistics, insights statistics, and the Audiences tab. If disabled, it is hidden.
You can show audience sizes, match rate, both, or neither to tailor the level of detail shared for each collaboration.
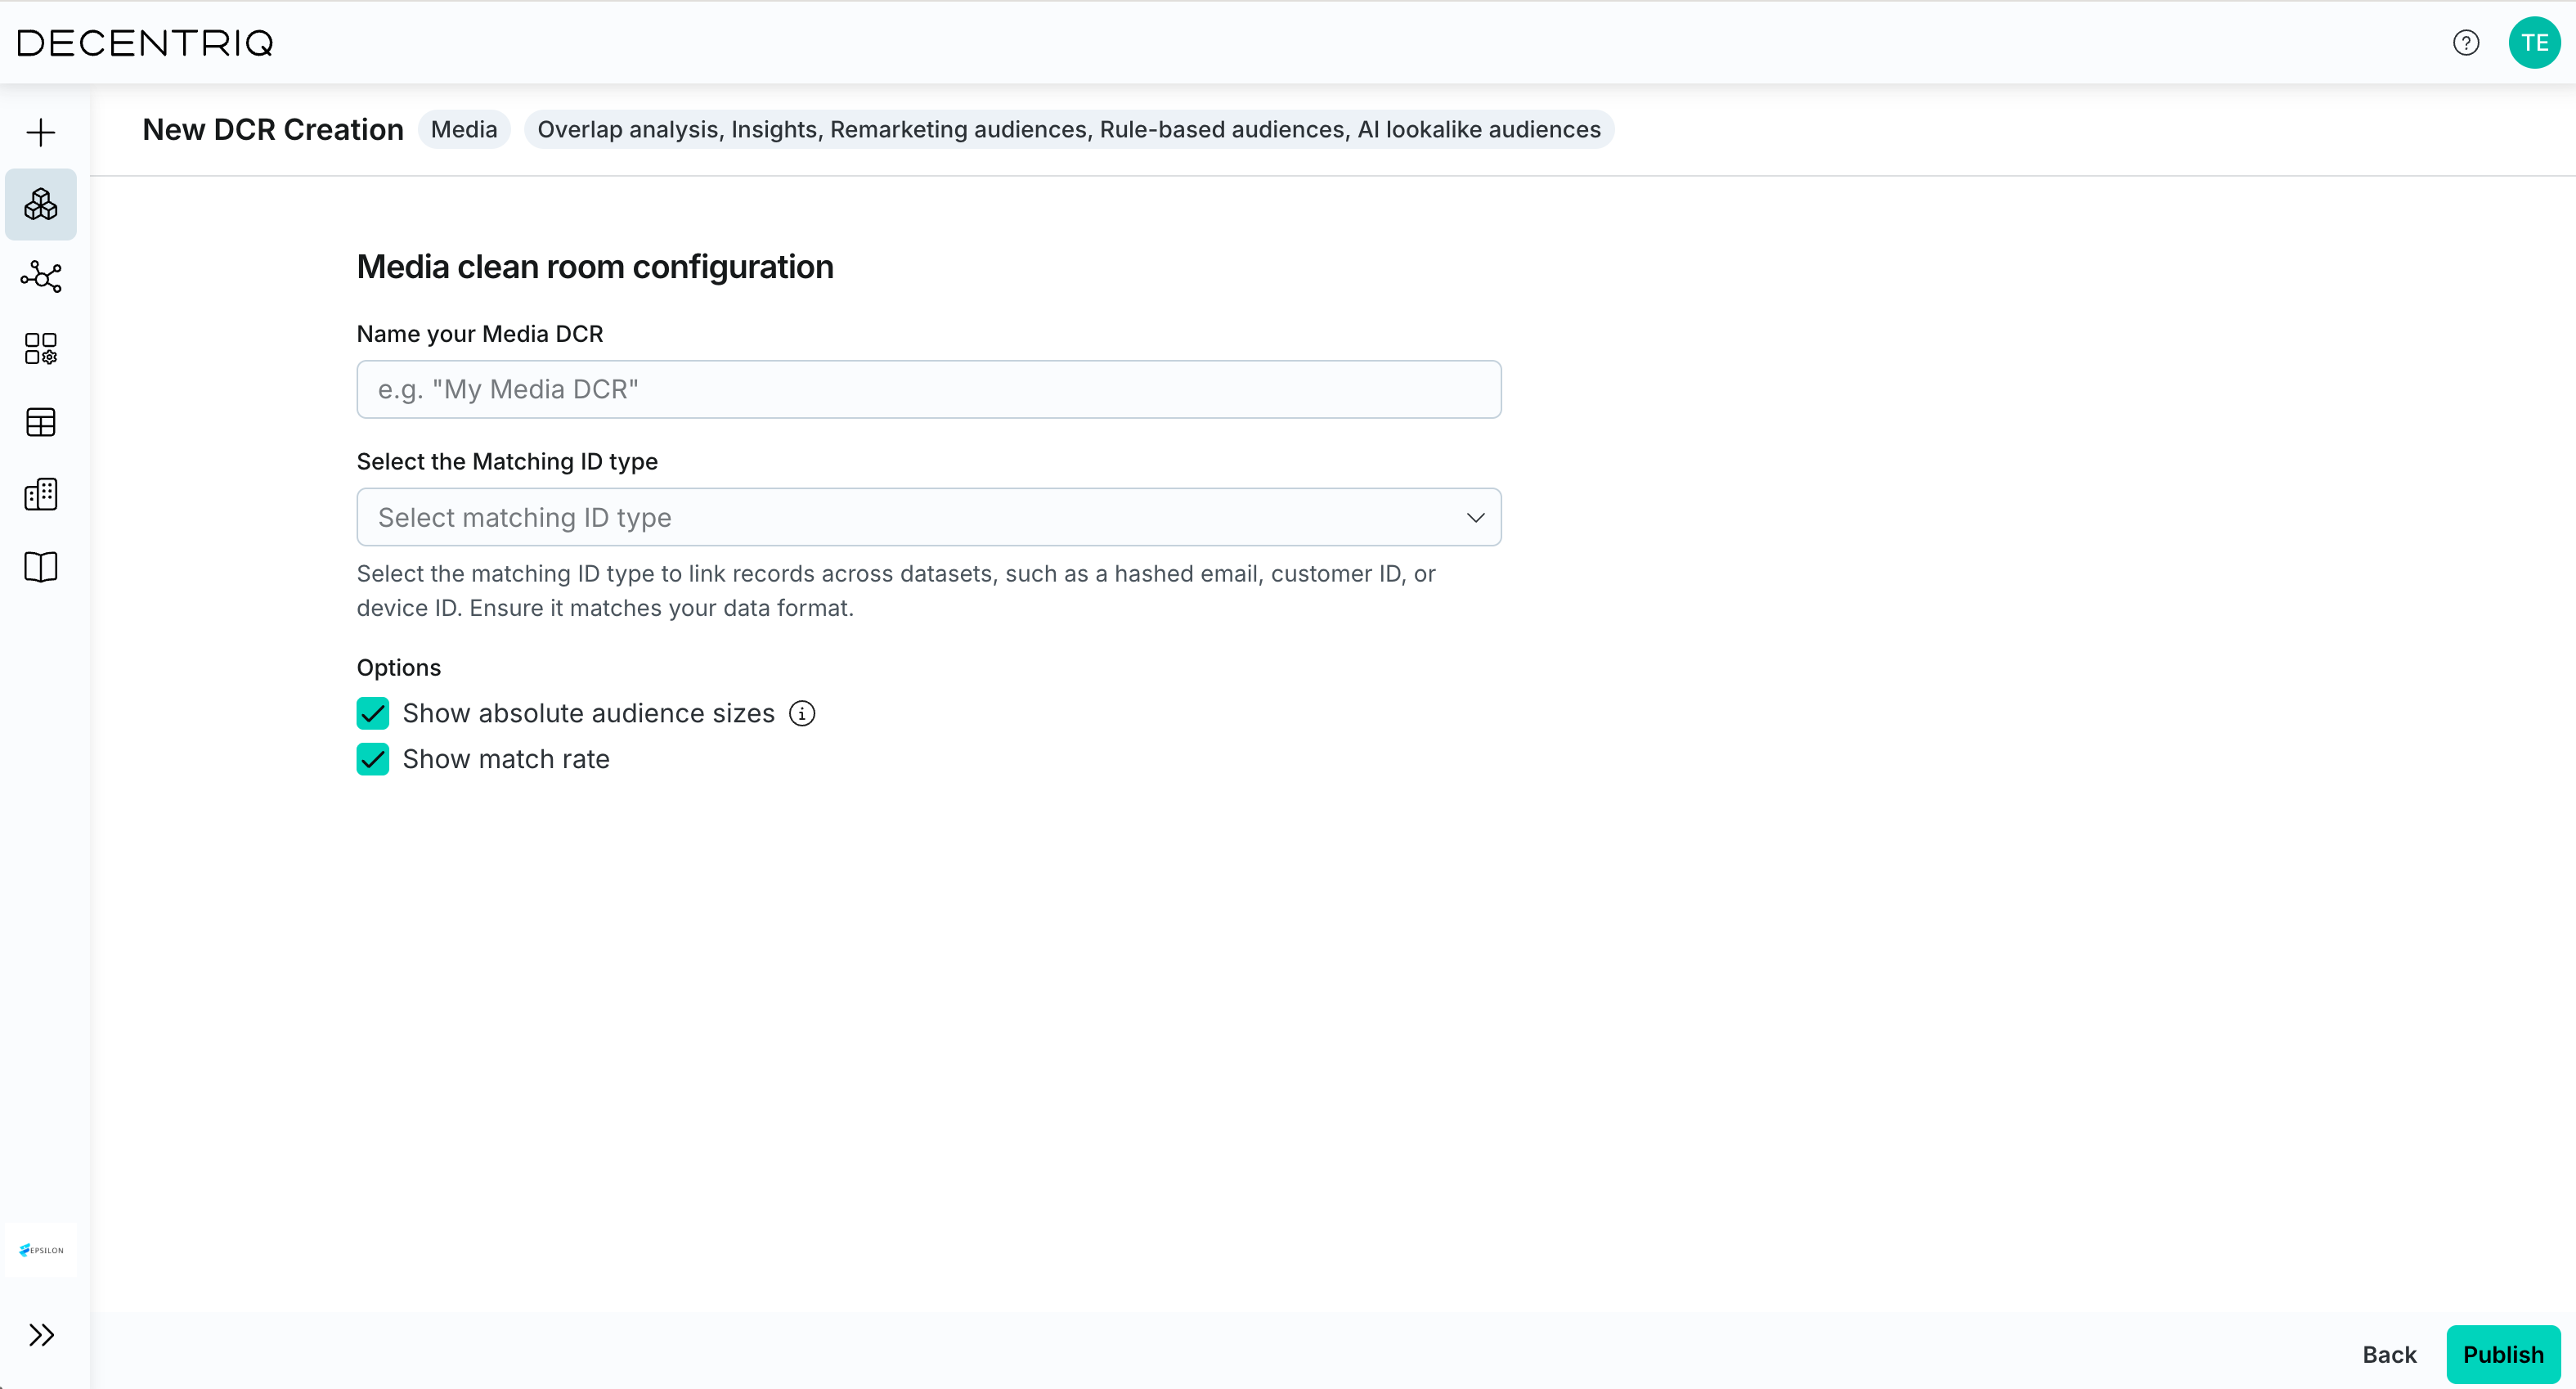
Step 5: Publish
Once the configuration is complete, click Publish to make the Media DCR available to all participants. After publishing, the DCR configuration cannot be changed anymore. All participants will be notified by email.